

How To Make Personalized Tumblers
Epoxy resin is an easy fashion to transform a boring old mug into a fun, personalized tumbler! With step past pace instructions and a video tutorial, we'll show you lot iv different ideas to make your own DIY resin tumbler, including a glitter tumbler, an alcohol ink tumbler, a marbled tumbler and a striped tumbler.
Here'southward what you'll need:
- ArtResin epoxy resin
- an insulated tumbler ( stainless steel is all-time equally epoxy resin doesn't attach to plastic )
- painter's tape
- spray paint
- arts and crafts materials of your pick to decorate your tumbler: glitter & spray adhesive, alcohol ink & sponges, ResinTint liquid colorant
- nitrile gloves
- plastic mixing cups and stir sticks
- plastic drop sail to line your work surface
- a small cream football
- a cup turner made from a Universal Rotisserie assembled onto a woods base
Scan our resin art accessories & tools!
Let'due south go started!
Assemble Your Cup Turner:
Nosotros saw a great tutorial by our customer Holli Mostella who demonstrated how to turn an ordinary charcoal-broil rotisserie into a fantastic loving cup turner! Nosotros picked upward a Universal Rotisserie at our local hardware store and, with a few easy steps, nosotros mounted it on some scrap pieces of woods. 💡TIP: A cup turner gives the advantage of slowly and constantly rotating the tumbler to provide even coverage with no drips. Although you could resin a tumbler and mount it vertically ( taping off the bottom to take hold of drips ), we really experience that the constant rotation of a cup turner can't exist shell for fifty-fifty coverage! 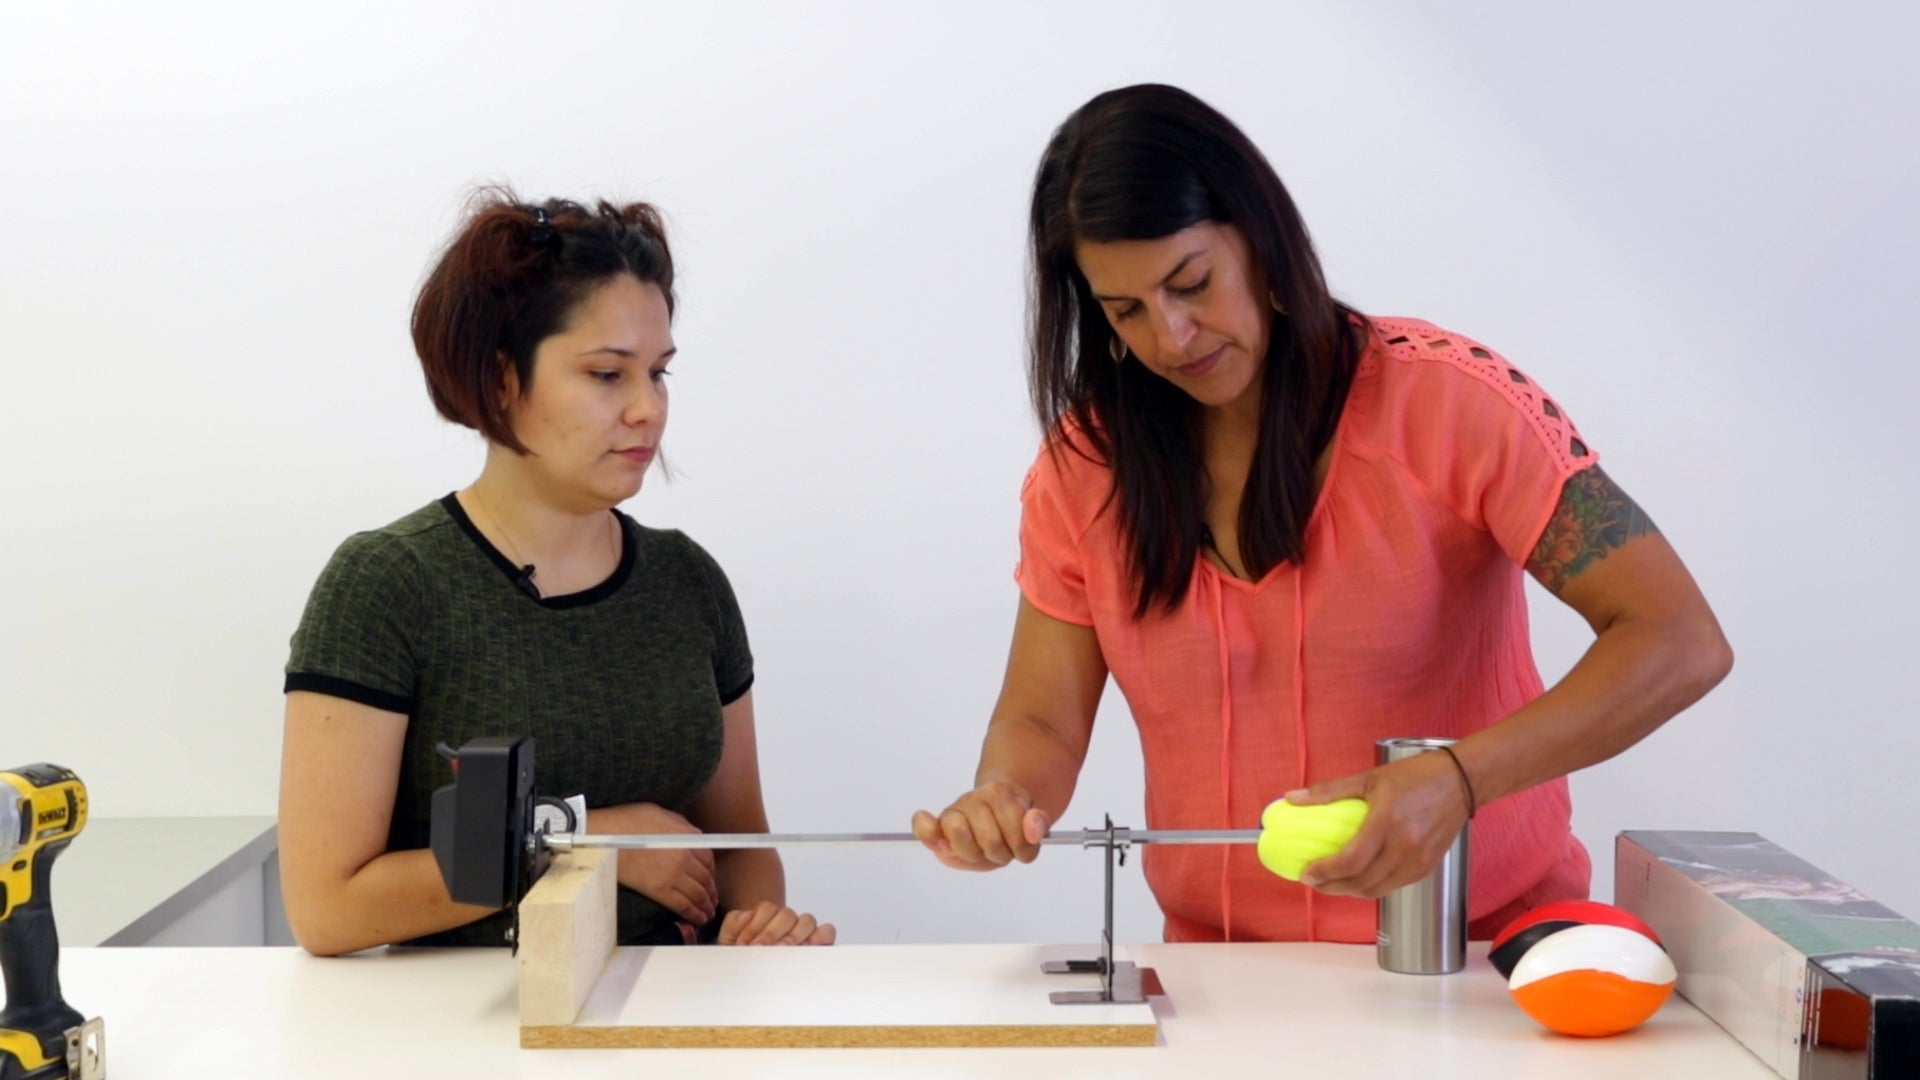
What You'll Need:
-
a Universal Rotisserie kit ( available at most hardware stores
-
drill and screws
-
wood glue
-
a 12" length of two ten 4 wood
-
a 12 17.5" piece of wood to deed as the base
-
a cream football ( bachelor at the dollar shop )
- a level
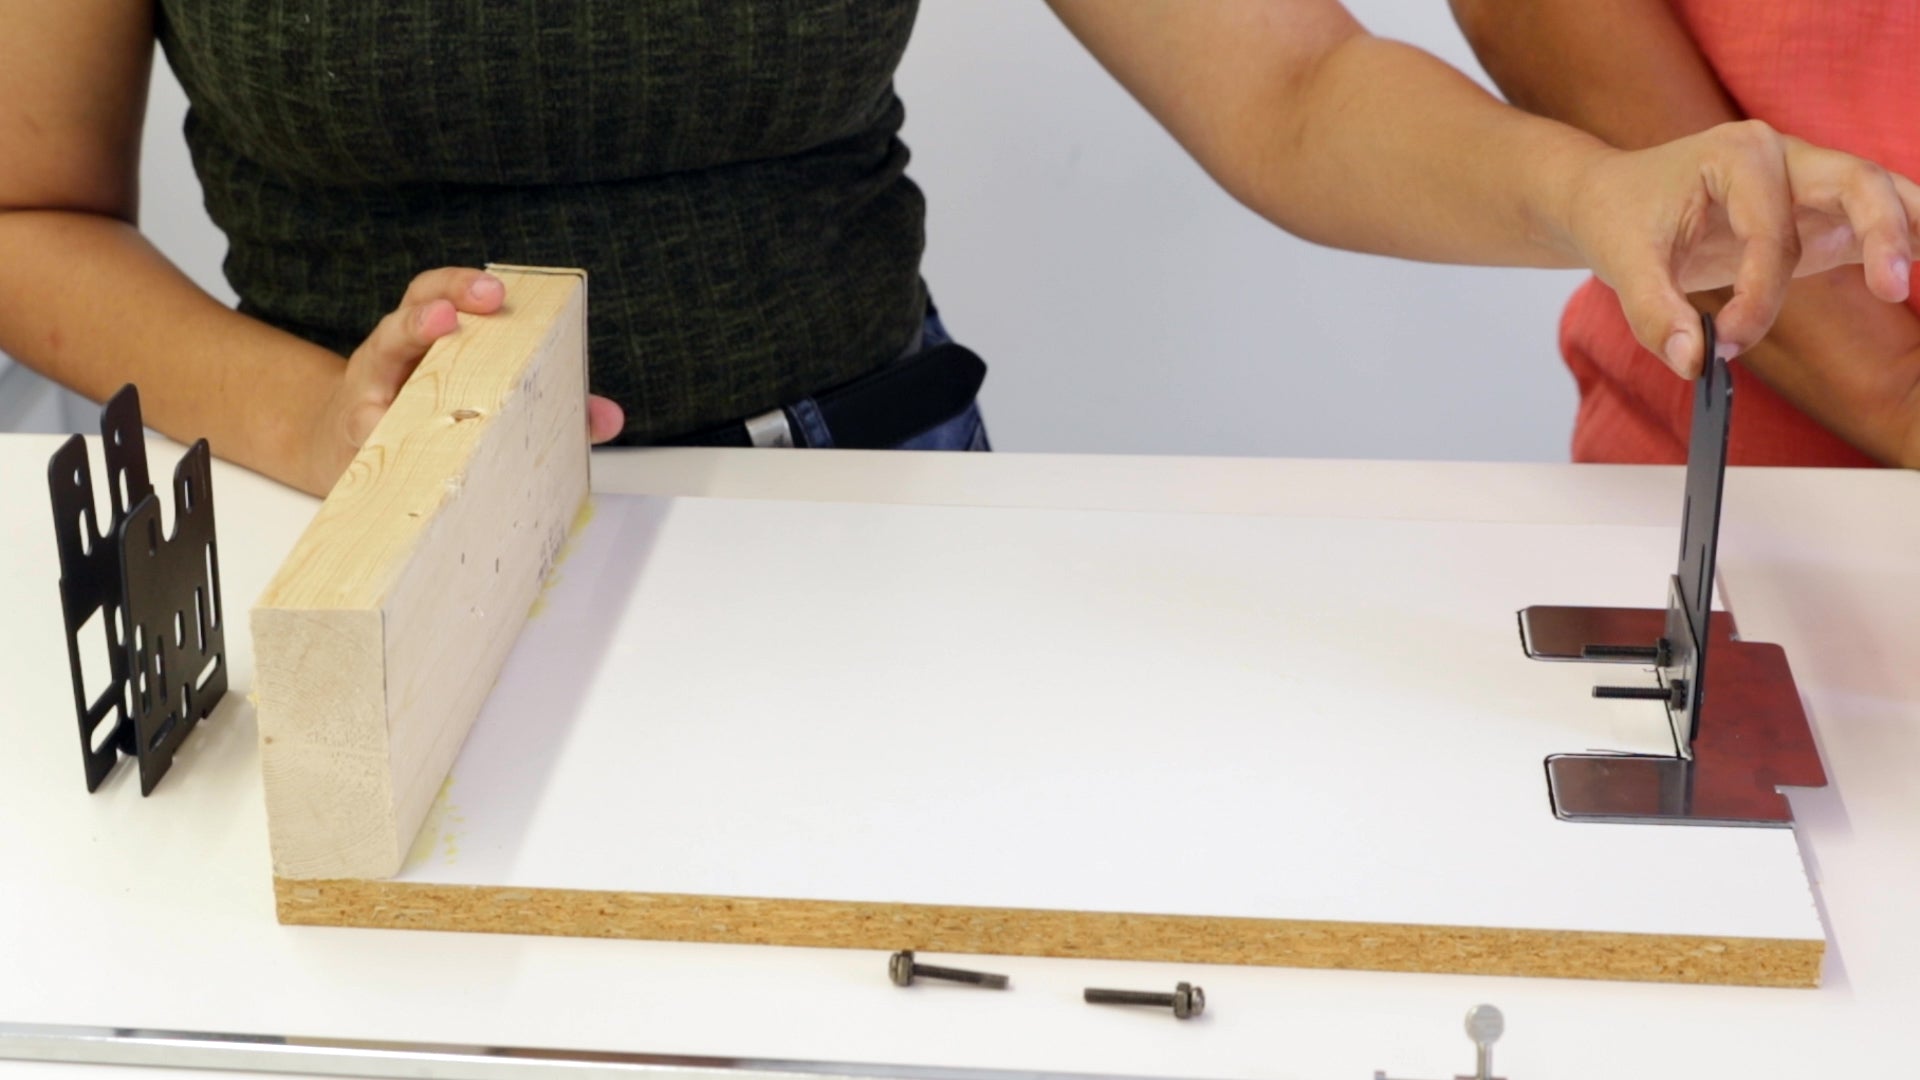
ane. Add glue
Along one of the 12" sides of your wood base, glue the 12" piece of 2 x 4. Glue the grate subclass in the centre of the other 12" side. Once the gum has stale, affix the upper grate bracket using the screws and hex nuts included in the kit.
Your cup turner should look like this:
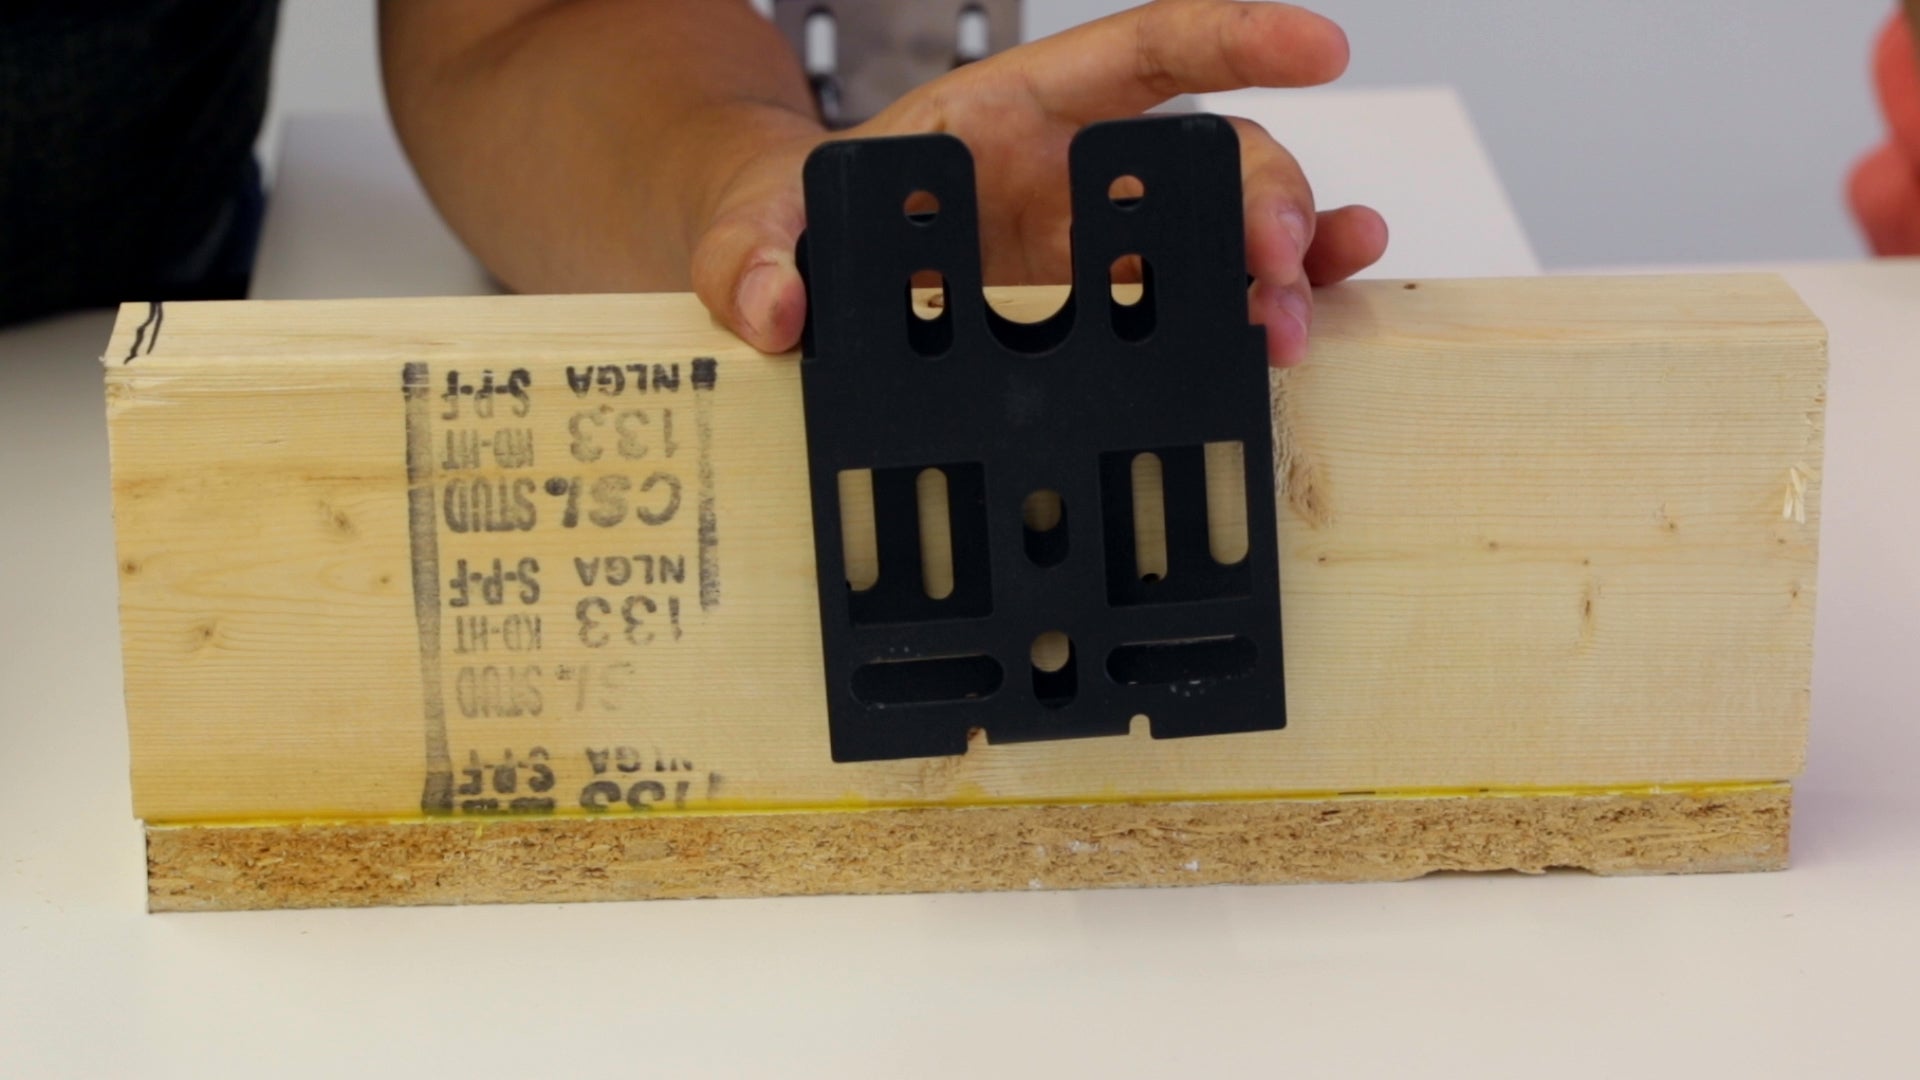
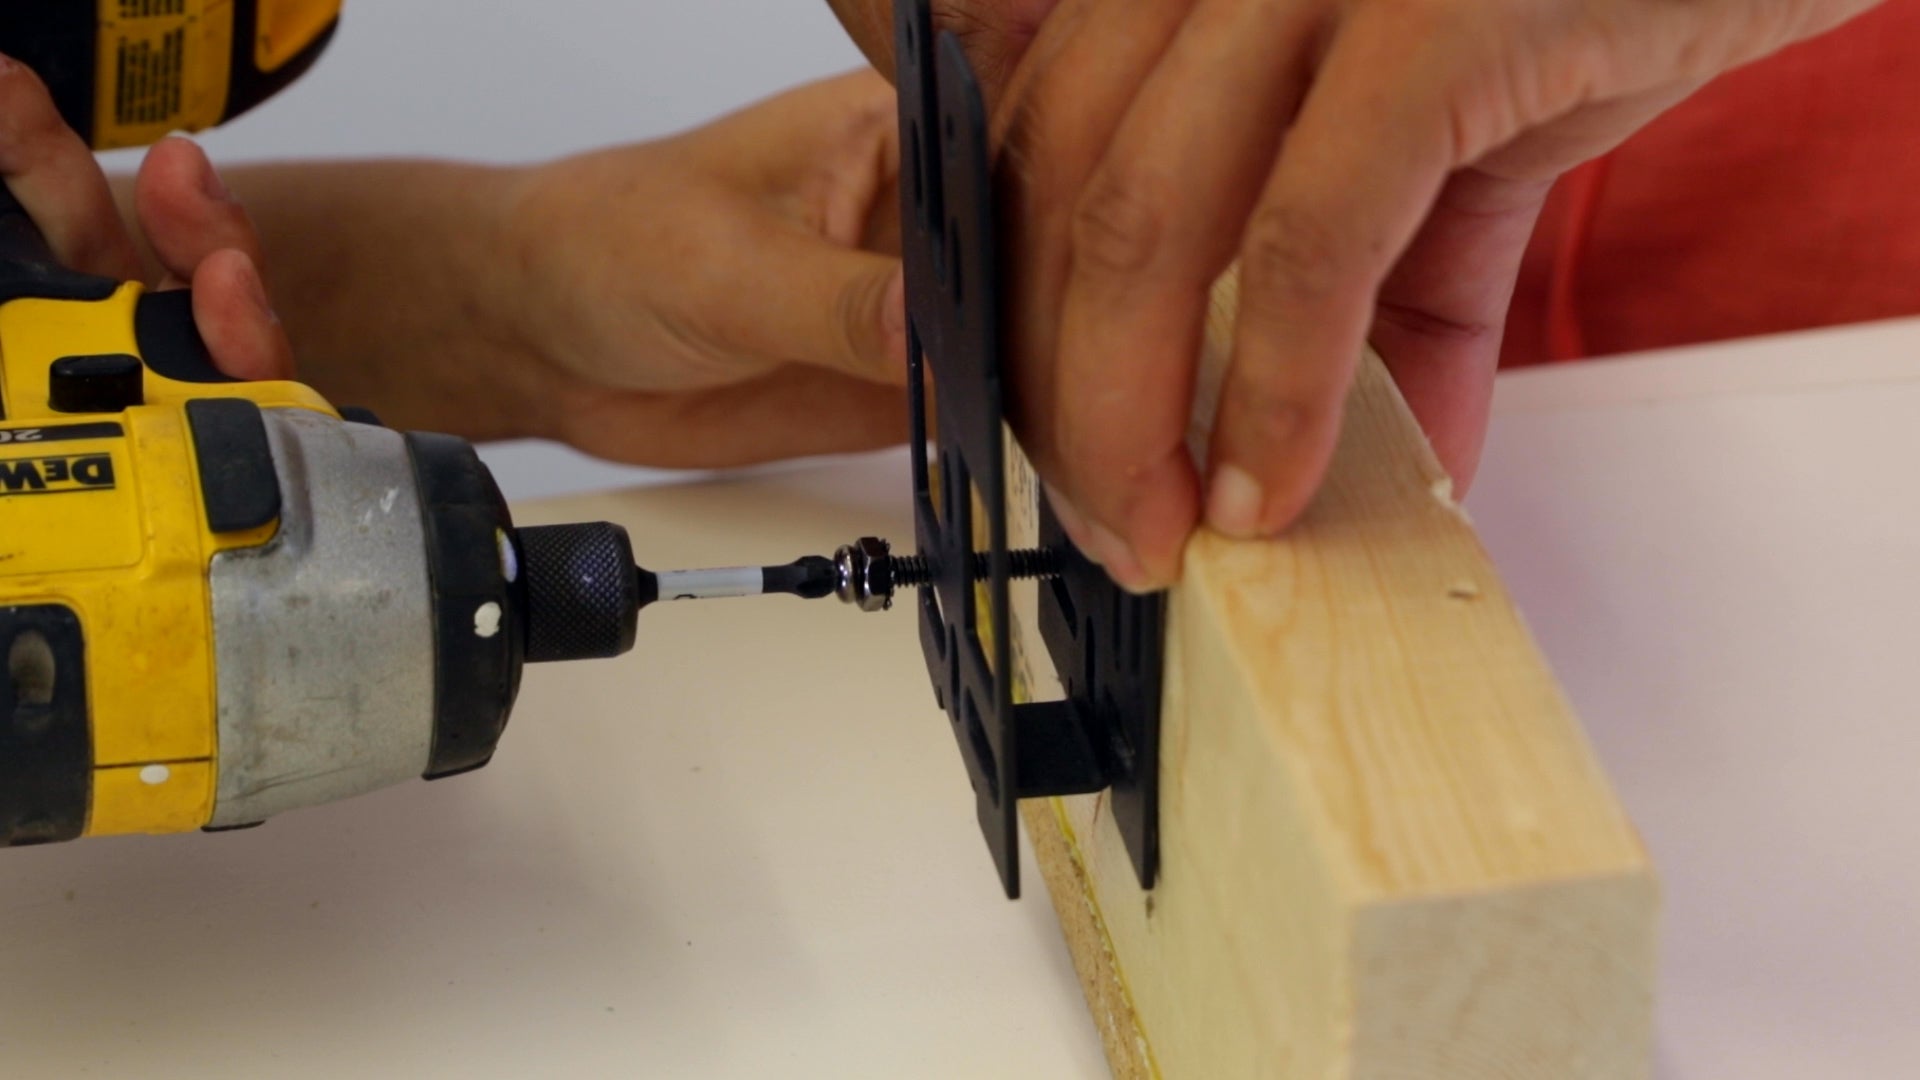
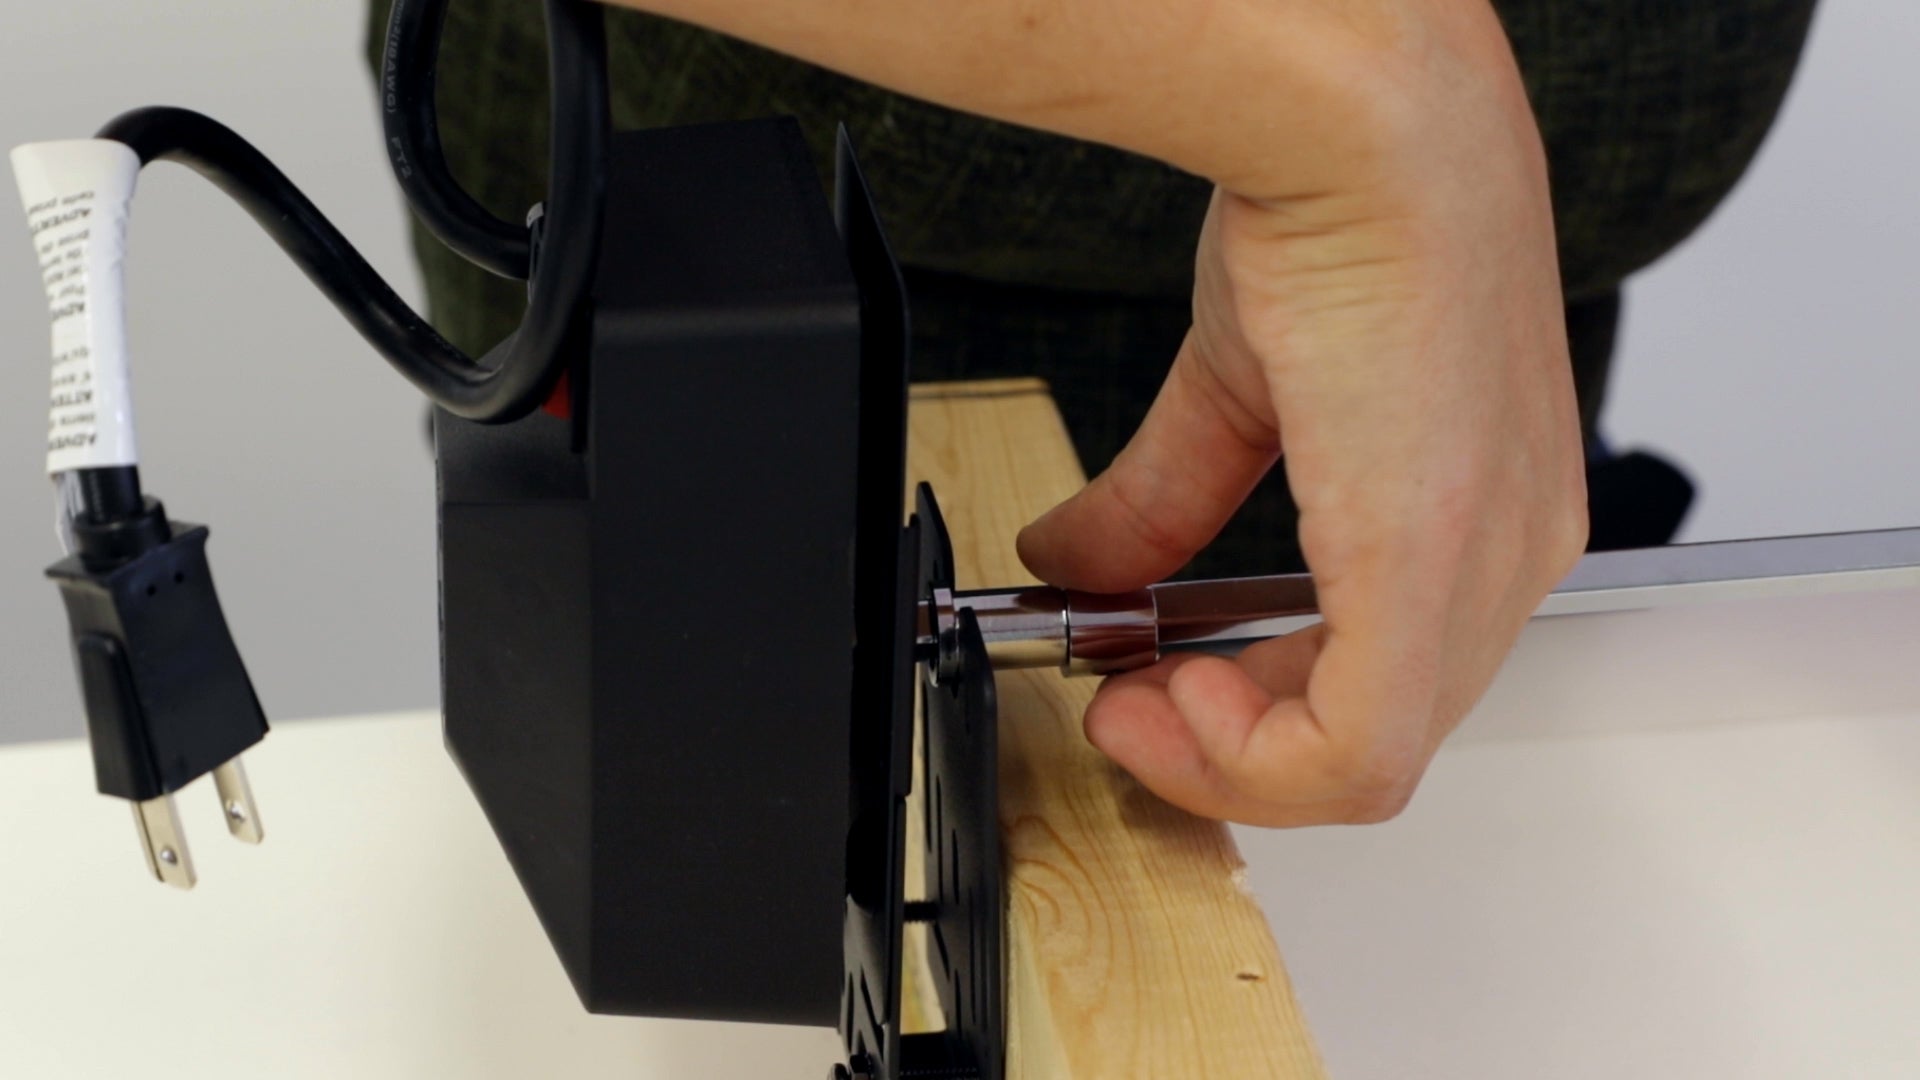
2. Mounting Bracket
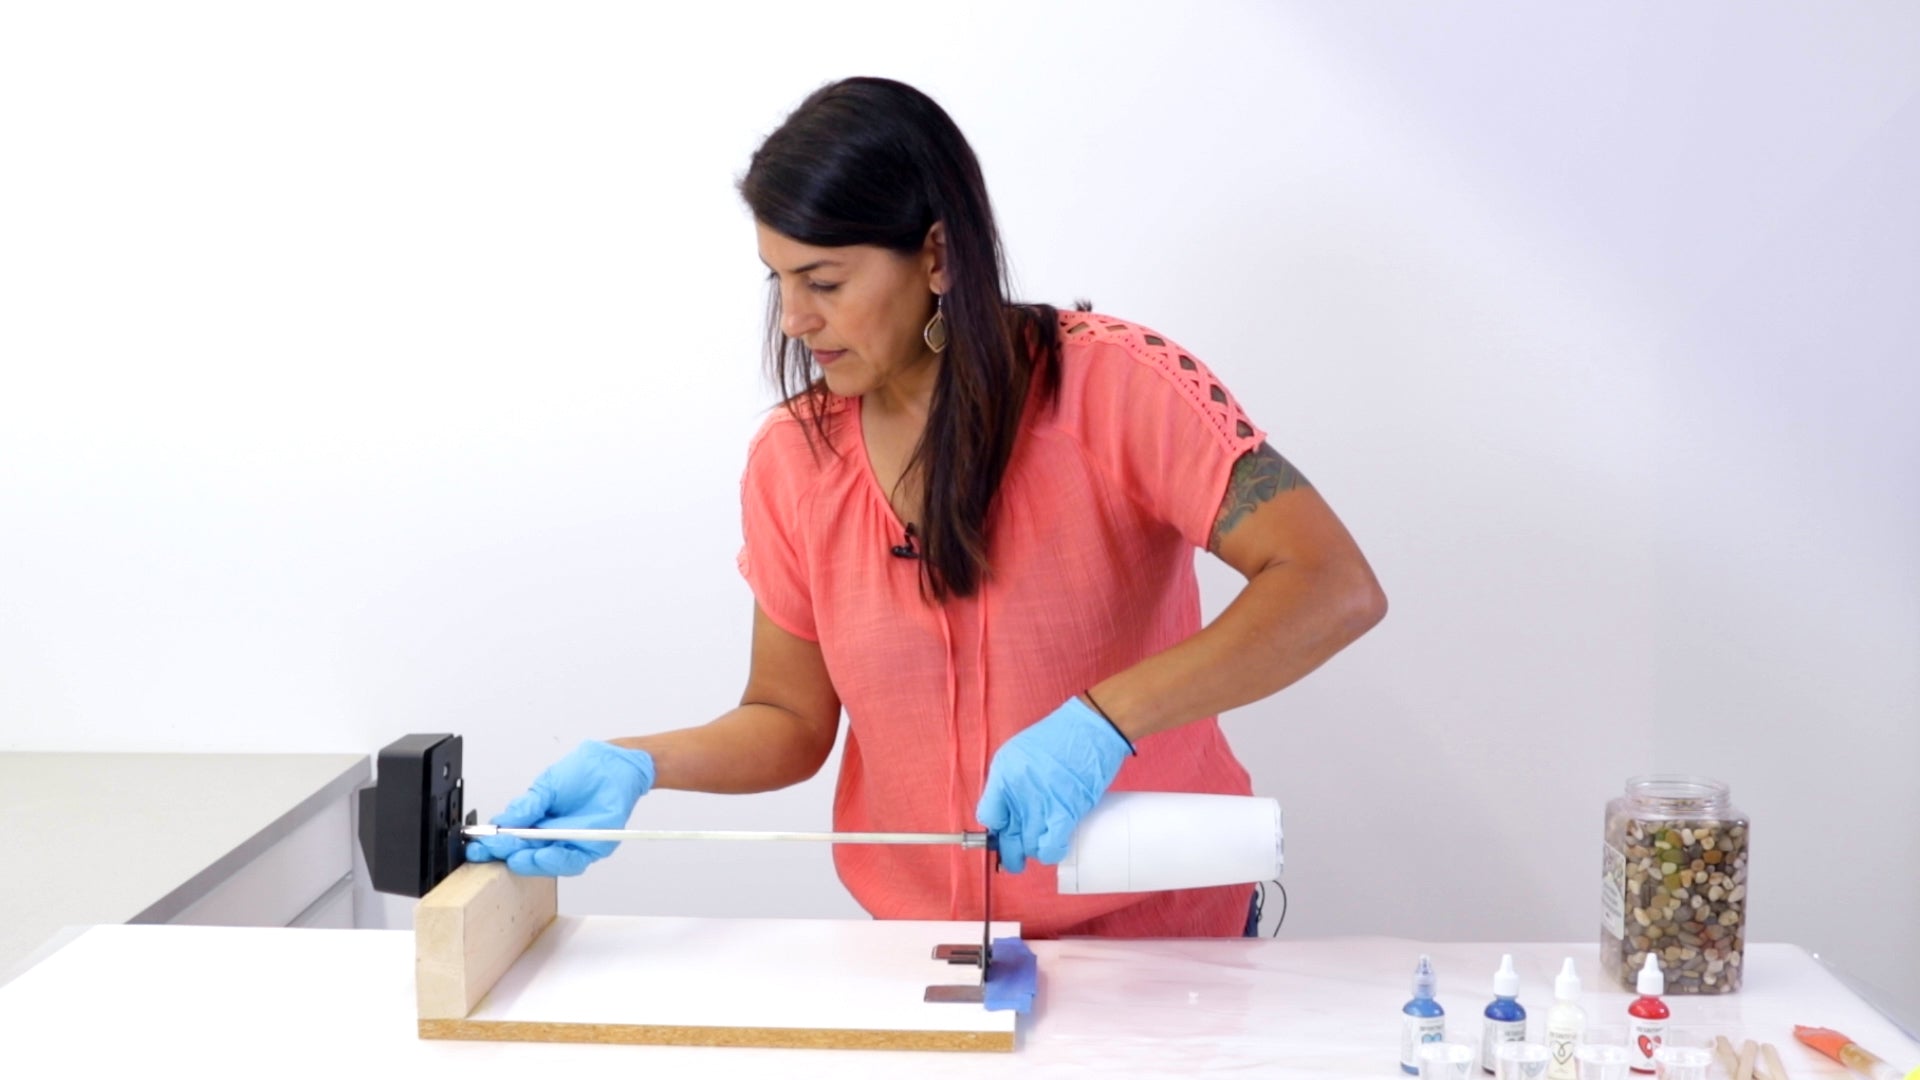
Line up the motor's mounting subclass on the outside of the 2 x 4 so that, once inserted, the rod will sit perfectly level. Spiral the bracket to the 2 x 4 using the electric drill.
iii. Slide the electric motor onto the mounting subclass
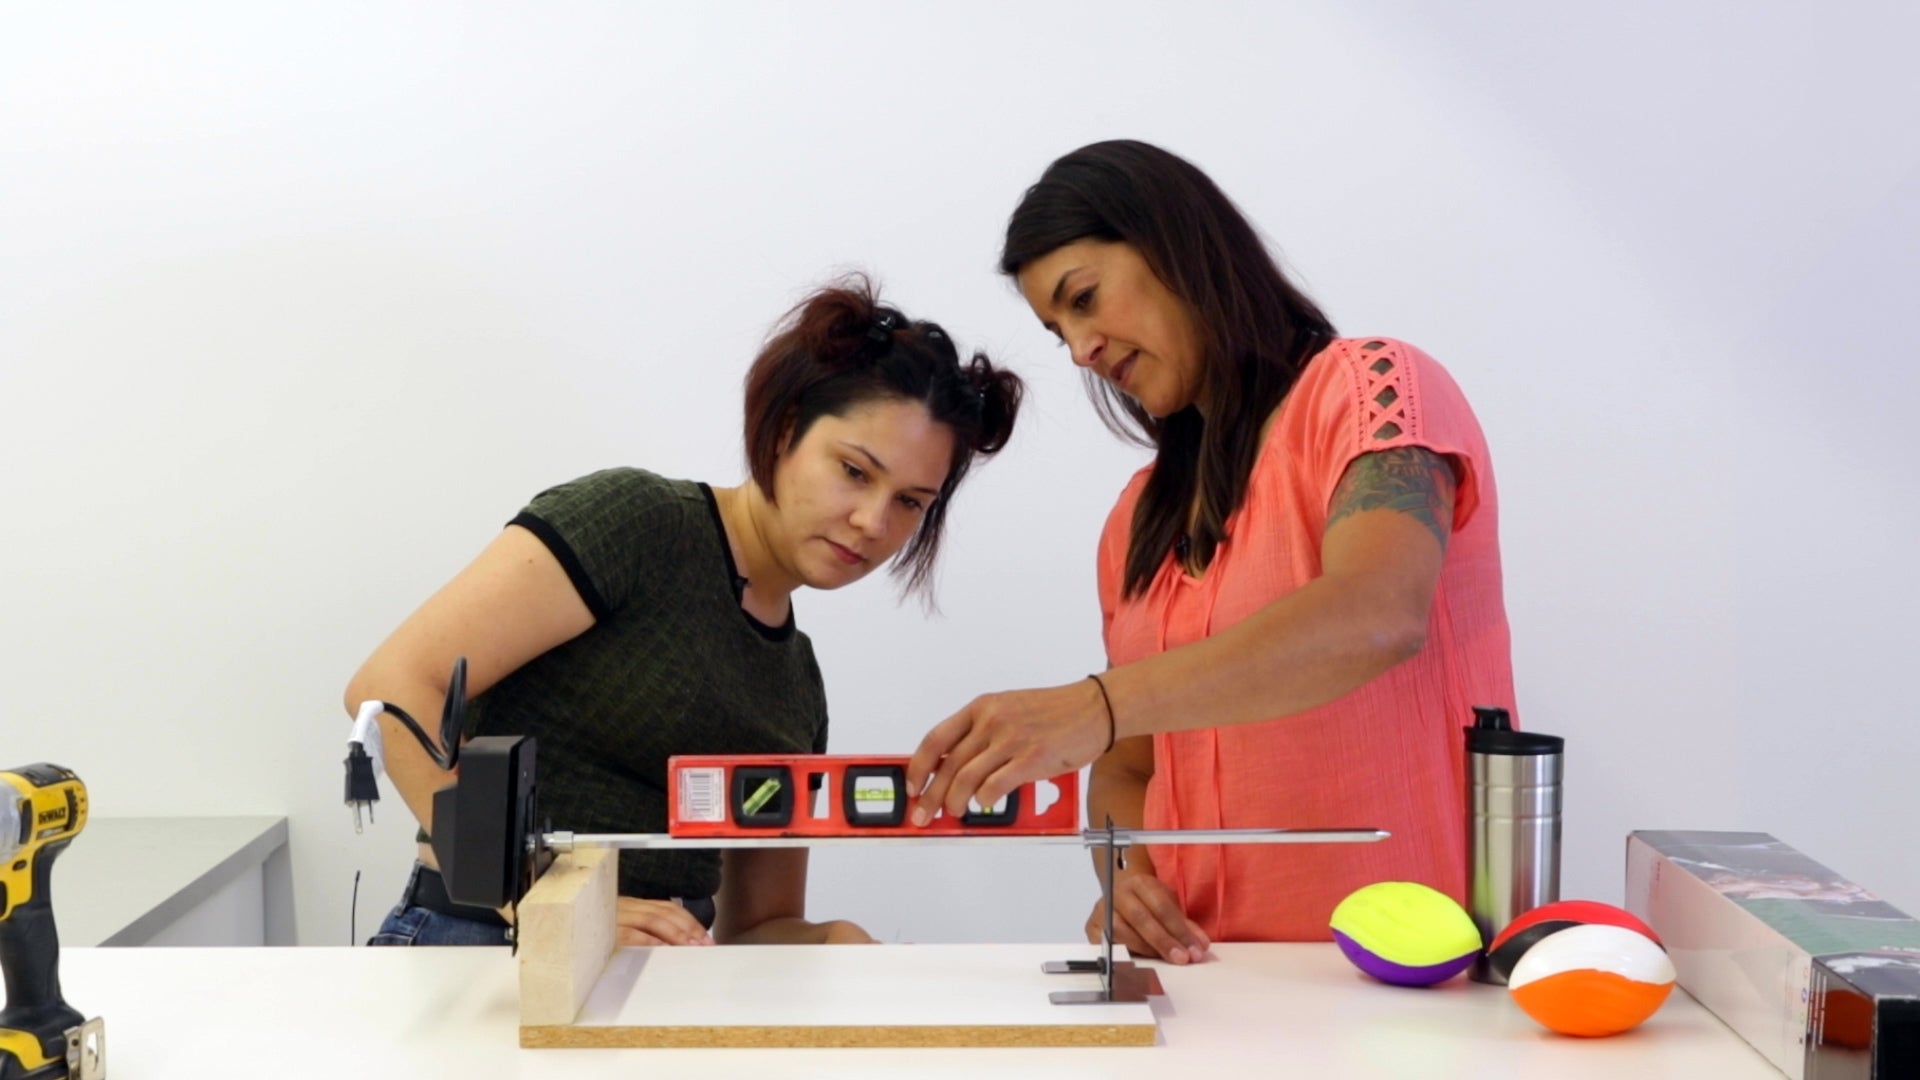
Attach the collars onto either ends of the spit rod. Insert ane end into the electrical motor, resting the other end on the far bracket. Using a level, make sure the rod is perfectly horizontal. 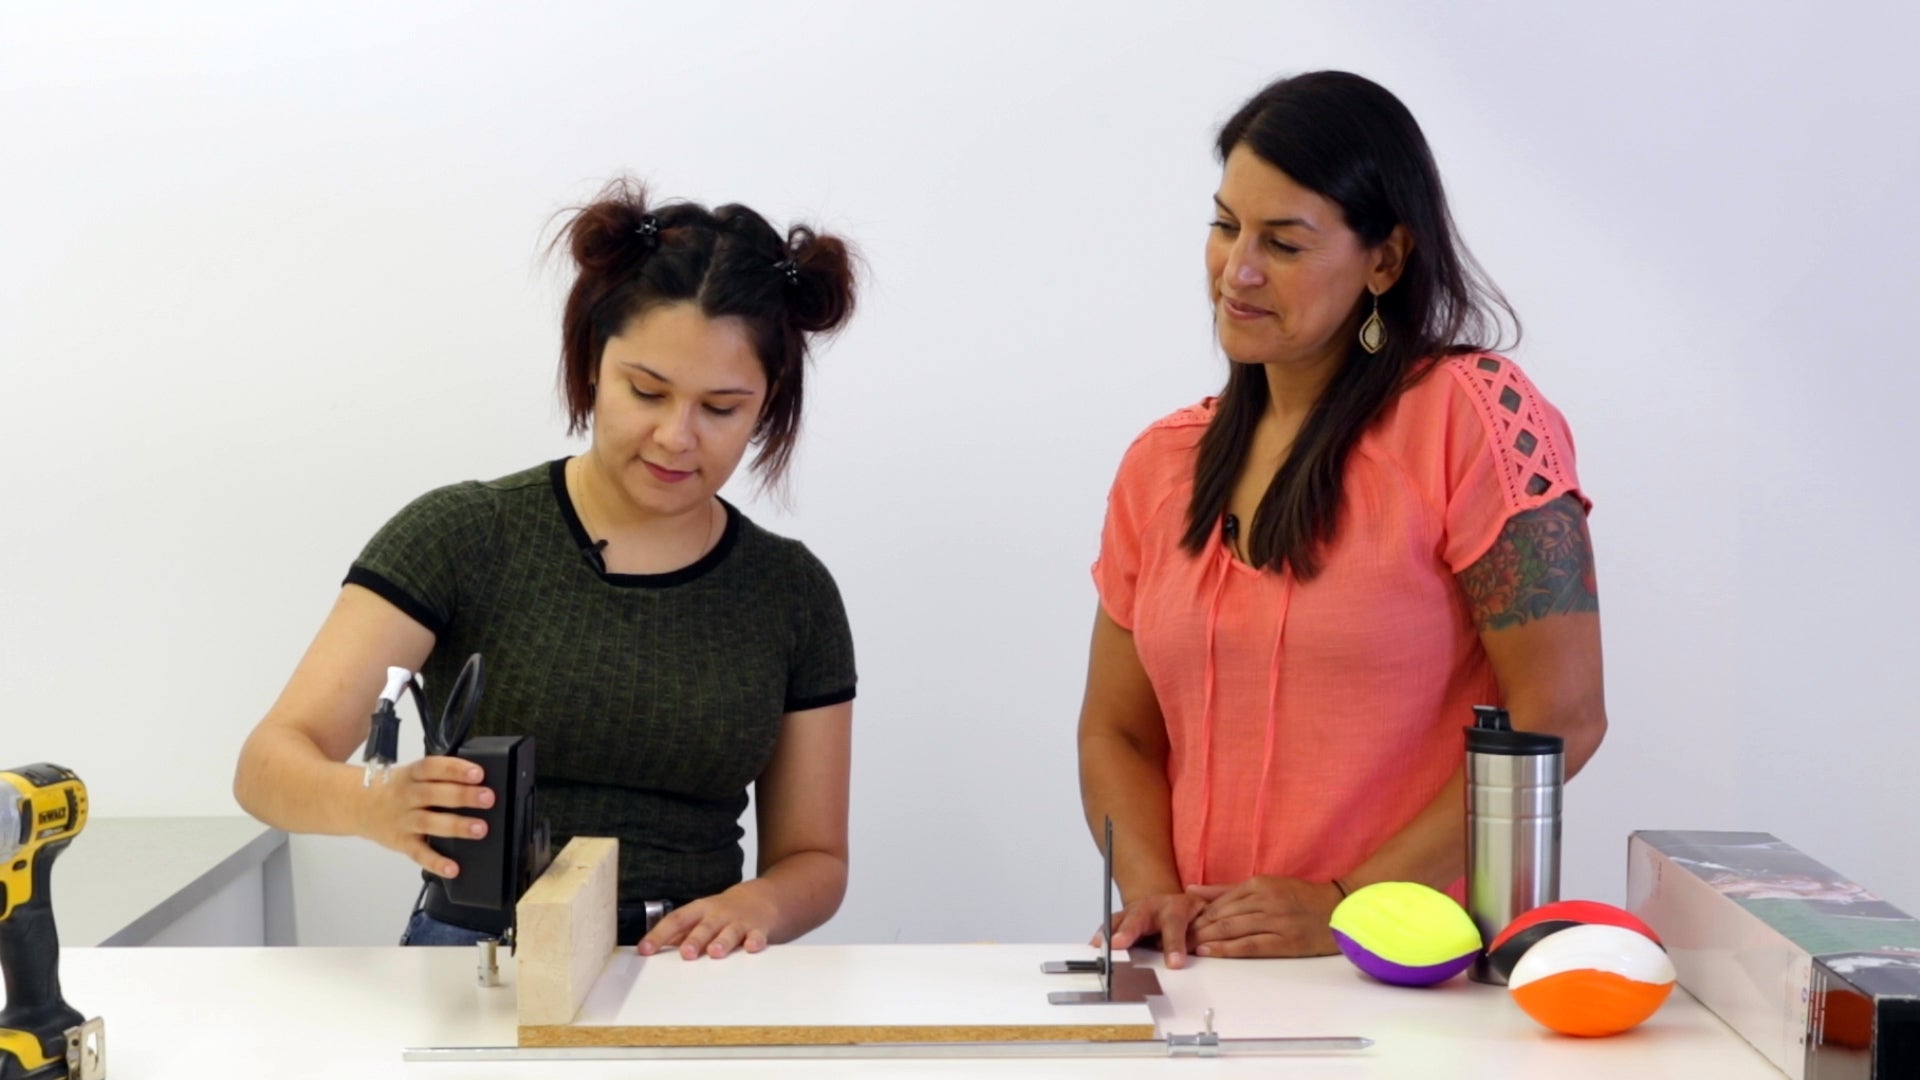
4. Spit Rod
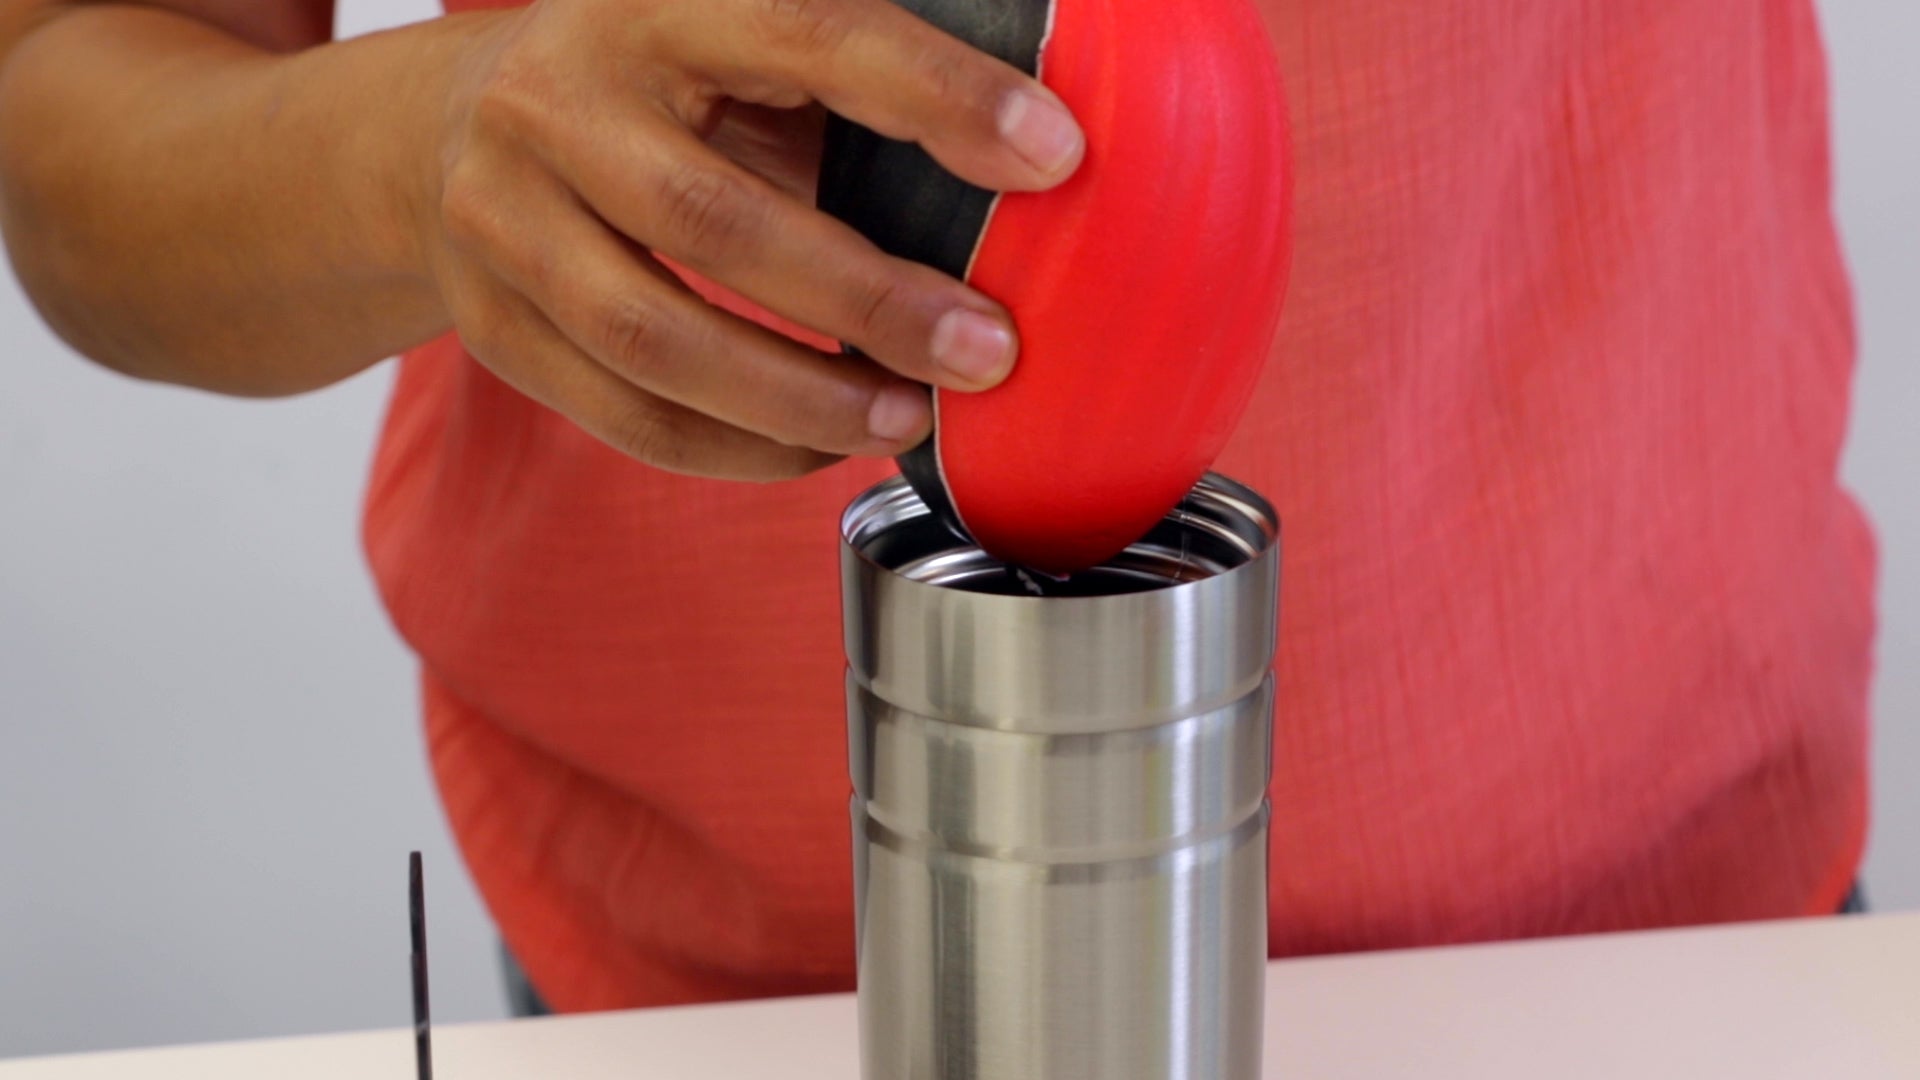
Cutting an Ten into one end of the foam football. Insert the pointed cease of the spit rod direct through the entire length of the football, then insert into the tumbler, pushing the football and spit rod down to the bottom of the tumbler. Re-attach the spit rod and tumbler dorsum onto the motor and bracket. Check with a level to brand certain it's sitting perfectly horizontal to ensure even resin coverage. Now you're fix to create! 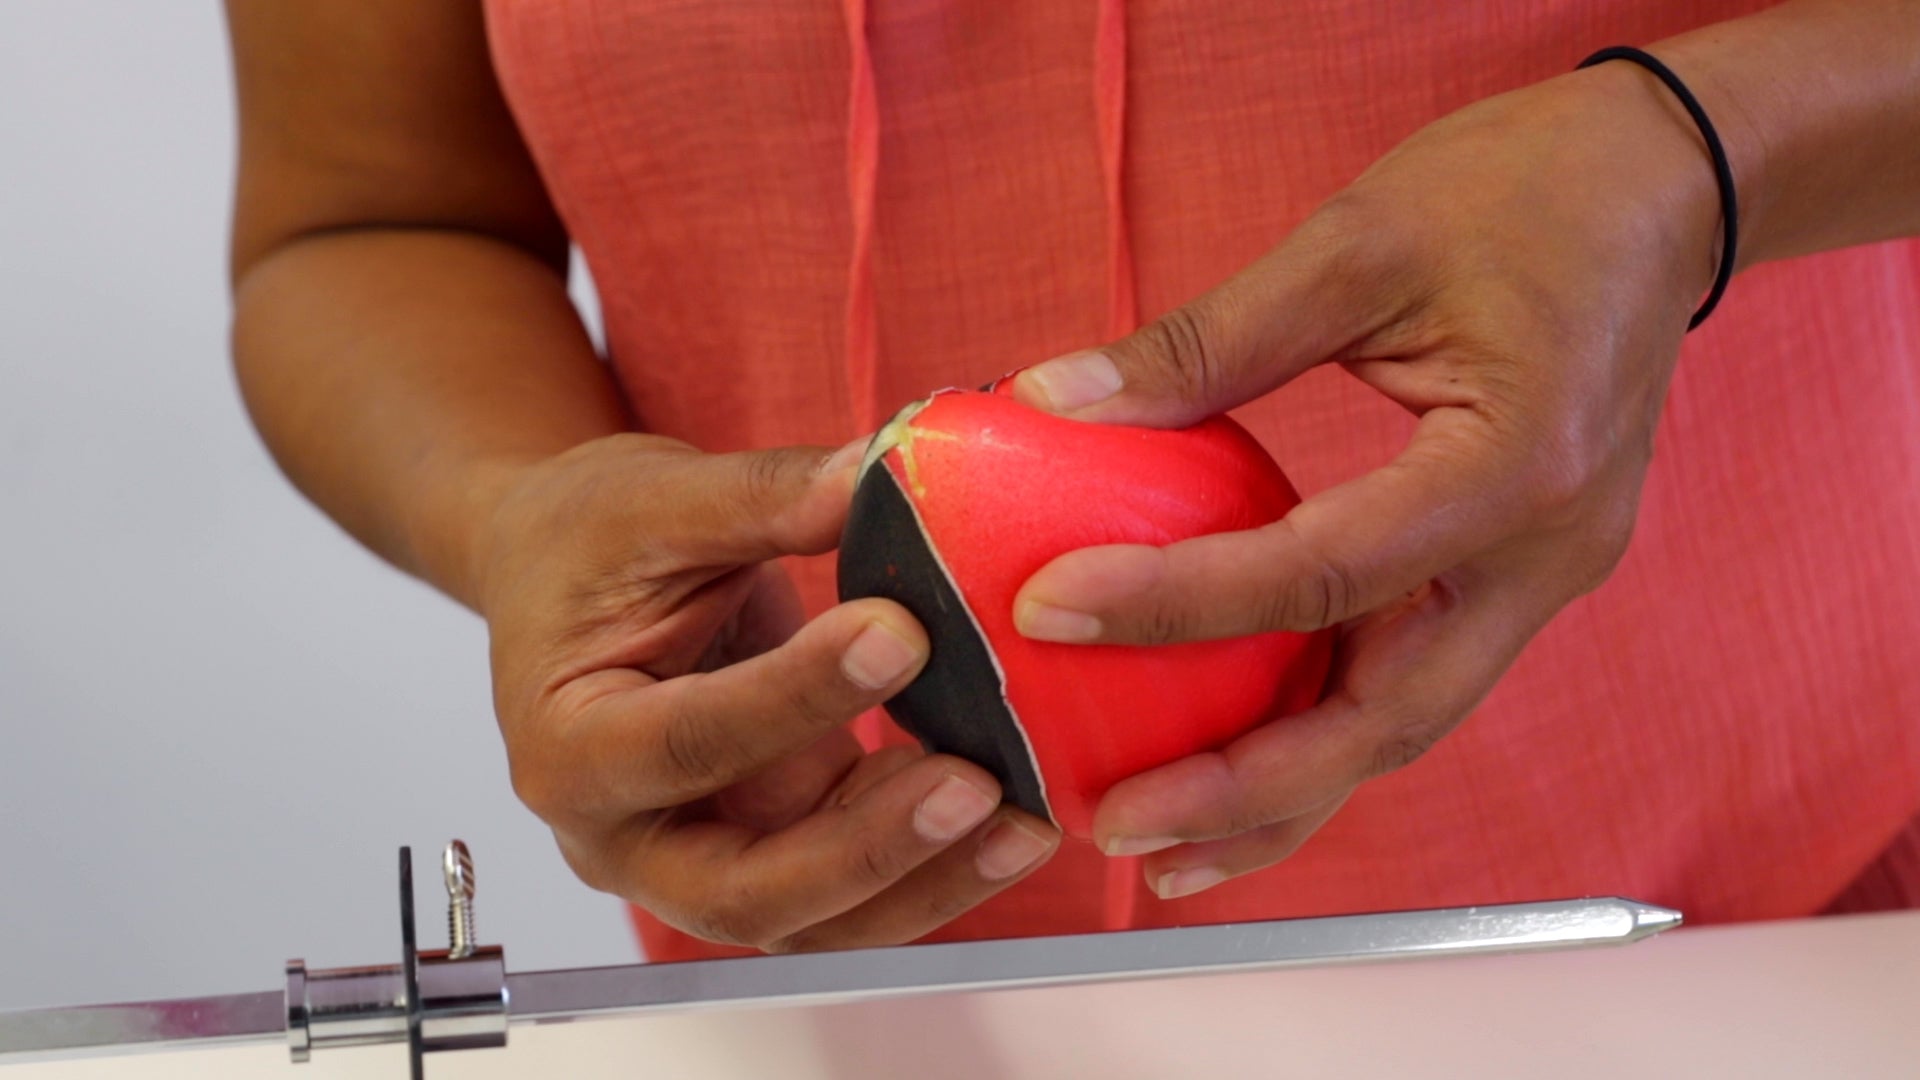


Which Type Of Tumbler Is Best To Resin?
Whichever tumbler you choose to utilize, it'due south best to look for a double walled or insulated tumbler.
Let's get through some of the more mutual tumbler materials, one by one:
Metallic & Resin
Stainless steel is your best bet when applying resin to a tumbler. Epoxy resin adheres very nicely to stainless steel and although it doesn't require a glaze of spray paint, you tin certainly apply a base coat to compliment your colour palette. If you're planning on using the tumbler for hot drinks, ever cull an insulated tumbler to protect the resin from the heat.
Learn how to resin metal.
Plastic & Resin
Avert using plastic tumblers for this projection. Epoxy resin does not adhere to plastic and can skin off in time. If your tumbler has a small-scale amount of plastic on information technology, you tin can cover it with a plastic-compatible spray paint to give the resin something to hang onto.
Glass and Ceramic and Resin
Resined glass or ceramic tumblers should simply exist used for cold beverages. The glass or ceramic will absorb the heat from hot beverages and the residual estrus could cause the resin to soften. Insulated tumblers with glass interiors are fine to apply as long the outside is stainless steel.
A Note on Vinyl Decals:
Many artists are placing vinyl decals on their tumblers and then sealing the decal with a final glaze of ArtResin. While this is a beautiful technique, we exercise recommend sealing the decal once it has been applied to the tumbler with a spray sealant or Modernistic Podge.
We besides recommend using gloves when adhering your decal to your tumbler. Your hands may take moisturizer or oily residue that will repel the resin causing voids and divots. Using gloves helps control whatsoever problems that can pop upward as the resin cures.
DIY Epoxy Tumbler Ideas
How to make a Ruby-red, White & Blueish Striped Tumbler:
What You'll Need:
- an insulated stainless steel tumbler, taped off and spray painted white
- ArtResin epoxy resin
- nitrile gloves
- mixing container
- stir stick
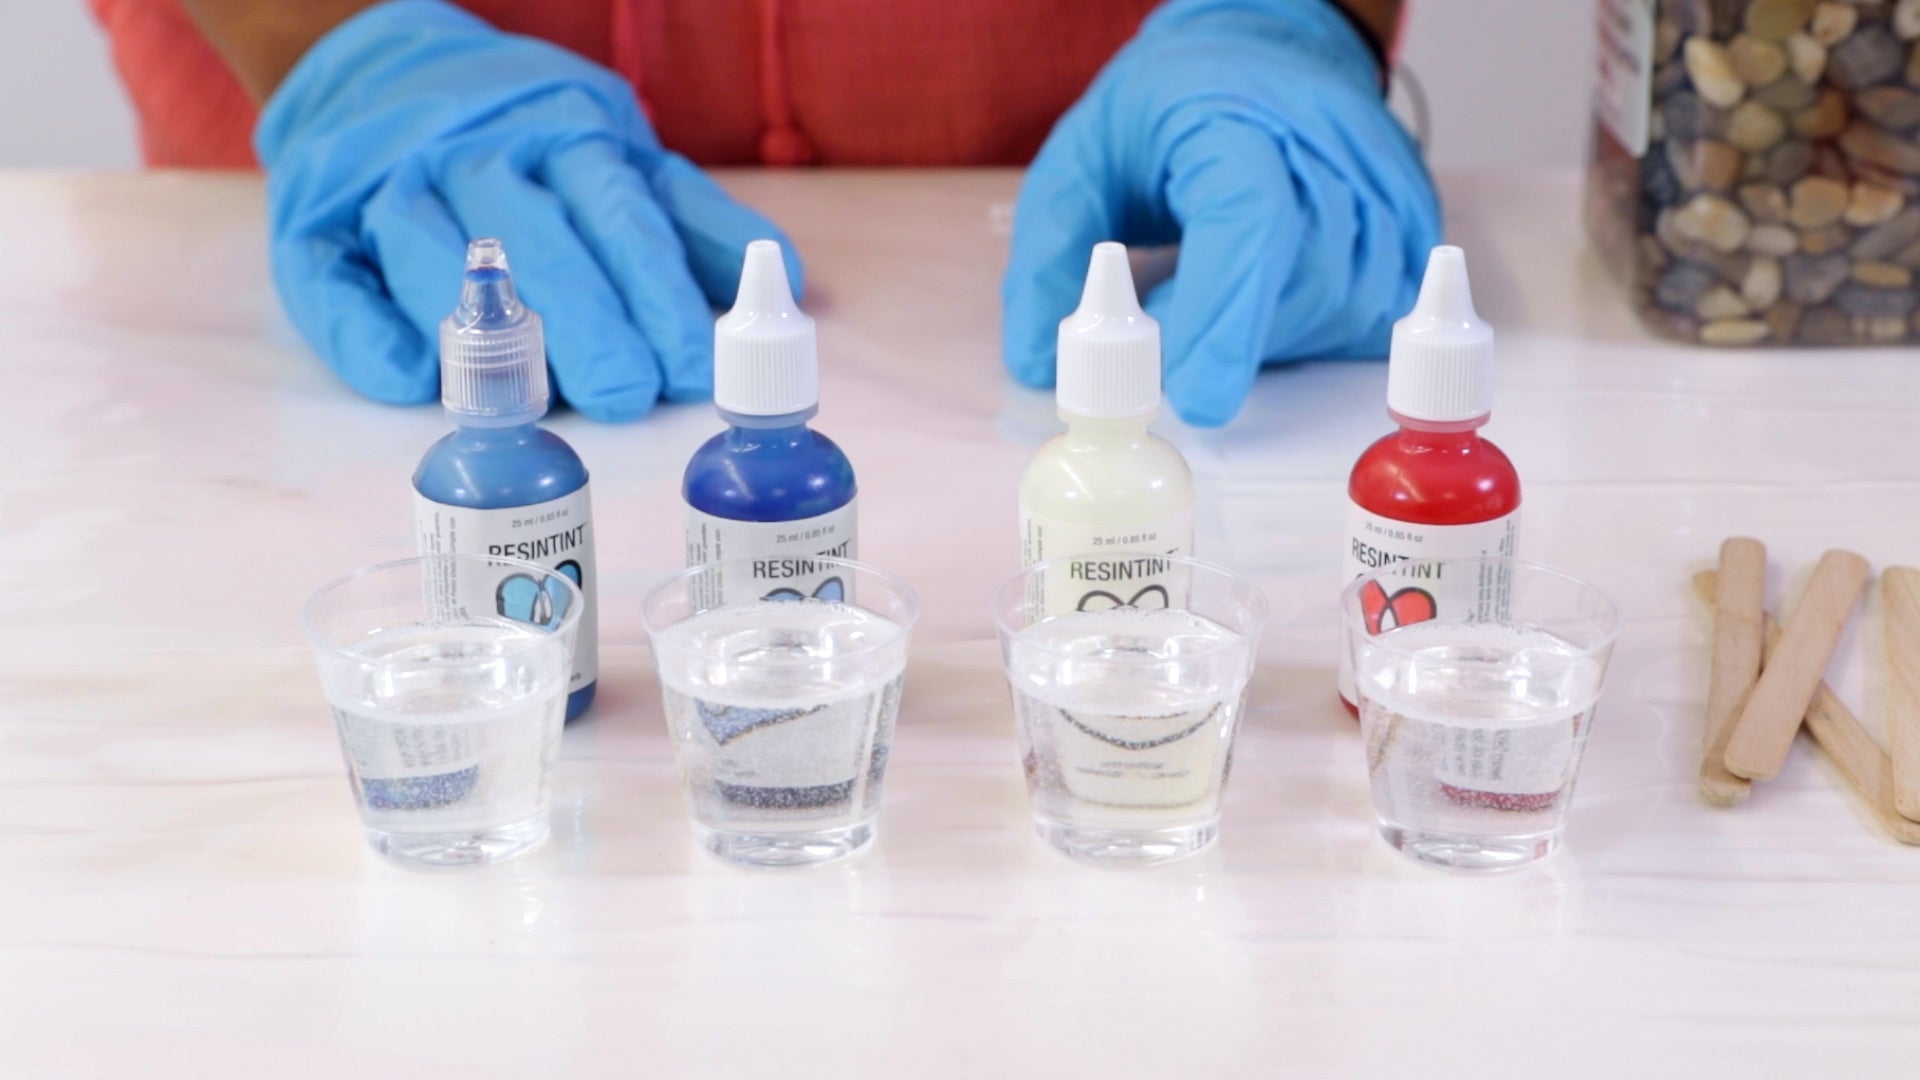
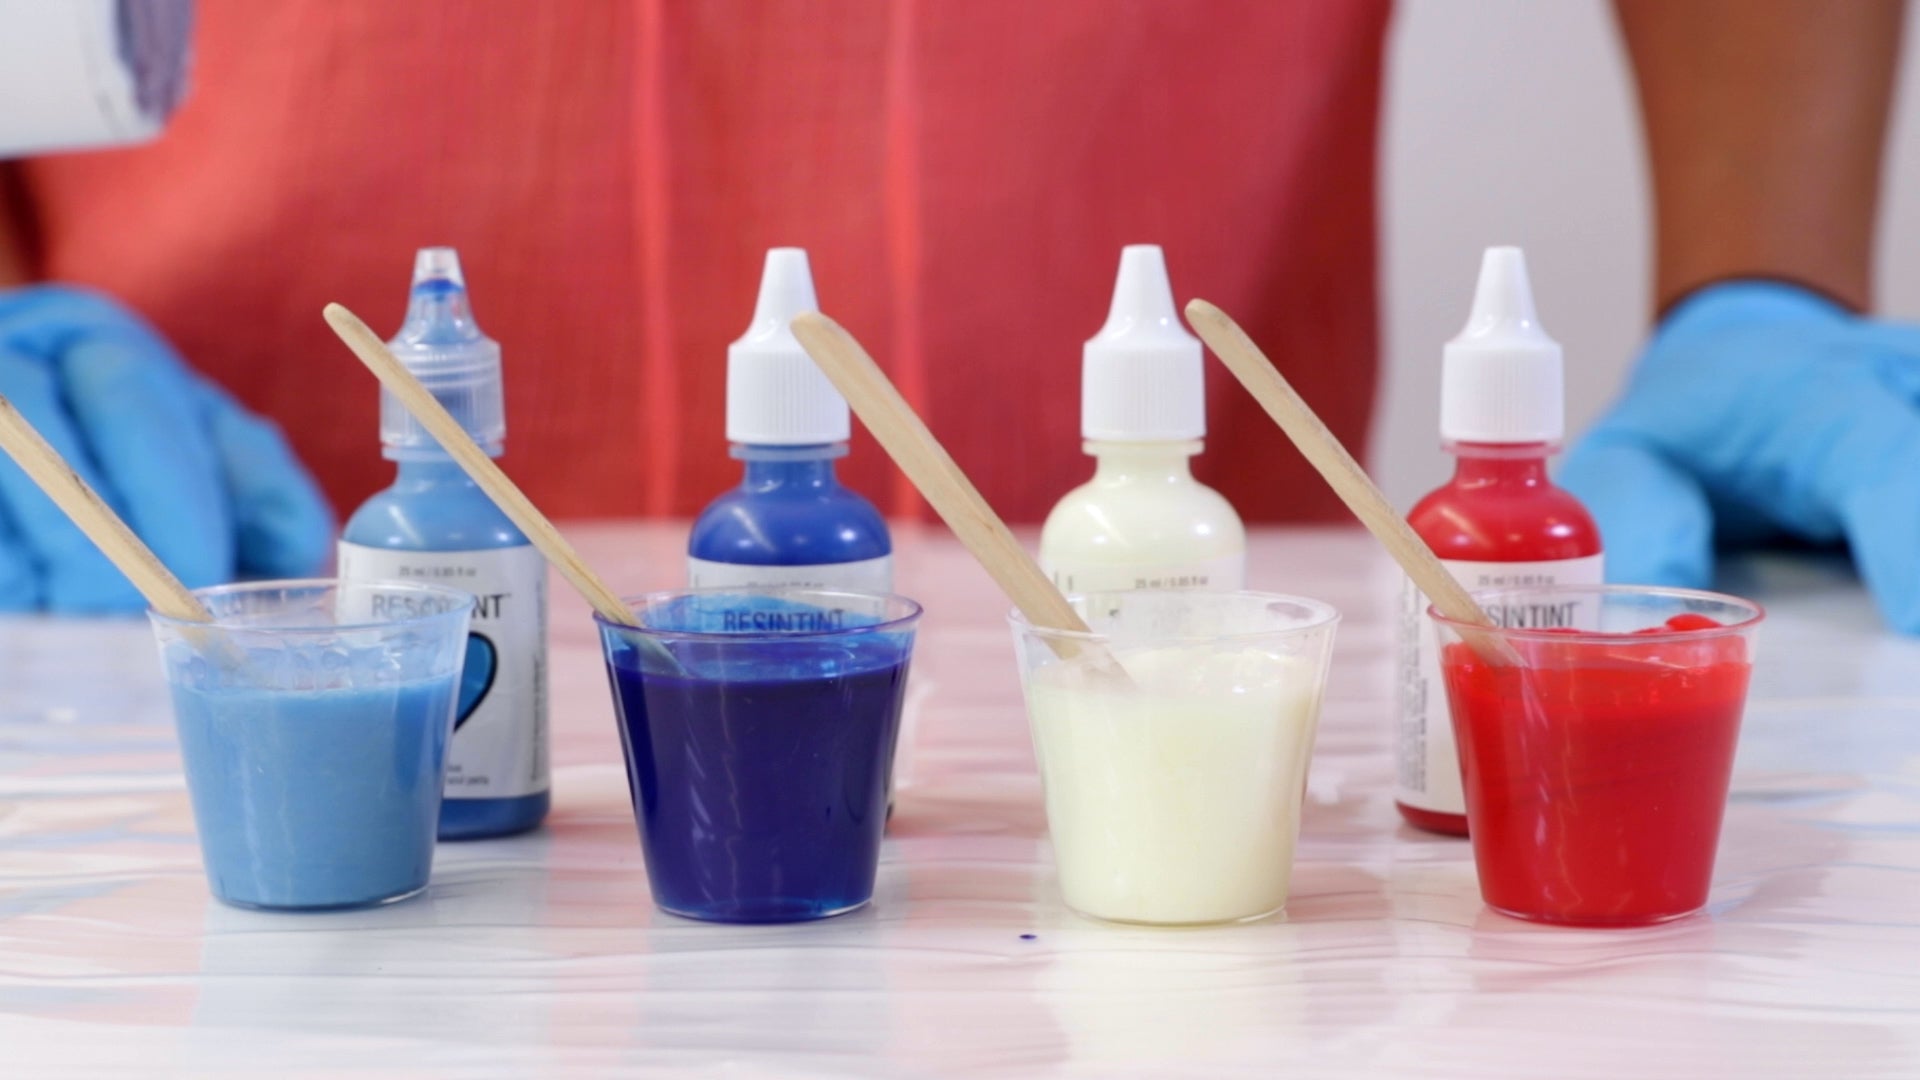
- ResinTint liquid colorant in light blue, dark blue, white and red
- 4 x plastic shot glasses ( 1 for each colour )
- iv x popsicle sticks ( one for each colour )
- an empty plastic tote or paper-thin box to protect your slice while it dries

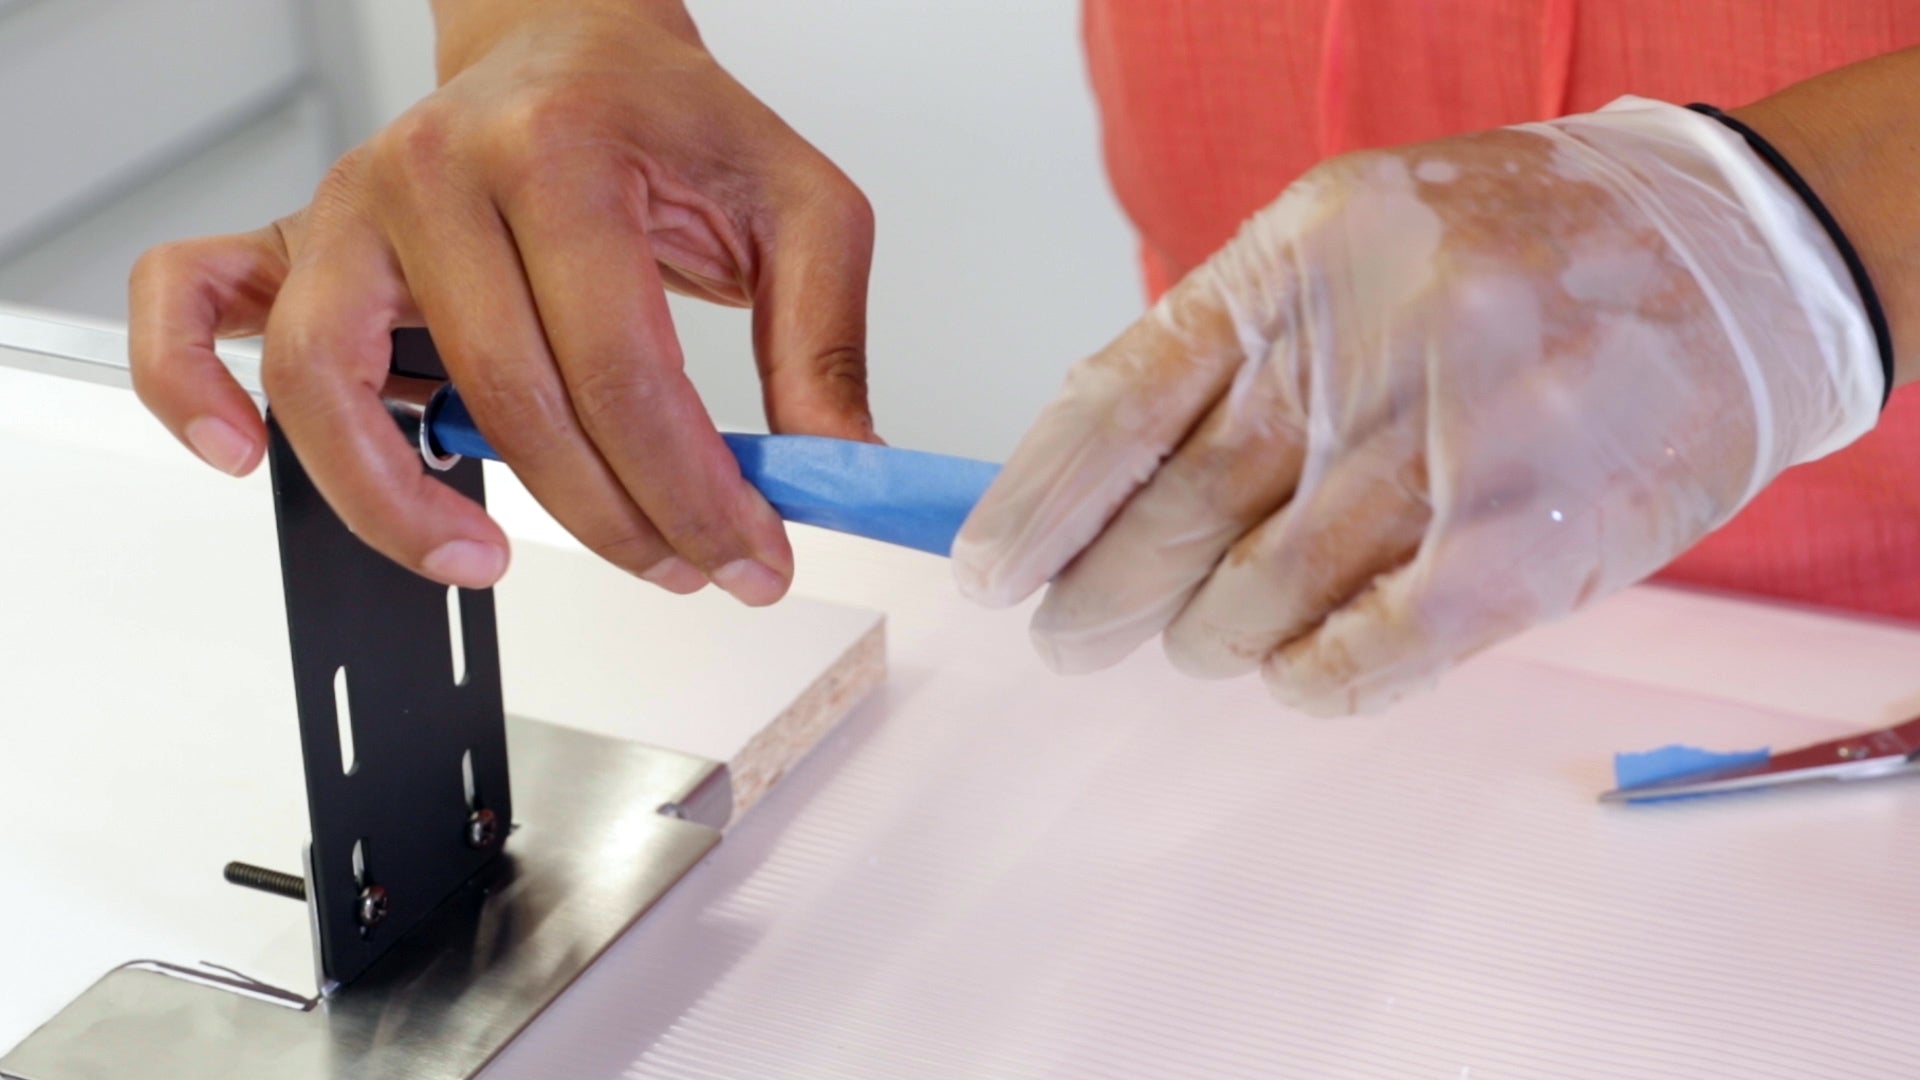
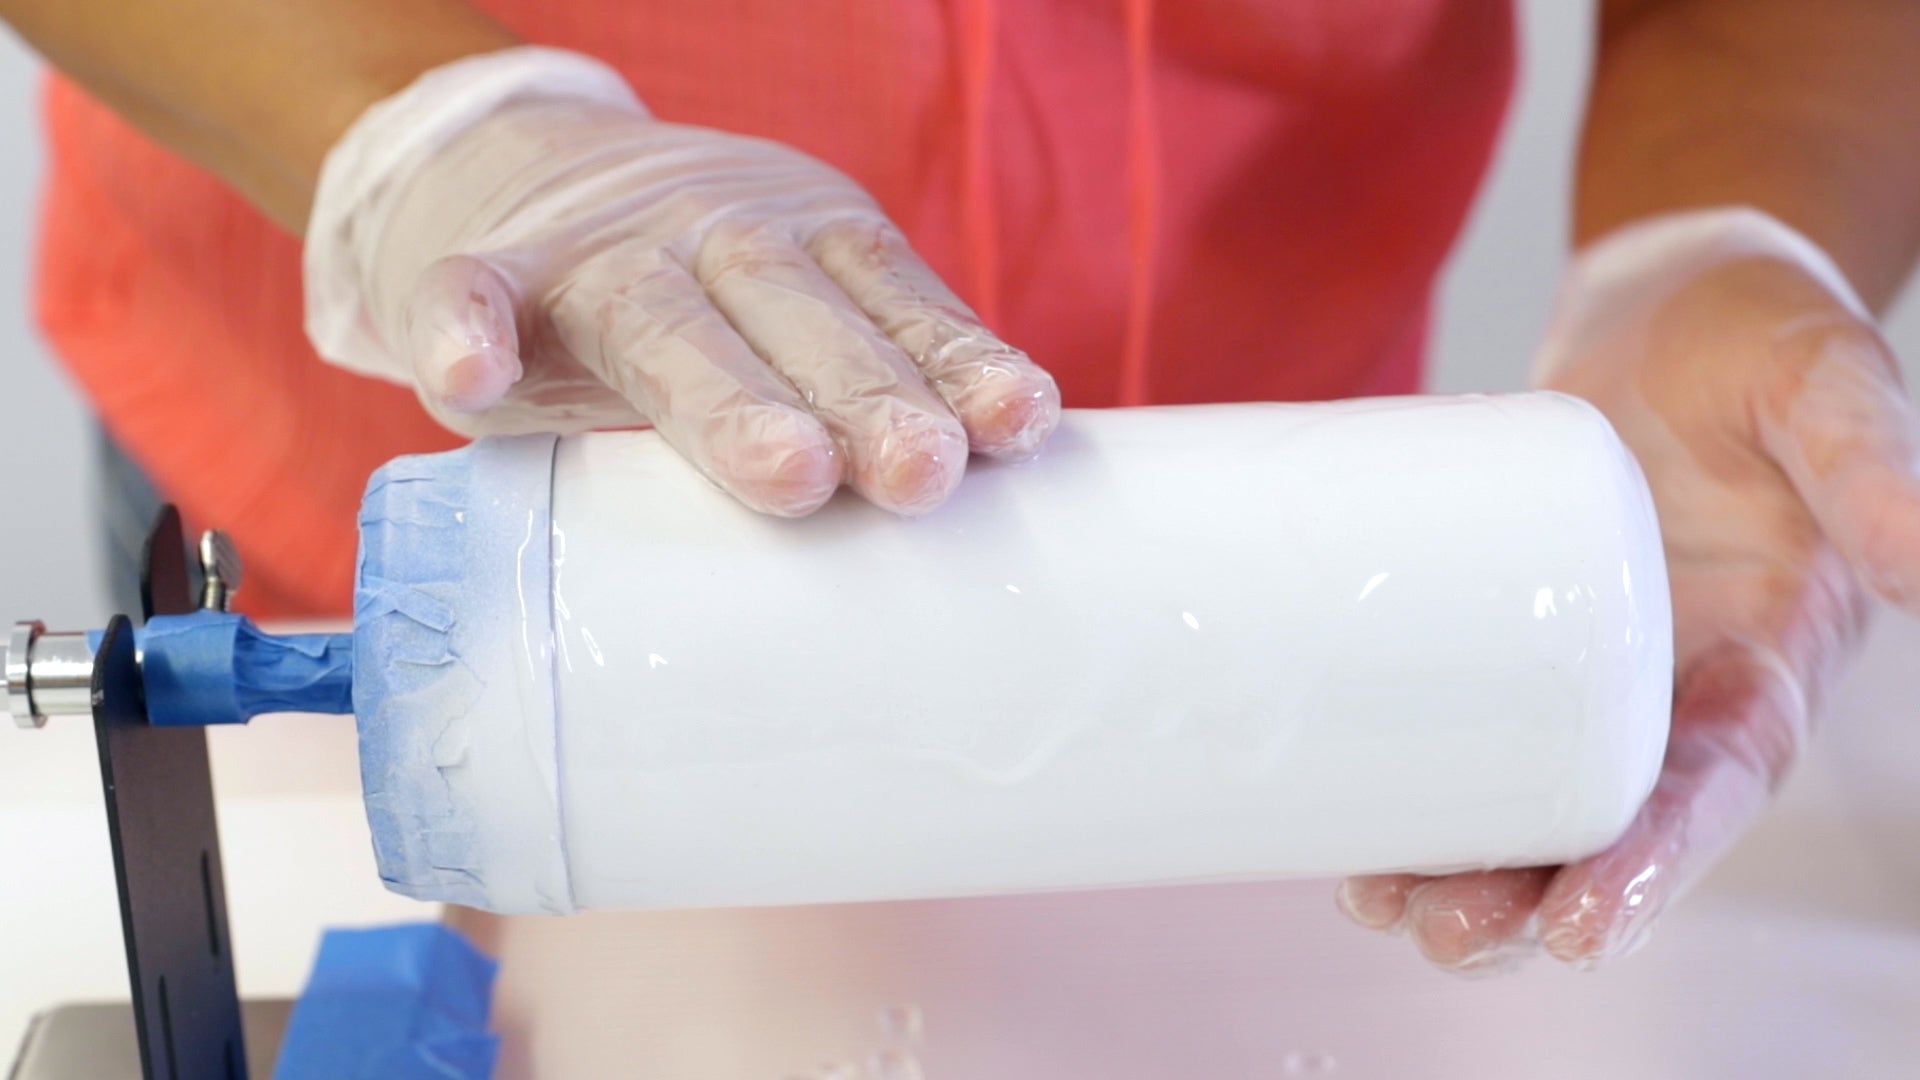
i. Prepare Your Work Surface And Tumbler
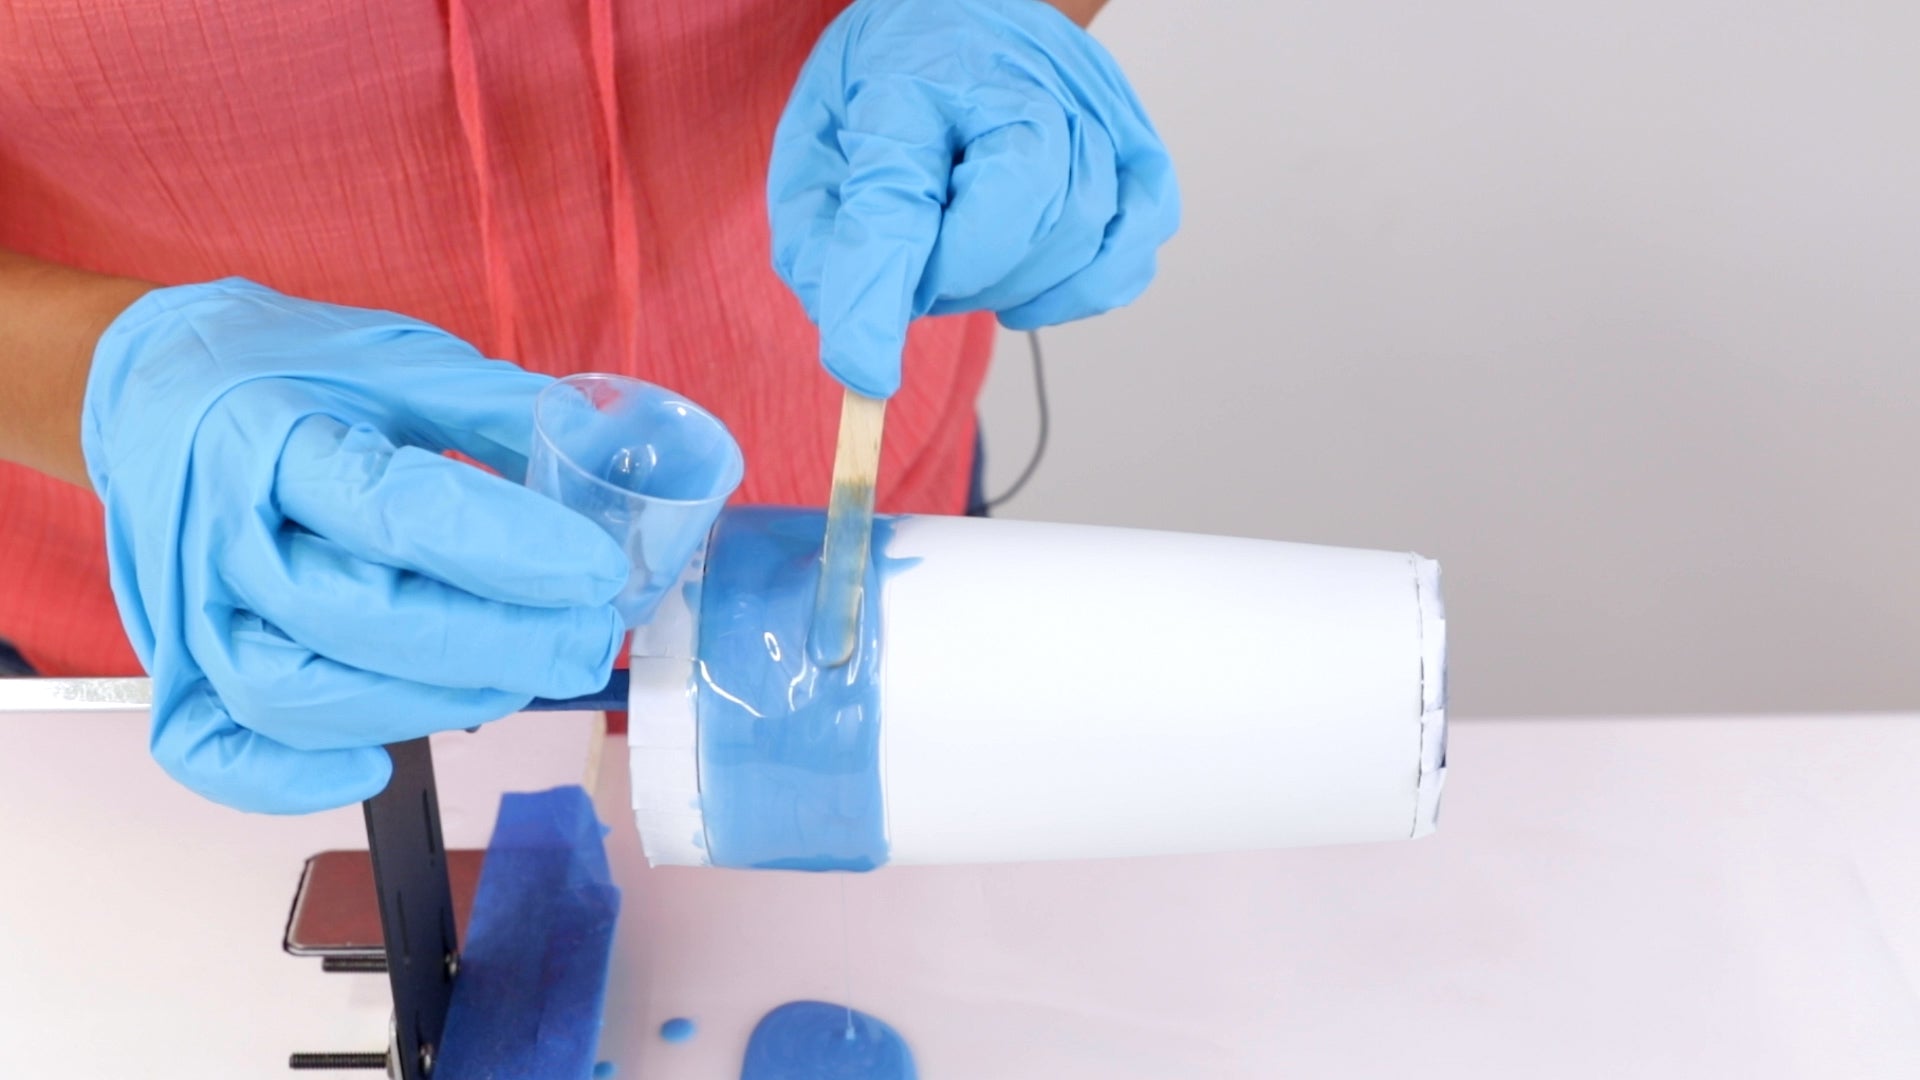
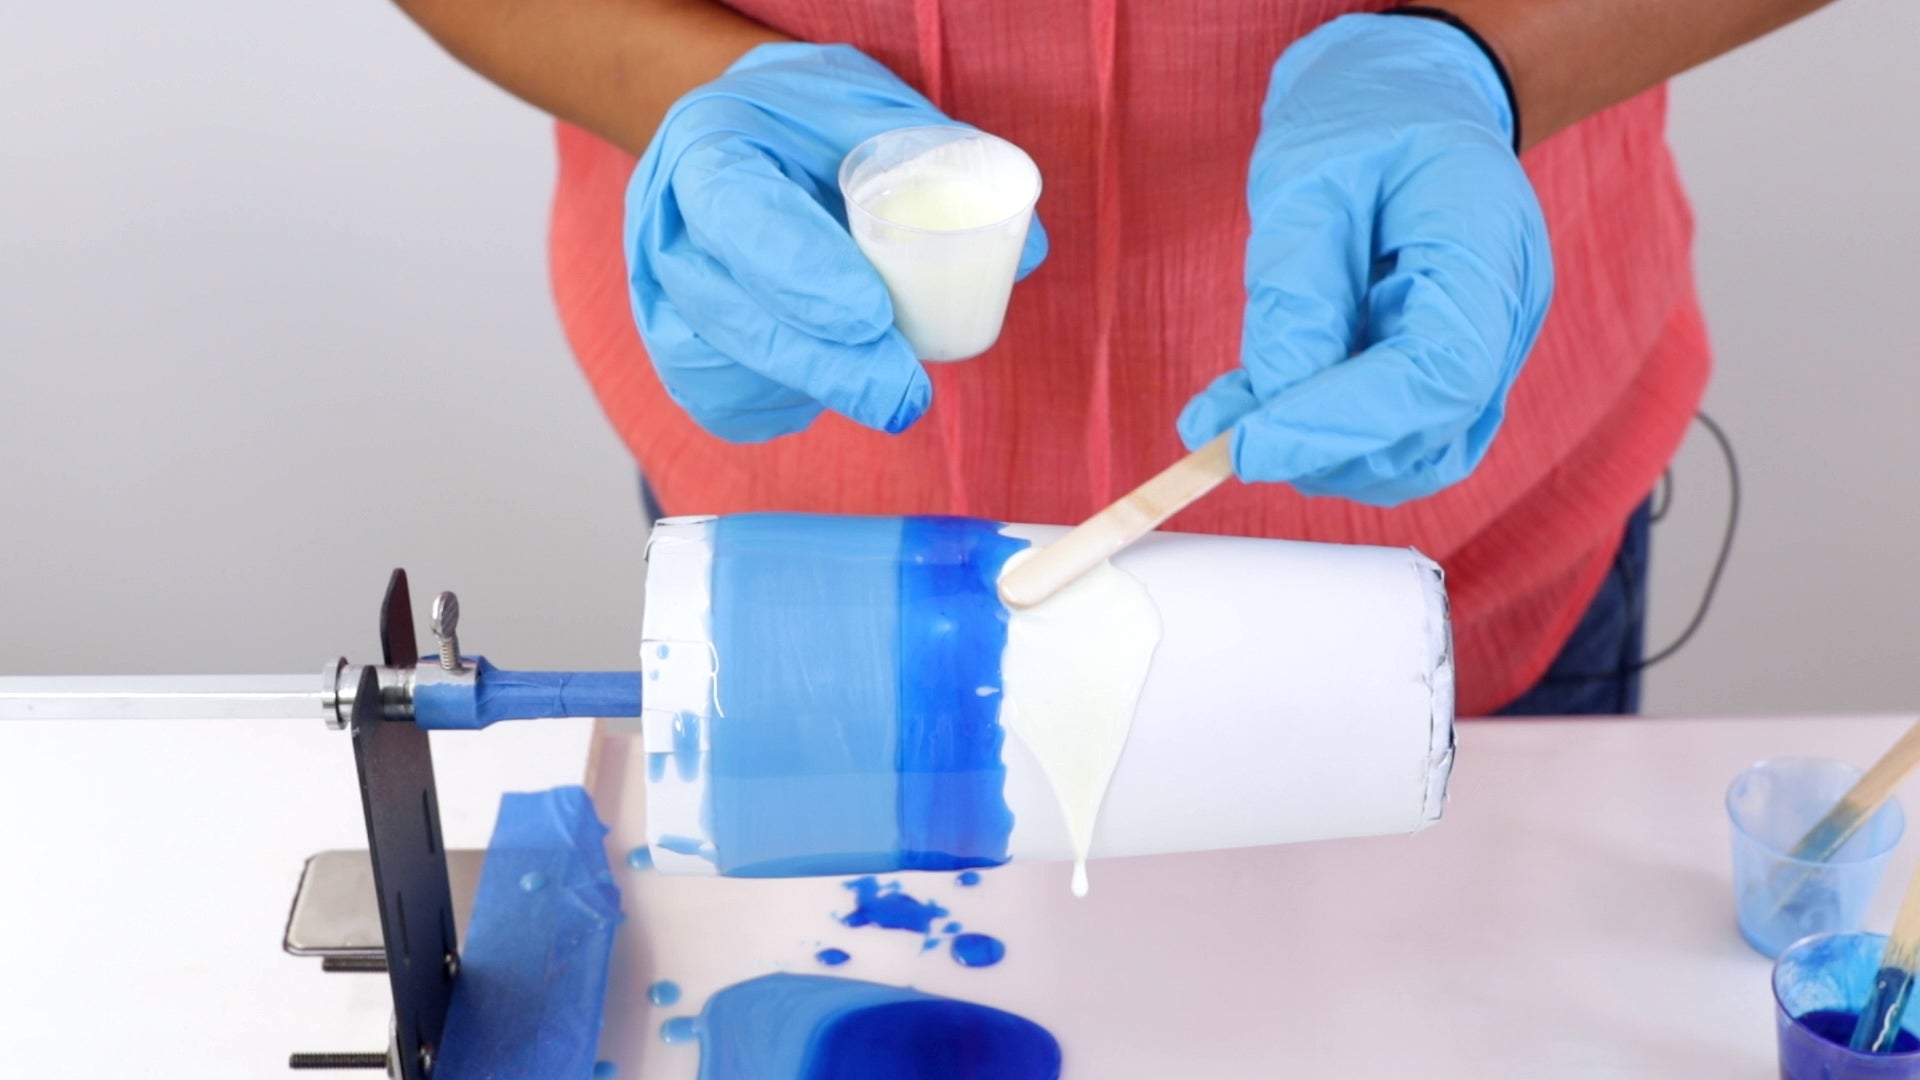
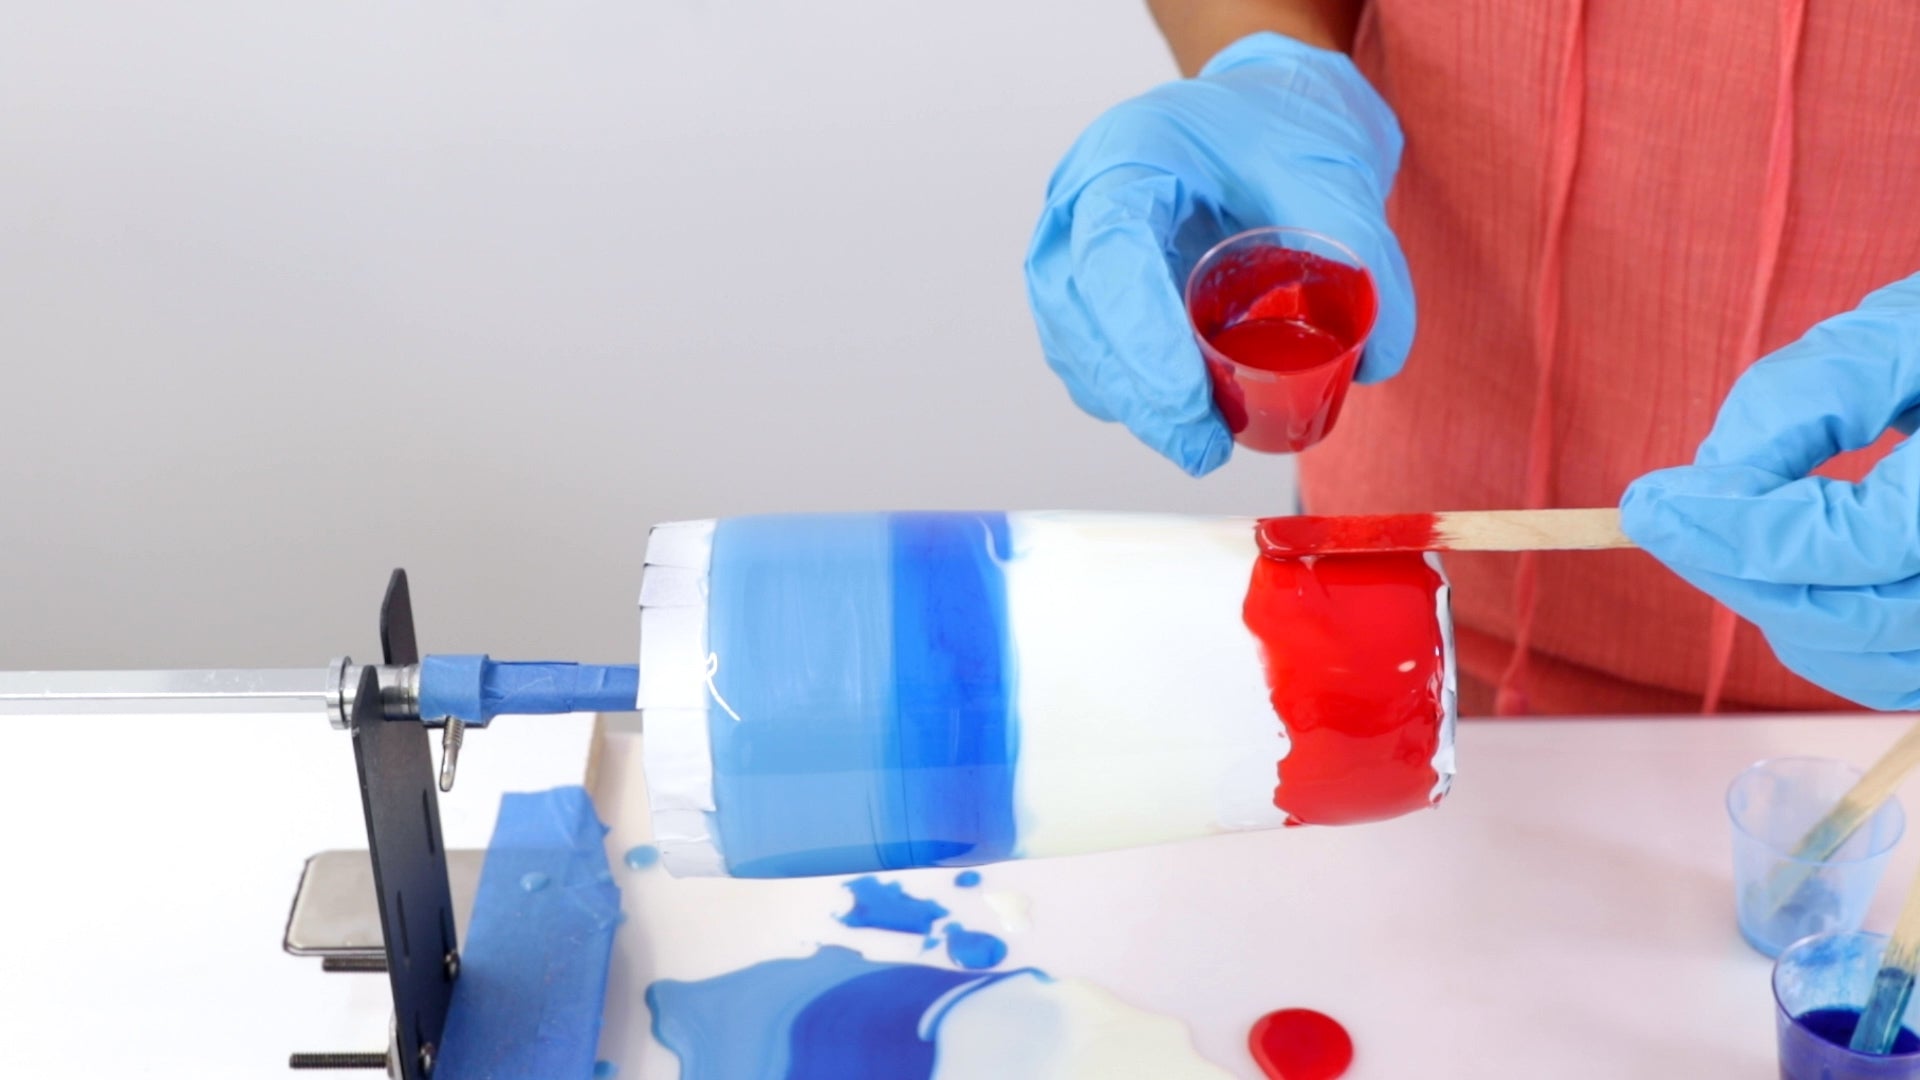
Ensure your work surface is lined with a plastic drib canvass to catch the drips. Place your loving cup turner on your work surface. Tape off the plastic lip of the tumbler ( and base if necessary. ) Spray paint the tumbler if desired. Insert the pointed end of the spit rod into the foam football, then insert into the tumbler, pushing the football and rod down to the lesser of the loving cup. Insert i end into the motor and the other terminate into the bracket. Check with a level to ensure the cup is sitting perfectly horizontal.
💡TIP: It'due south a good idea to add some painter's tape to the spit rod to protect it from resin drips. 

2. Fix Your Resin:
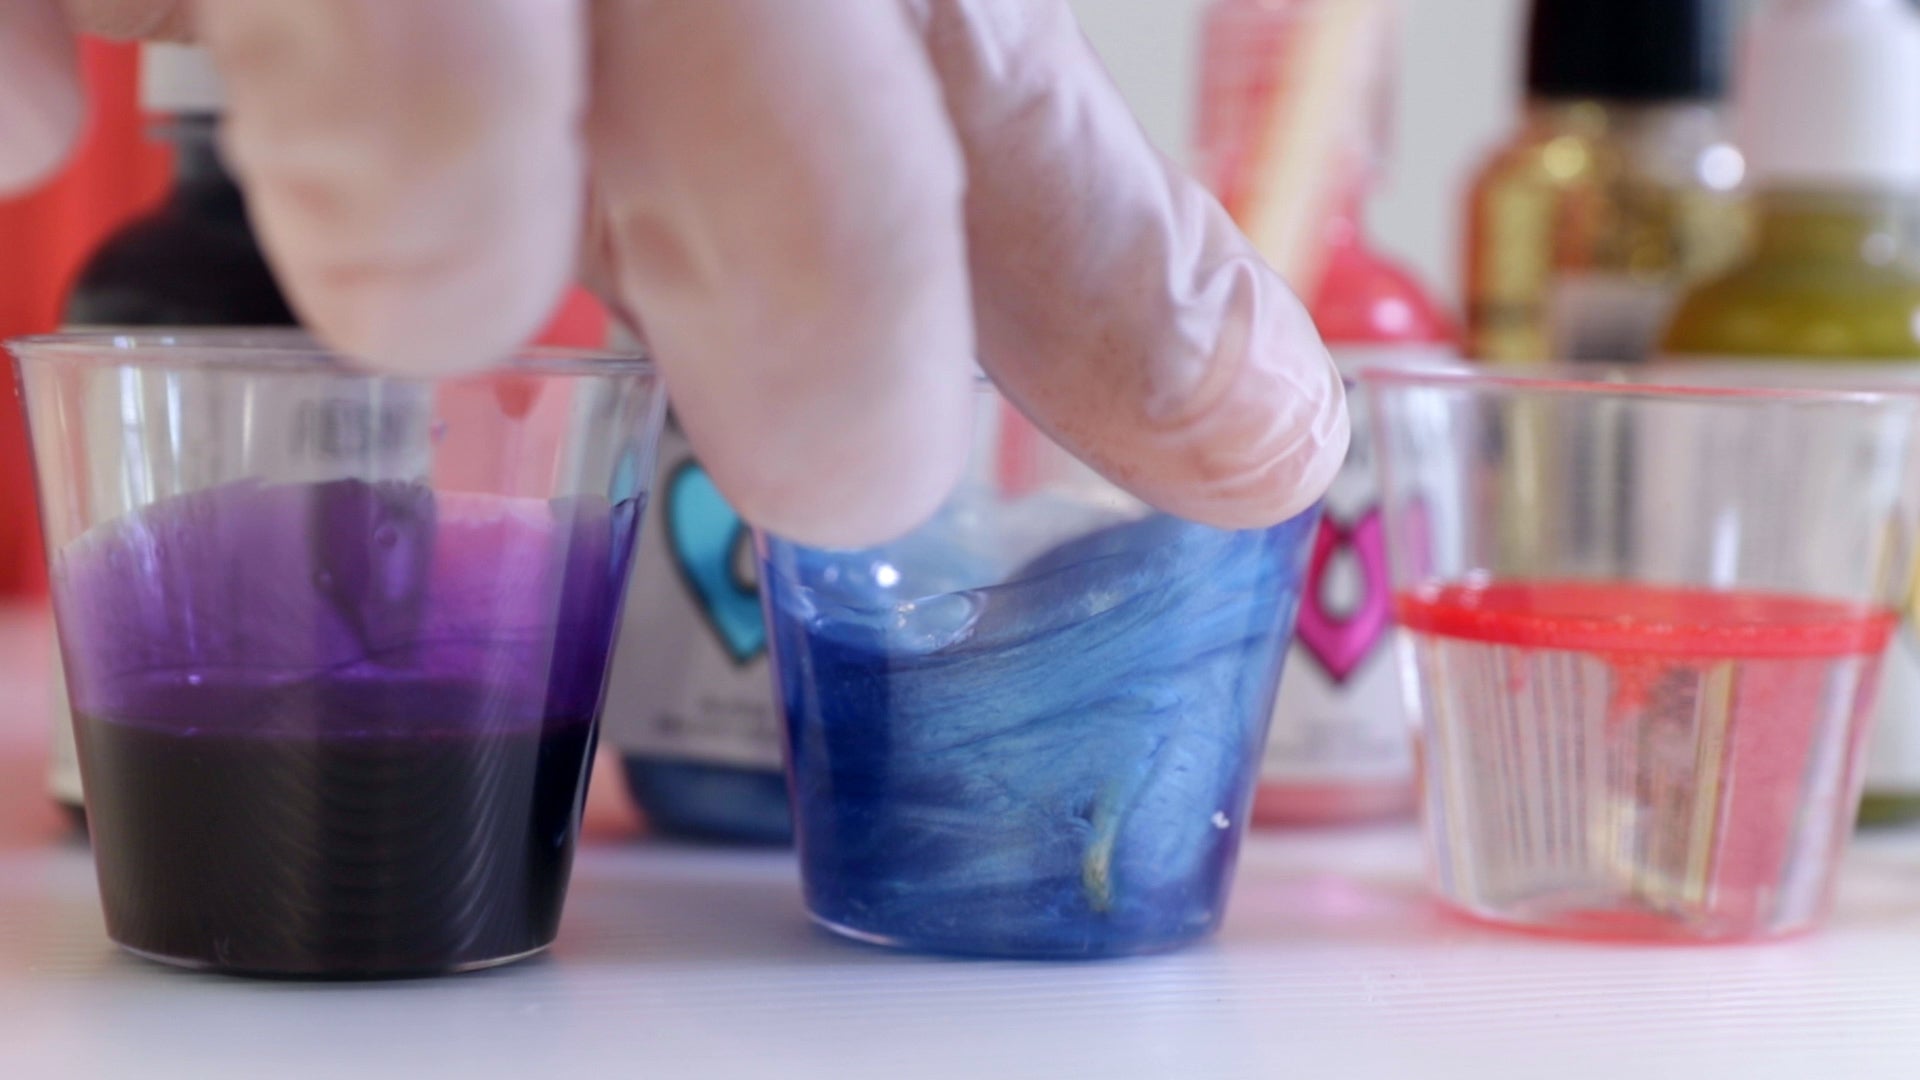
Wearing gloves, prepare your ArtResin according to the label instructions, measuring accurately and mixing thoroughly. Using ane plastic shot drinking glass per colour tint, divide your prepared ArtResin amid your cups. Add the tint and mix thoroughly.
💡TIP: Ever start with less tint than you lot think yous need, adding more as necessary. ResinTint is a richly saturated pigment and then a little goes a long fashion. No matter which colorant you employ, never add together more than 6% of the total combined volume of resin and hardener or your resin may not cure properly.

3. Utilise The Resin On The Tumbler
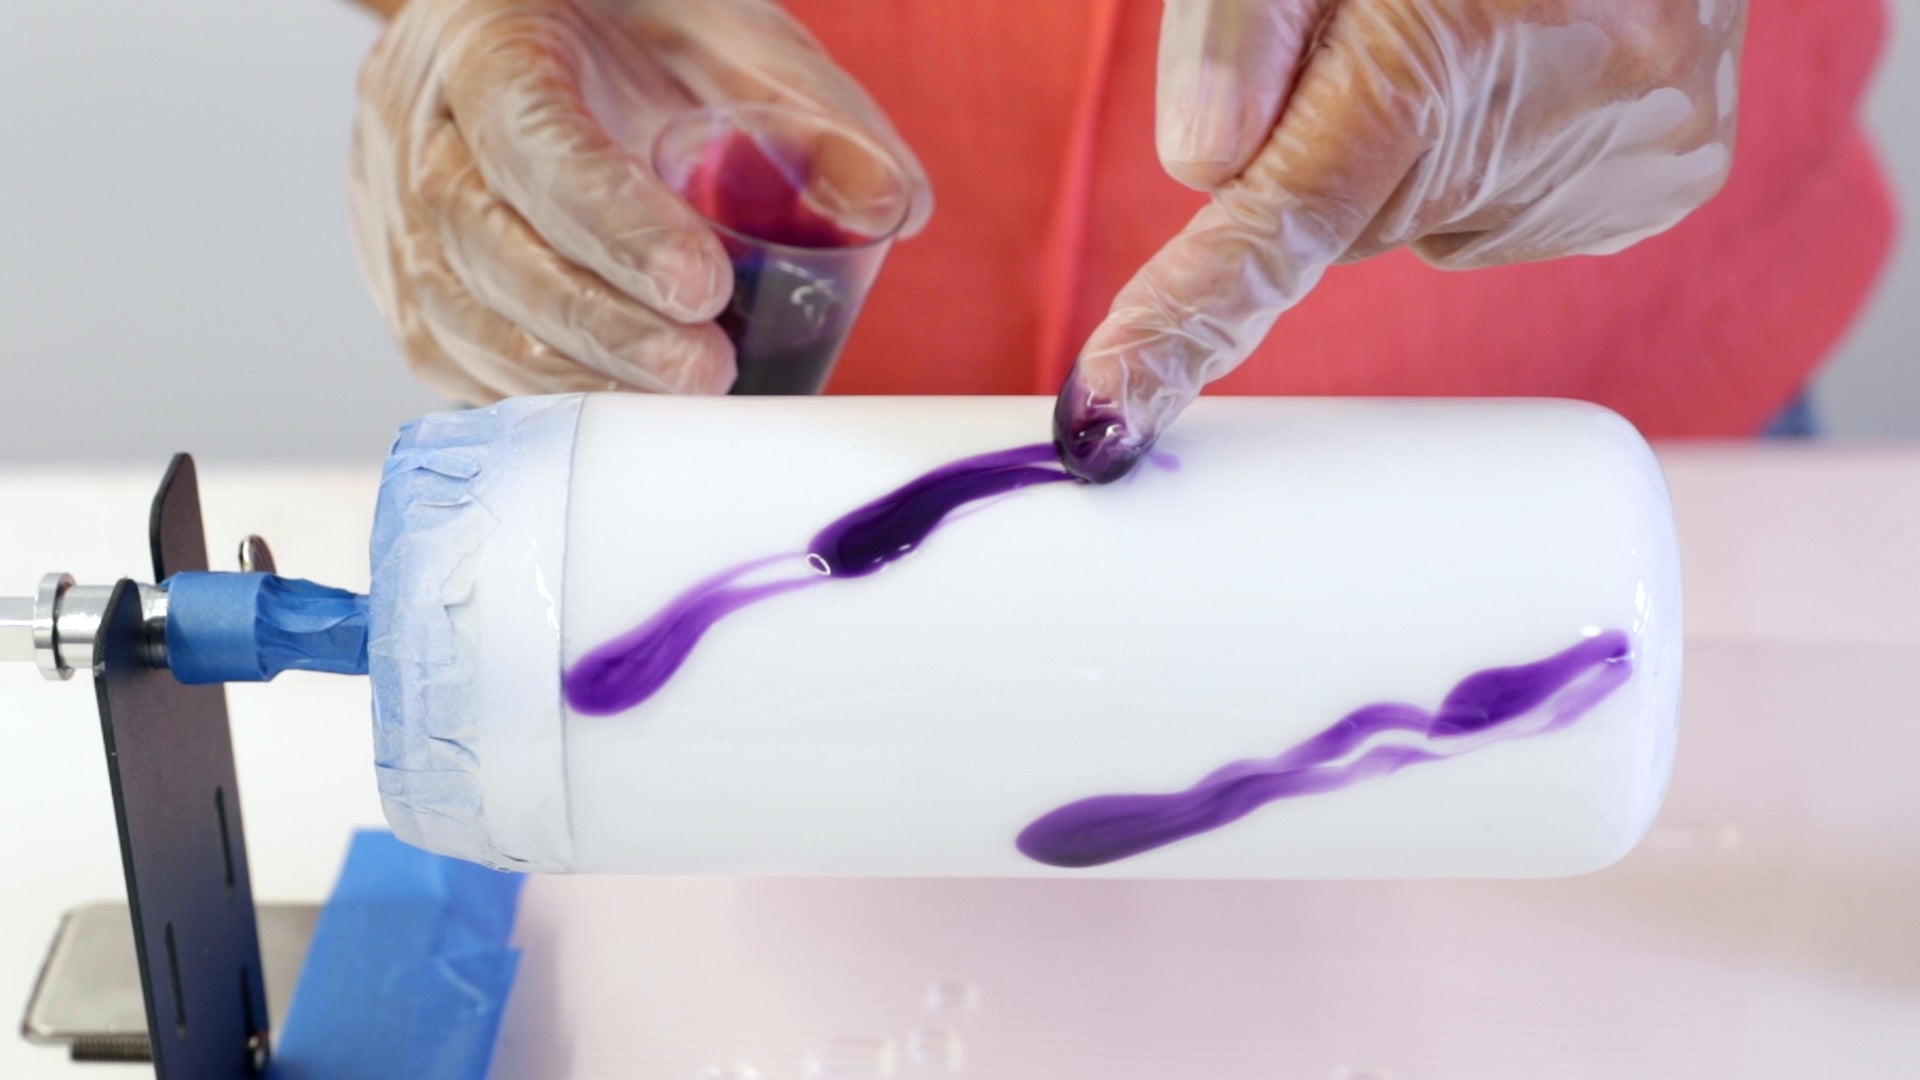
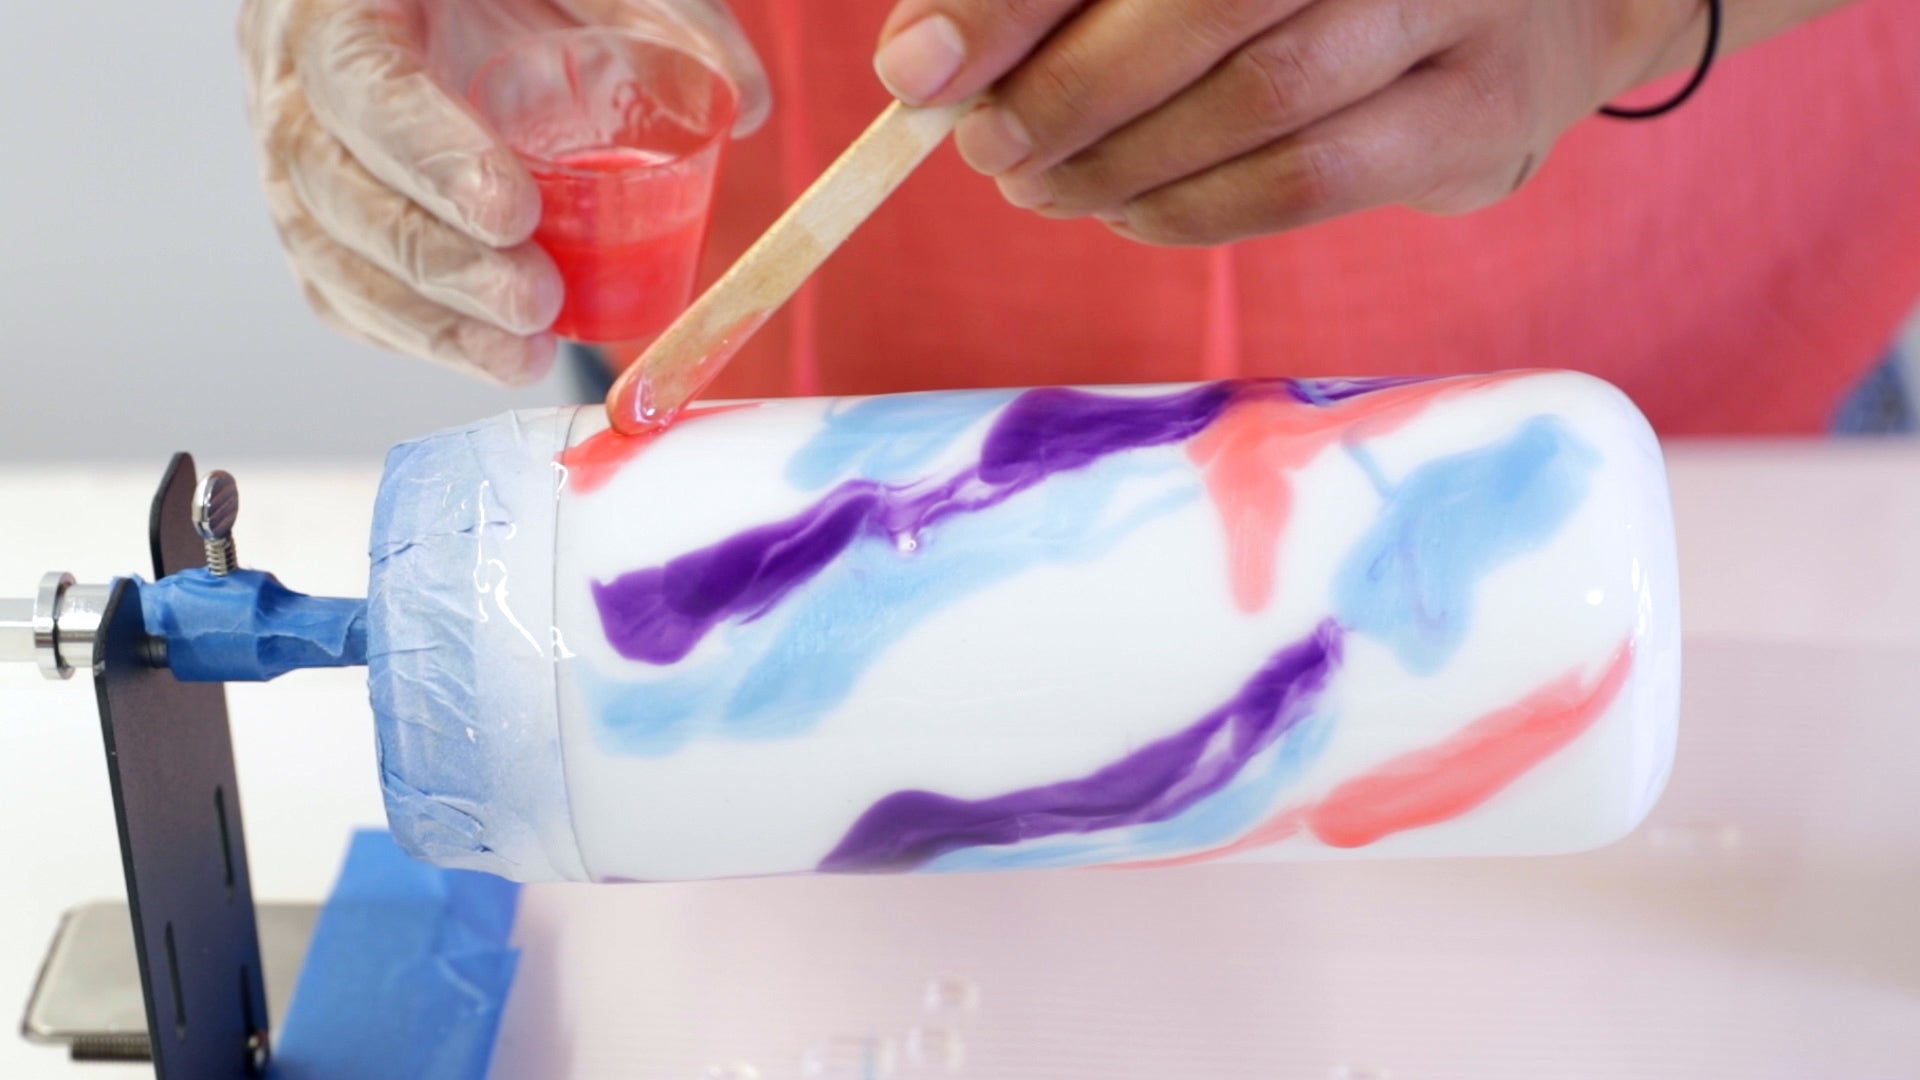
Flip the rotisserie motor on and every bit the loving cup is turning, slowly pour the calorie-free bluish tinted resin over the spinning tumbler. Use the popsicle stick or gloved finger to advisedly spread information technology. Repeat the process with the dark blue, white and red tinted resin. If you wish, you can drizzle a little white over each colour for a marbled effect.

iv. Let The Tumbler Cure:
Leaving the motor running, allow the cup to continue turning until the resin is dry to the bear upon, approximately xviii-24 hours later. Remove the tumbler from the cup turner and remove the record. Allow the loving cup to continue curing - information technology volition be fully cured at the 72 hr mark.
💡TIP: If at that place is any tape residuum left on your tumbler, you lot tin use a fiddling vegetable oil or a production like Goo Gone to remove it. If in that location is any ArtResin that seeped nether the tape, you can remove it with a piddling acetone or rubbing alcohol. If the resin has already cured, use a bract or some sandpaper to scrape information technology off. Wipe any sanding remainder abroad with damp textile. Launder the tumbler thoroughly with soapy water before use.
How to make a Resin Marbled Tumbler:
What You'll Need:
- an insulated stainless steel tumbler, taped off and spray painted white
- ArtResin epoxy resin
- nitrile gloves
- mixing container
- stir stick
- ResinTint liquid colorant in the colours of your option ( we used white, purple, pearl blueish, pink and aureate )
- white glitter to add together to the white resin
- gilded glitter to add to the gilt resin
- 5 10 plastic shot spectacles ( one for each color )
- 5 10 popsicle sticks ( one for each color )
- an empty plastic tote or cardboard box to protect your piece while it dries

1. Set Your Materials:
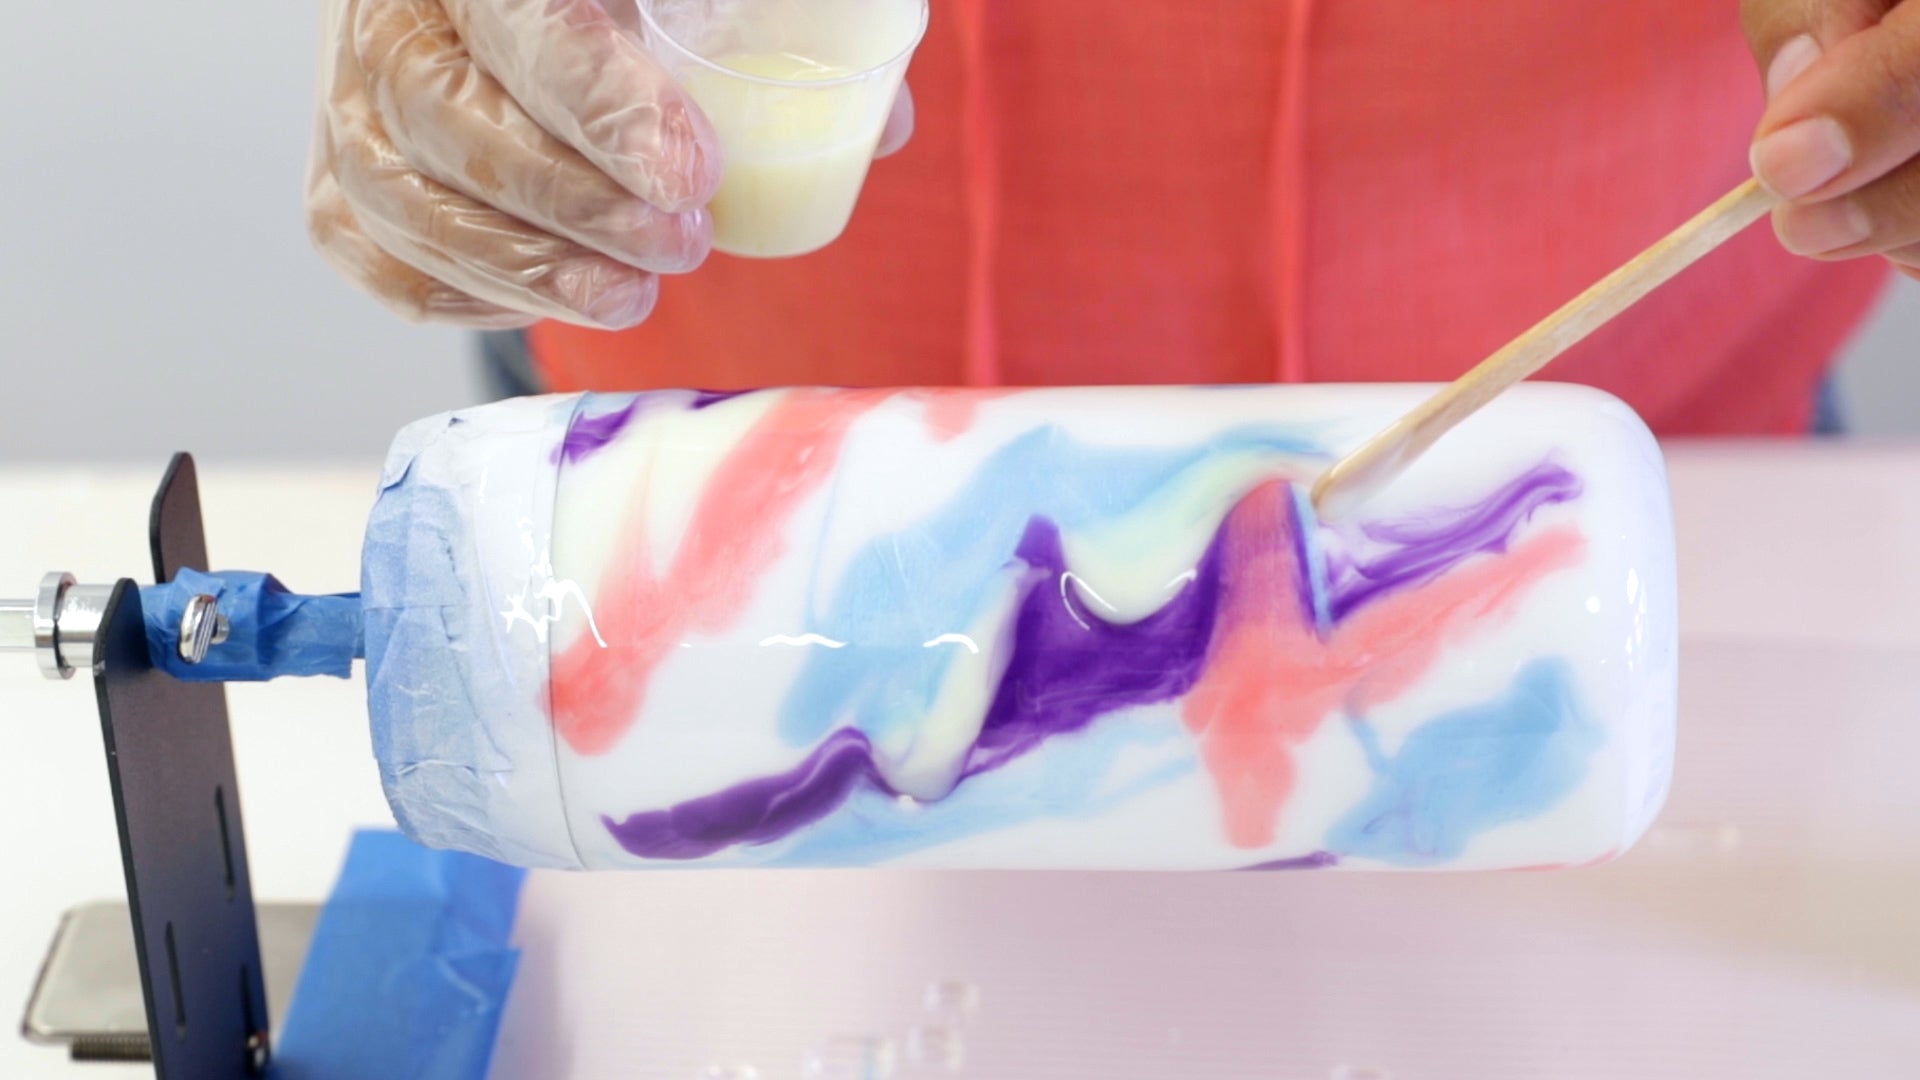
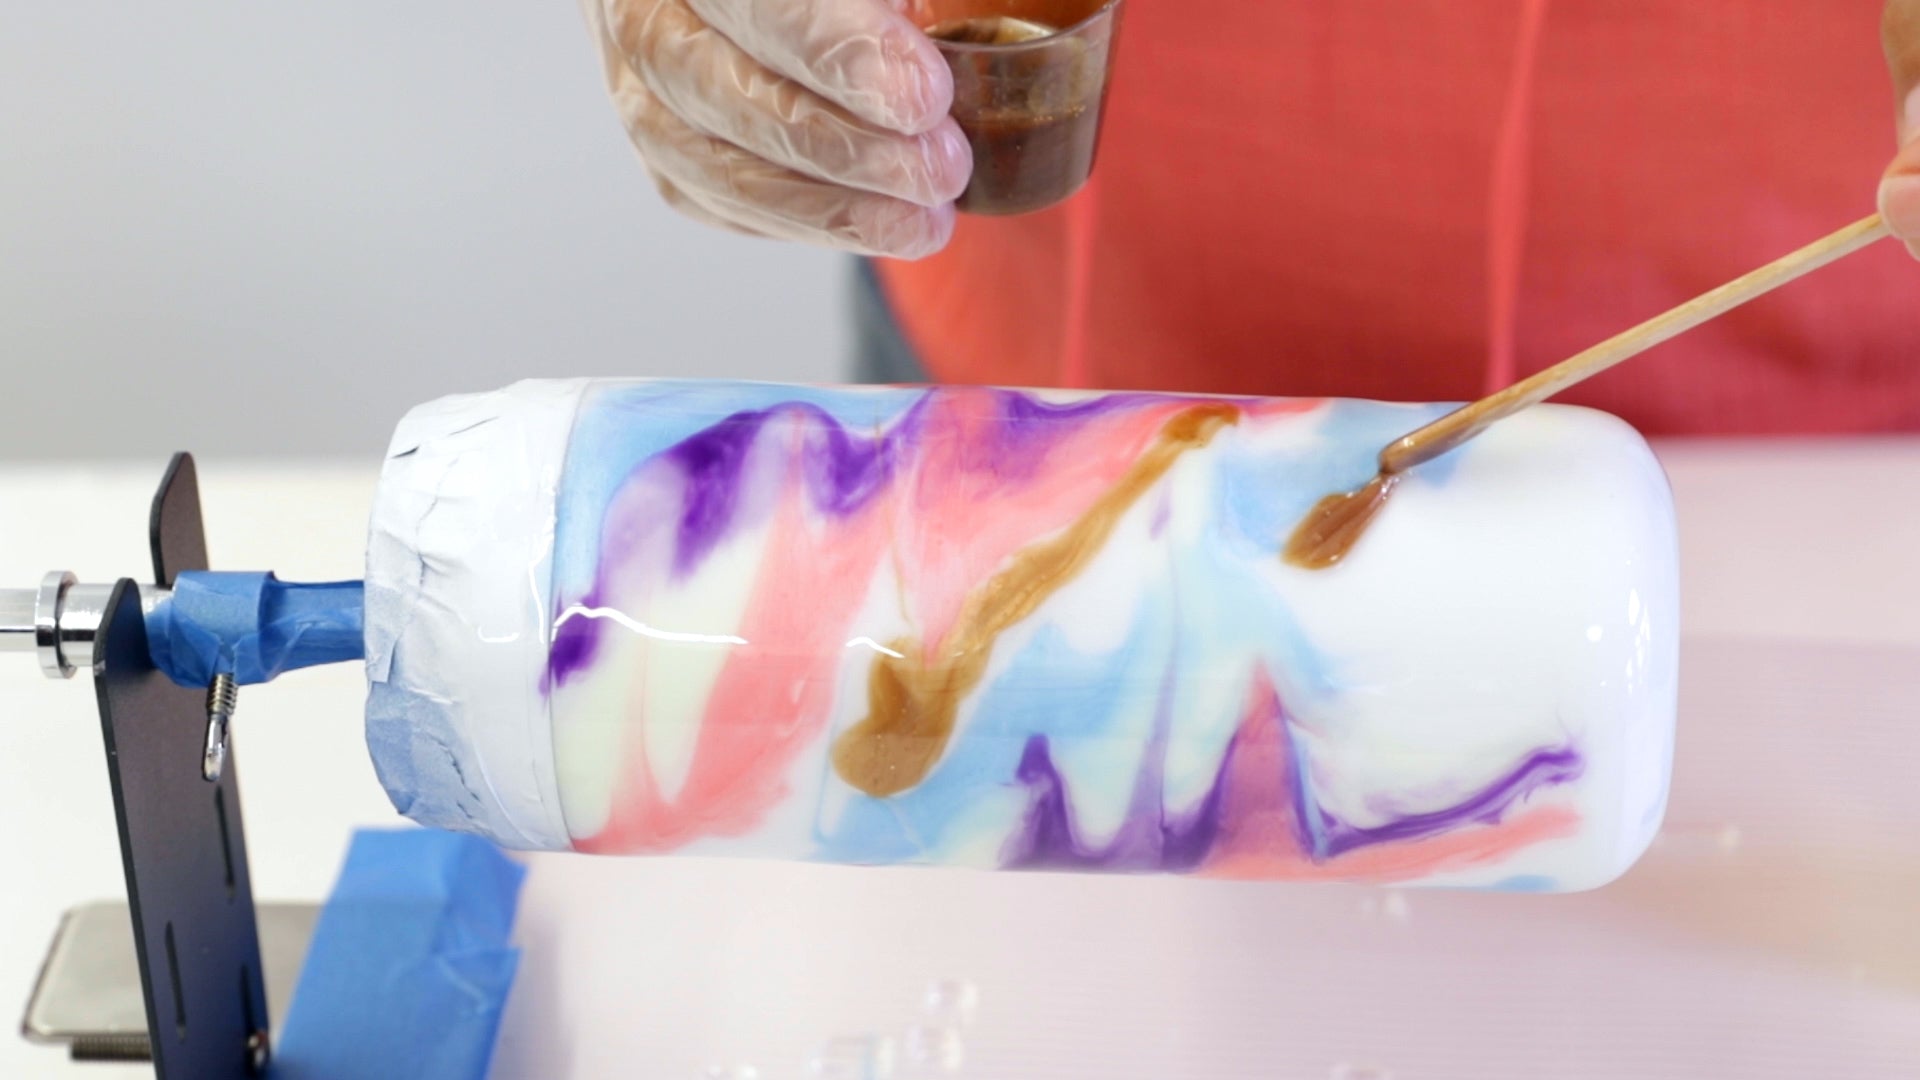
Prepare the piece of work surface and loving cup turner as above. Wearing gloves, carefully measure and mix your ArtResin according the instructions. Carve up among the 5 plastic shot glasses, one per colour, reserving some clear resin in your mixing cup. Add your tint to each cup, as above, mixing thoroughly. If desired, add together glitter to your resin for a sparkle result!

two. Apply Your Resin on your tumbler
Turn the rotisserie motor on and, with the tumbler spinning, use a clear coat of ArtResin, spreading it evenly over the entire surface with your gloved easily. This first coat of clear resin will aid the tinted resin to alloy, creating a marble effect as the tumbler turns. Starting with your darkest colour first, apply each colour, 1 by one, in a diagonal fashion.
💡TIP: Always start by applying less resin to see how the colours alloy. You tin always add more if yous wish.

4. Let The Tumbler Cure:
Leaving the motor running, allow the cup to proceed turning until the resin is dry out to the touch, approximately 18-24 hours later. Remove the tumbler from the cup turner and remove the tape. Allow the cup to continue curing - it will be fully cured at the 72 hour mark.
How to make a Resin Glitter Tumbler:
What You lot'll Need:
- an insulated stainless steel tumbler, spray painted purple
- ArtResin epoxy resin
- nitrile gloves
- mixing container
- stir stick
- acrylic glitter paint and a paintbrush OR spray adhesive and loose glitter
- an empty plastic tote or cardboard box to protect your piece while it dries
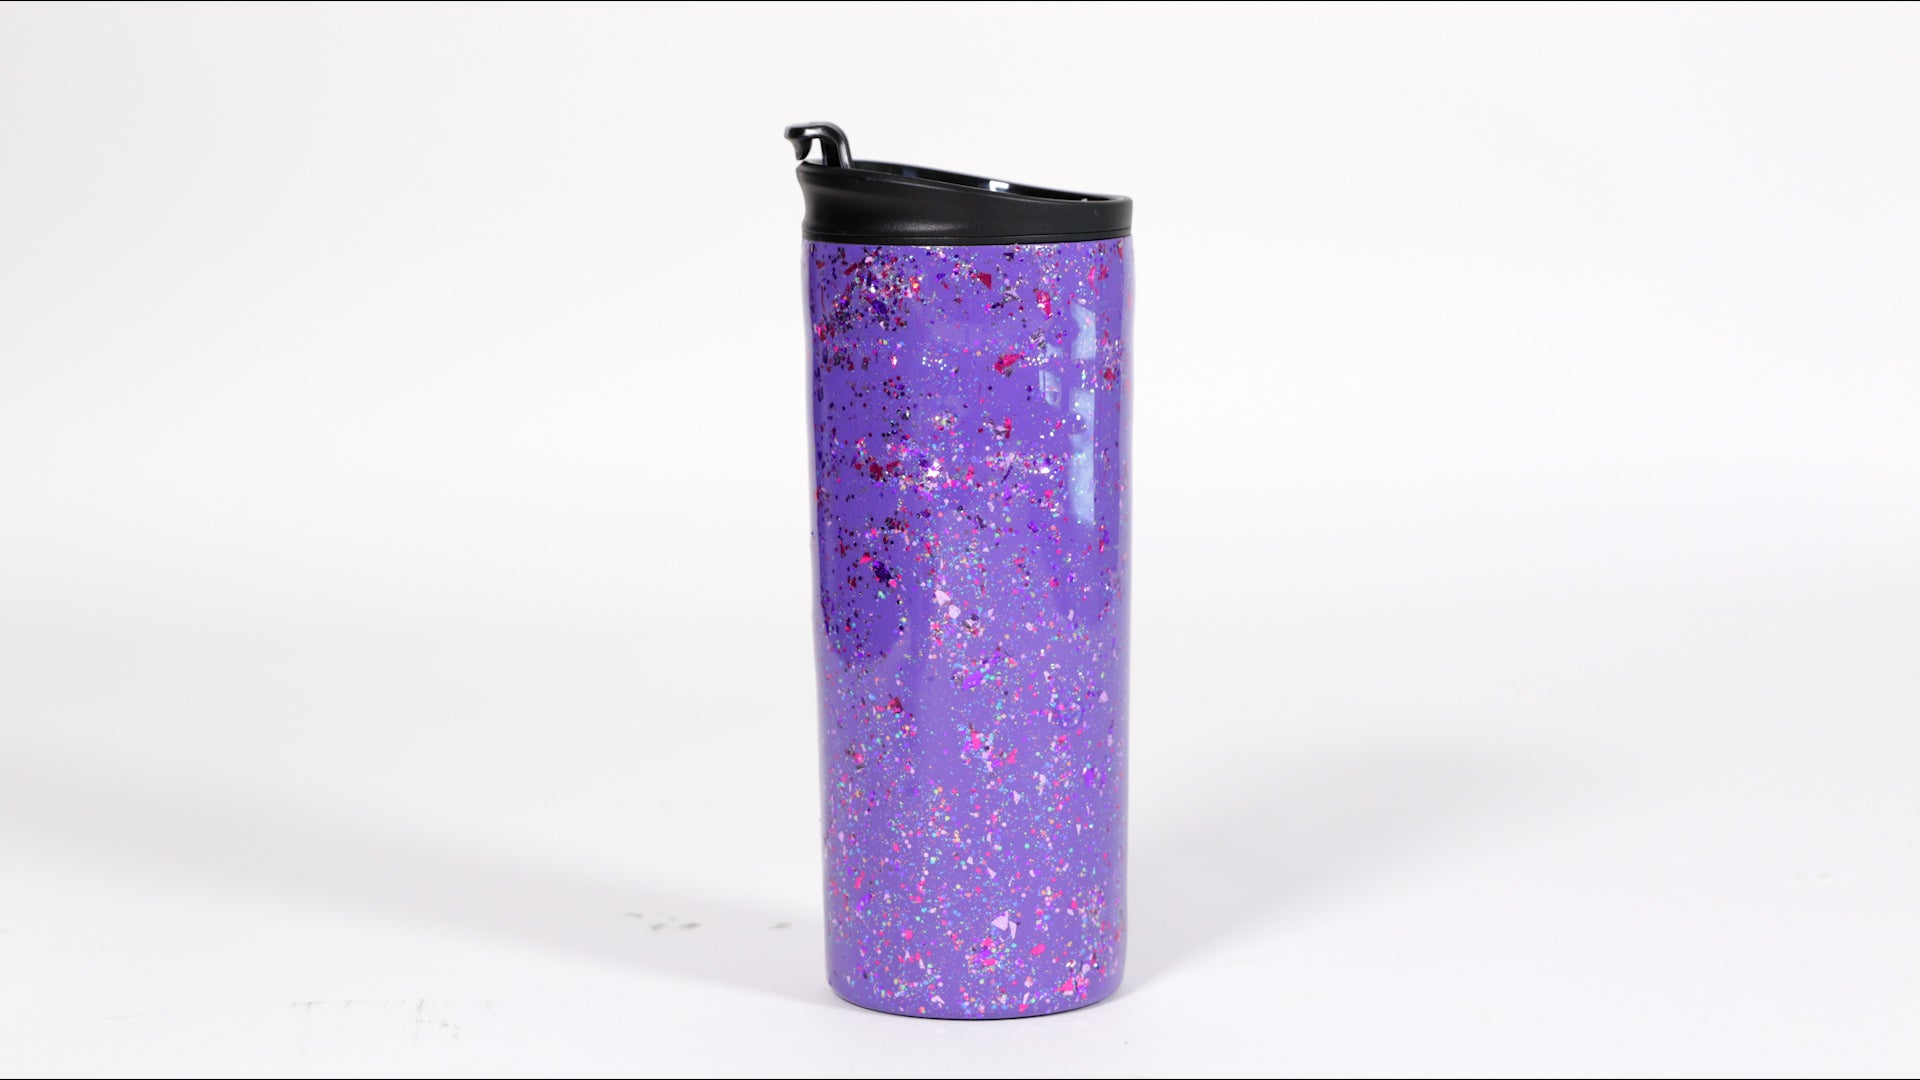
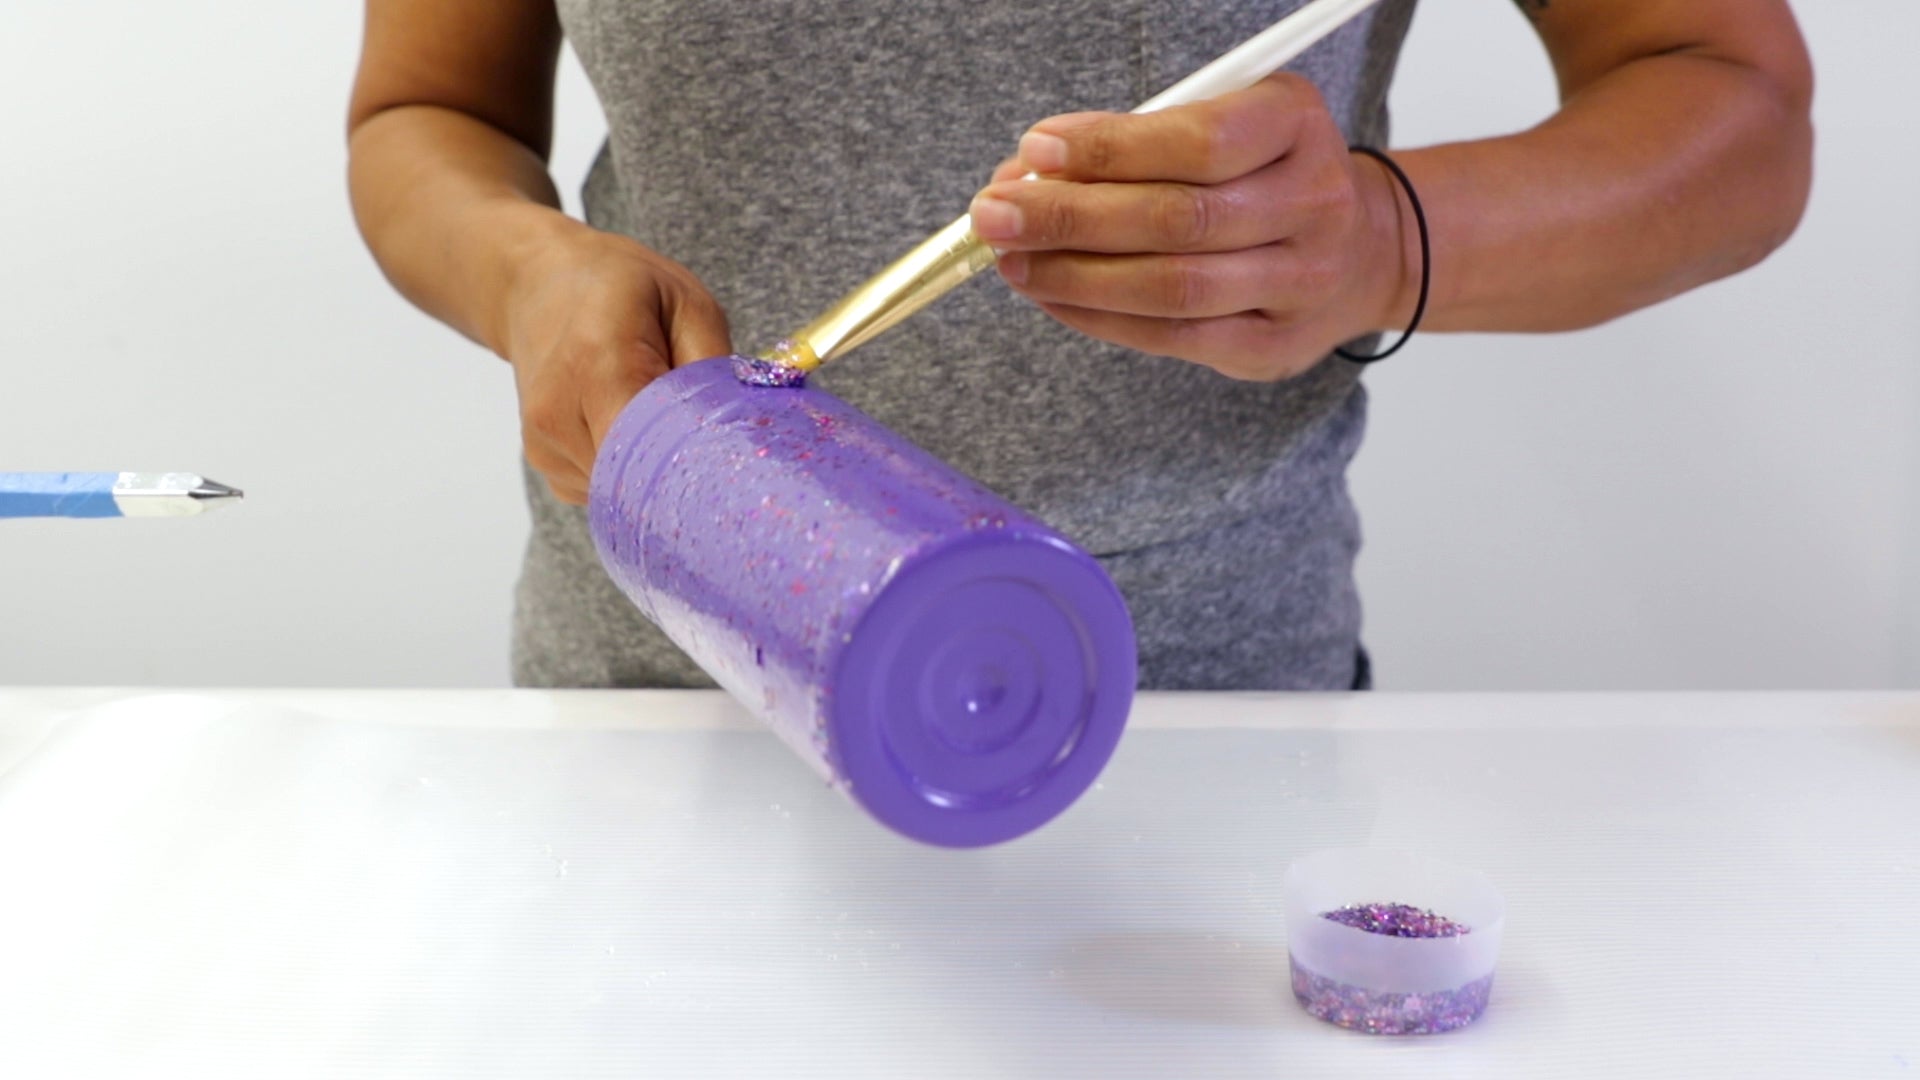
1. Apply The Glitter on the tumbler loving cup
If using acrylic glitter paint, apply the paint with a brush to the unabridged surface of the tumbler and allow to dry. If using loose glitter, spray the entire surface of the tumbler with spray adhesive and, working over a canvas of paper to collect the spillage, generously sprinkle the glitter over the entire surface of the tumbler. Allow the tumbler to dry throughly.
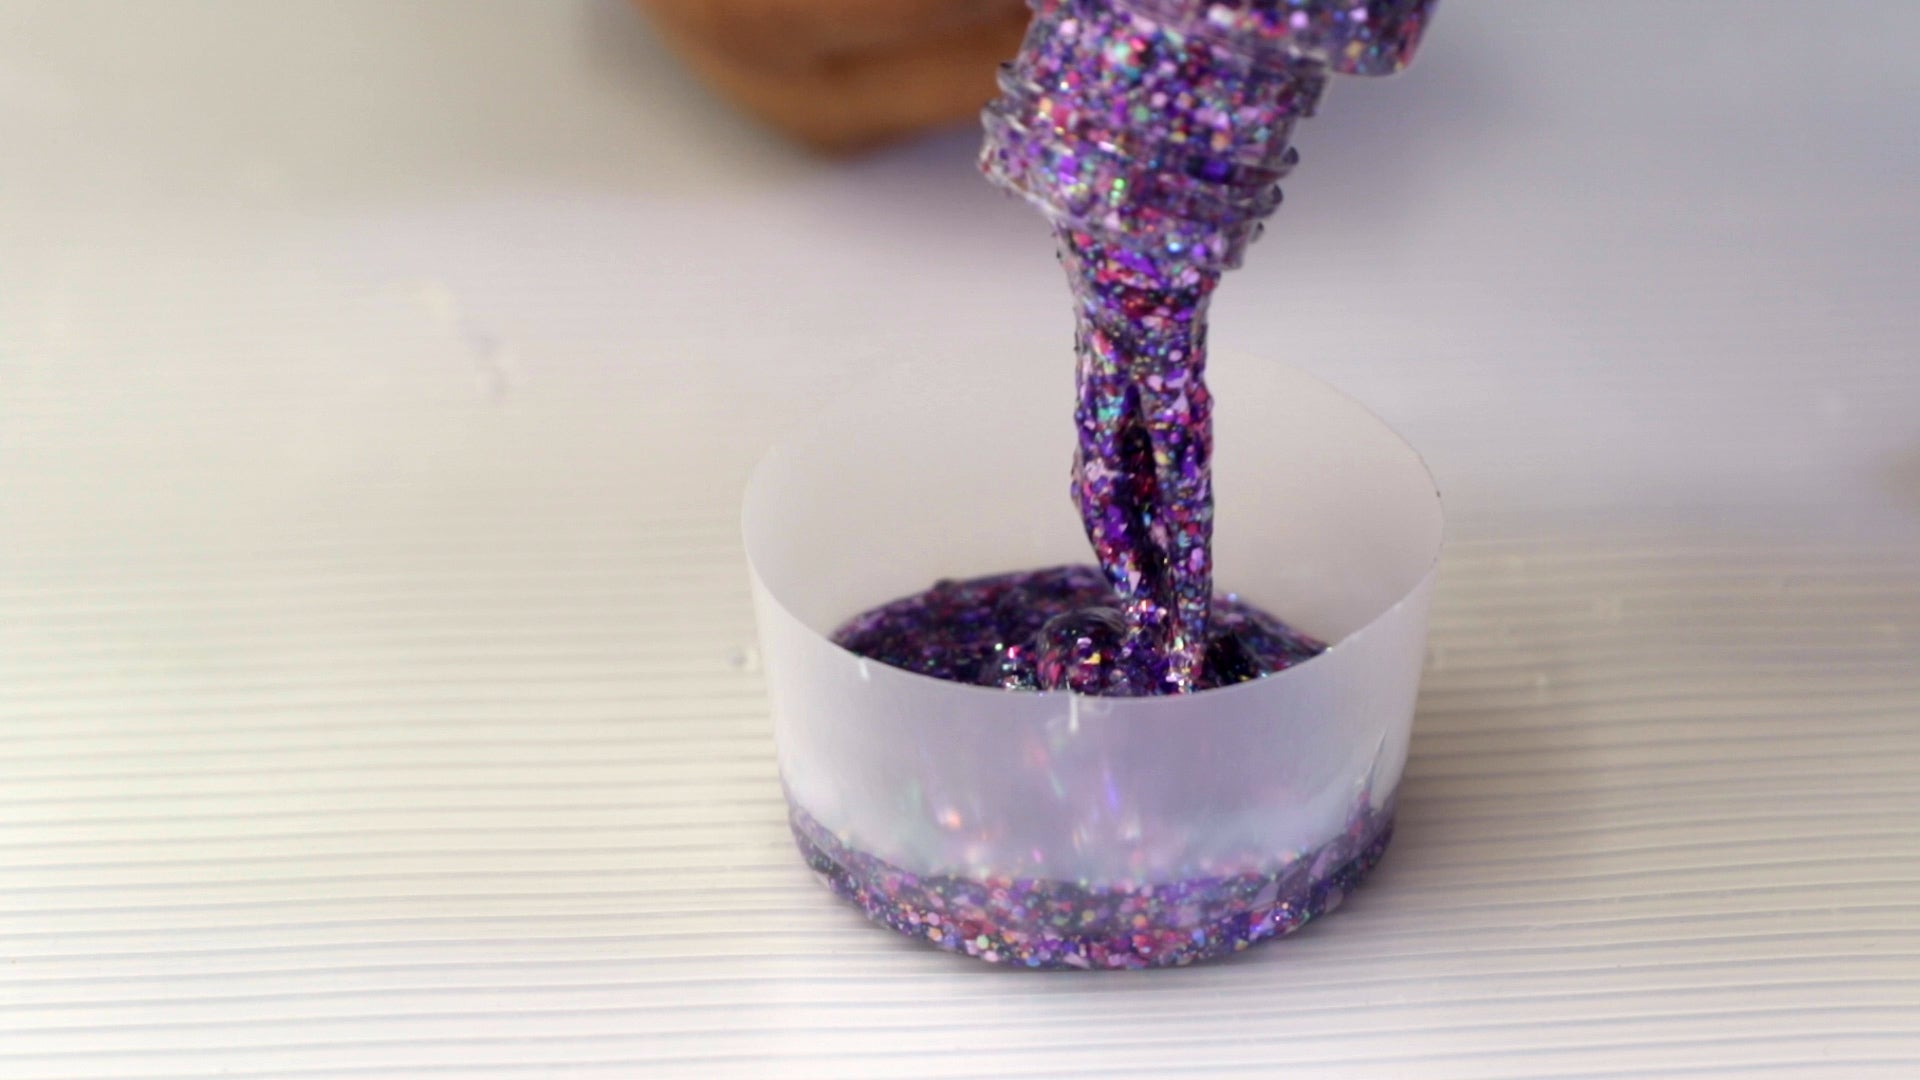
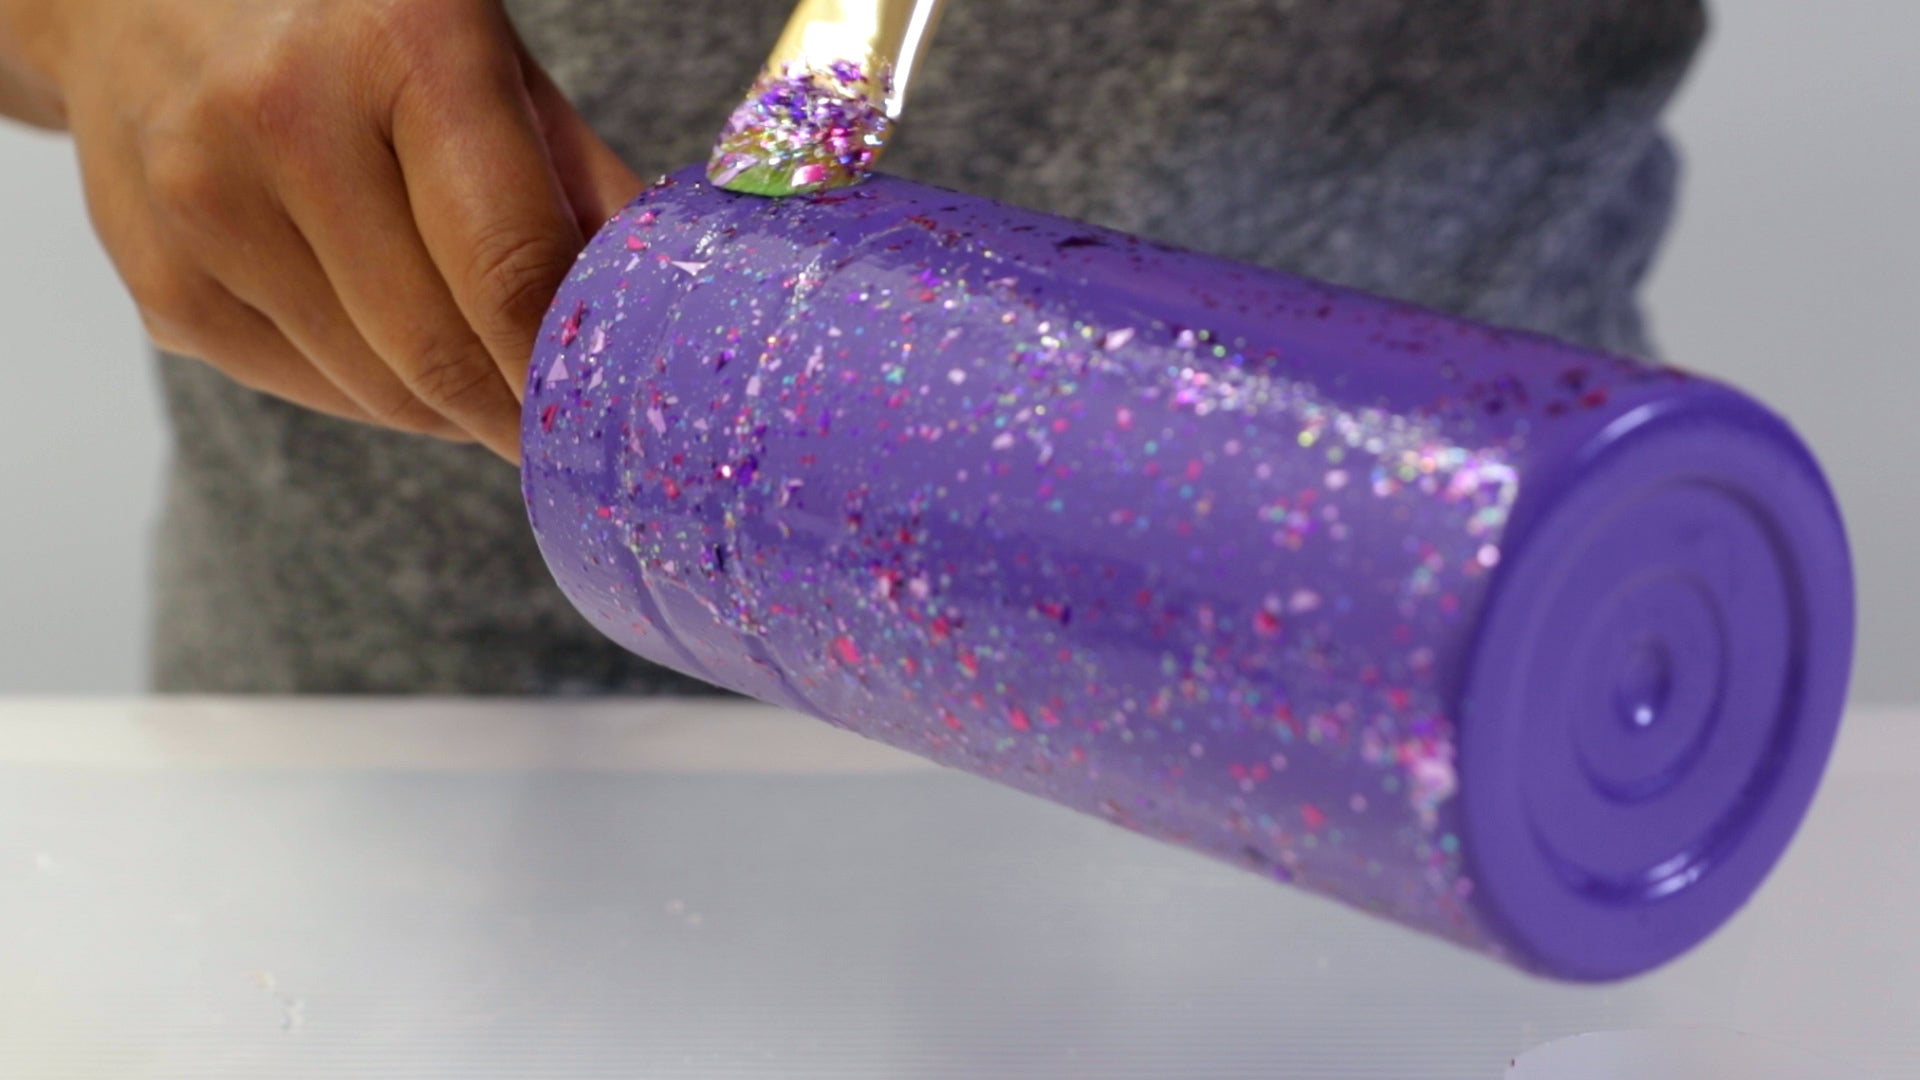
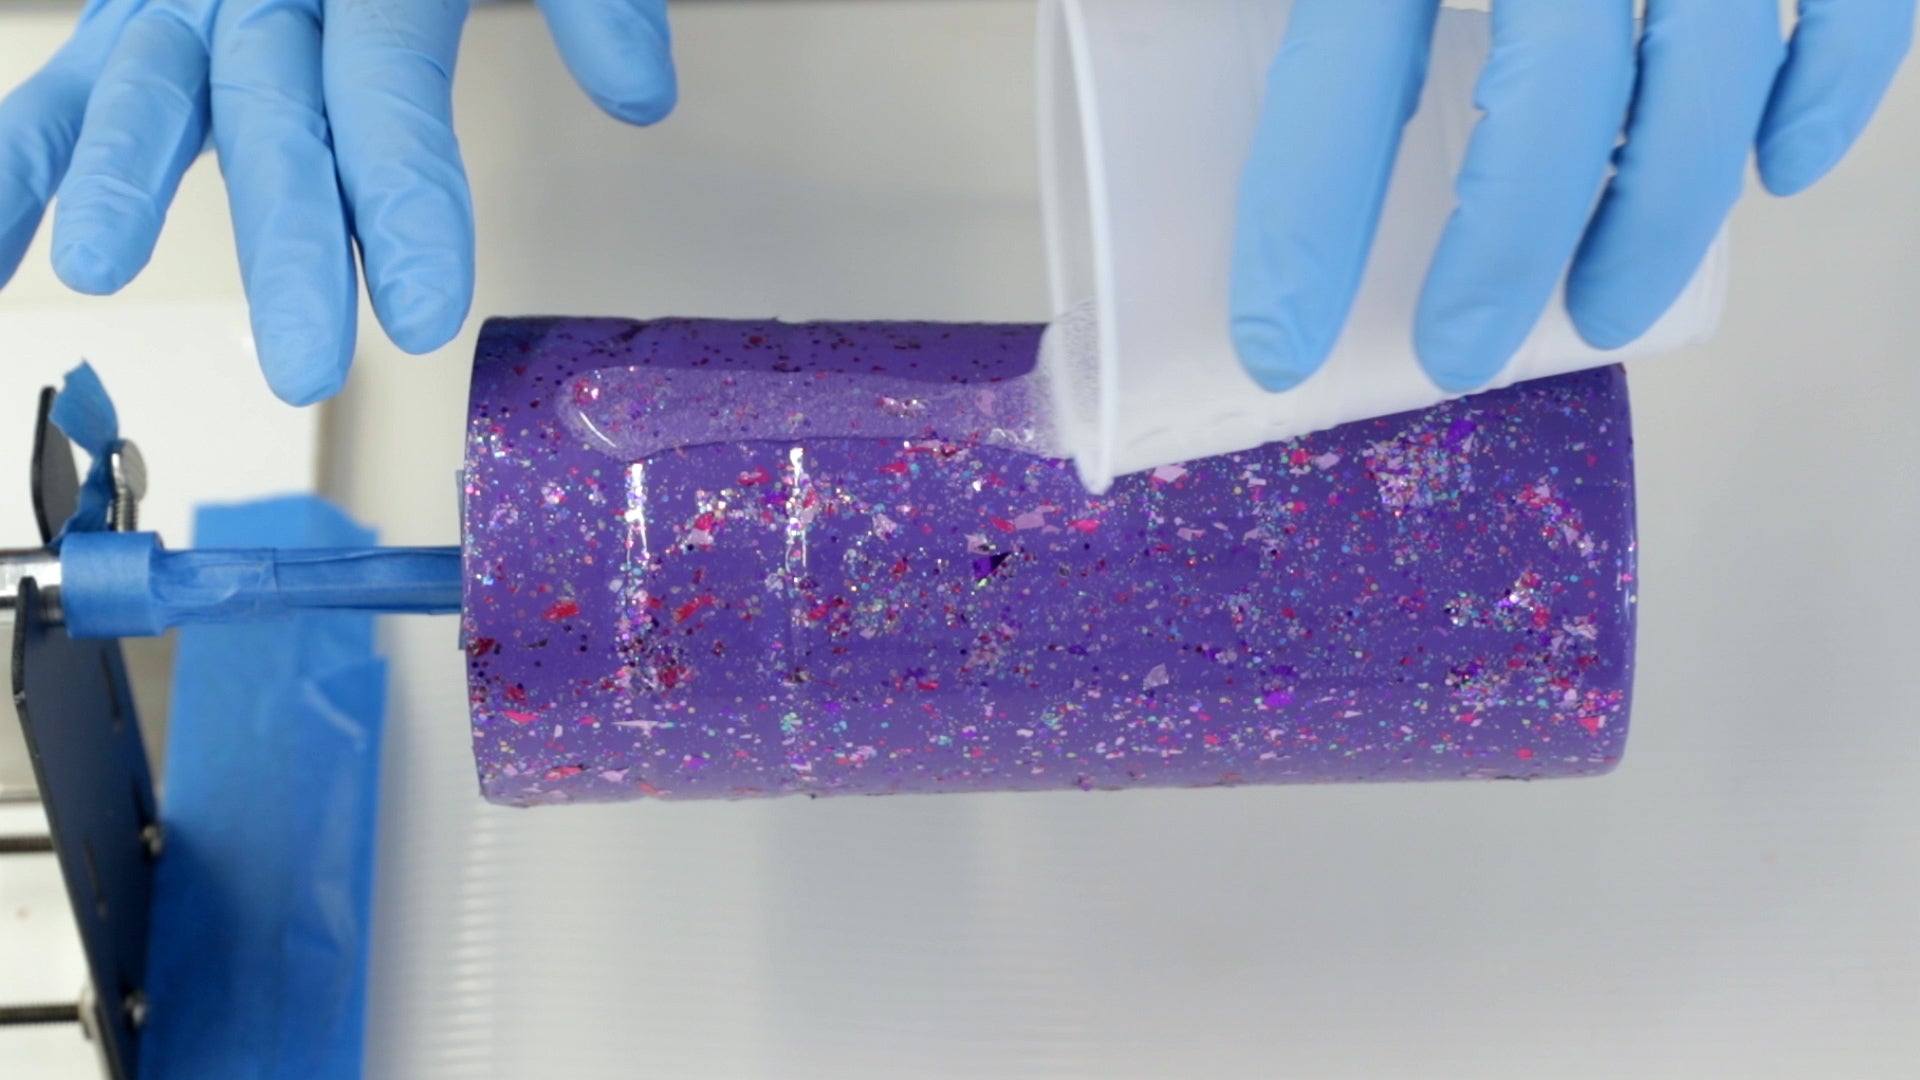
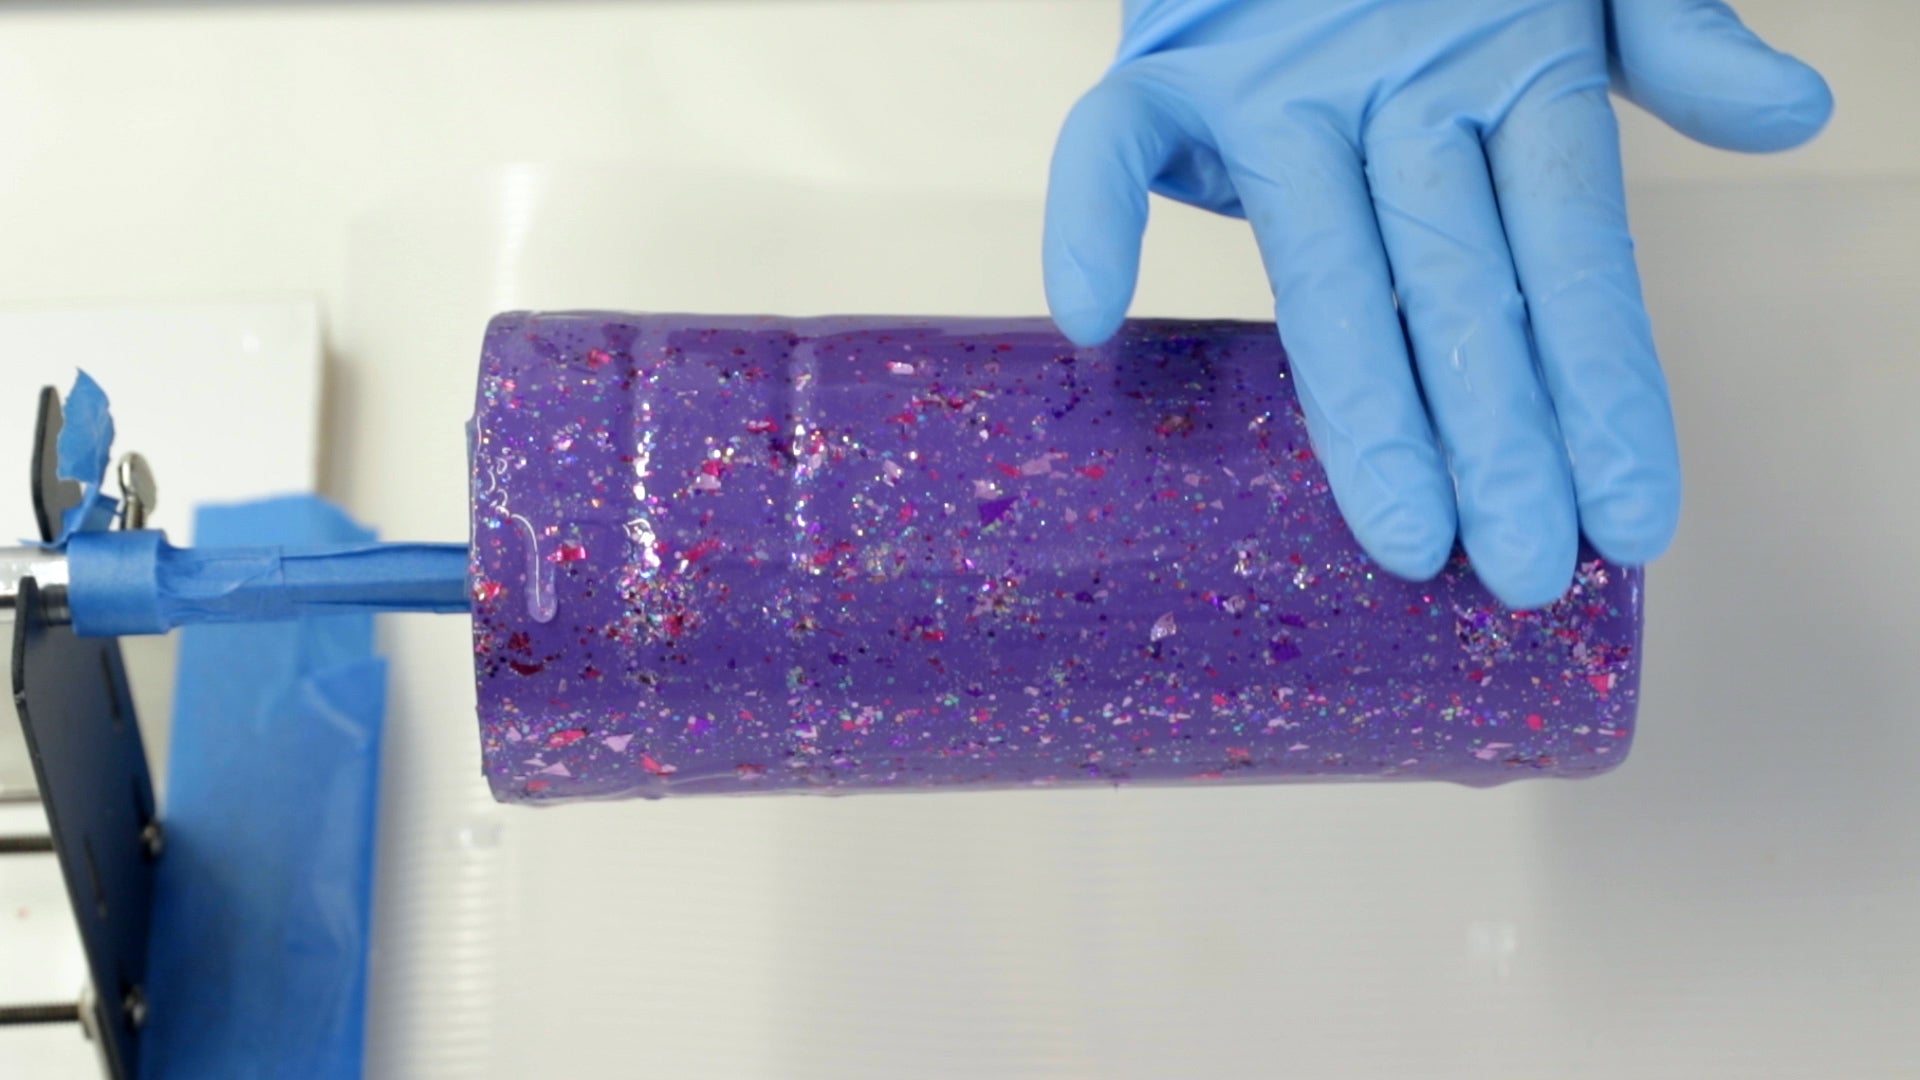
ii. Apply A Coat Of Resin:
Once the glitter coat is thoroughly dry, mount the tumbler onto the loving cup turner. Wearing gloves, carefully measure and mix a minor amount of ArtResin. Plow the rotisserie motor on and, with the tumbler turning, slowly pour the ArtResin onto the surface of the tumbler as information technology turns, smoothing information technology out with your gloved hands. One time the unabridged surface has been evenly covered, permit information technology to turn until it is dry to the bear upon, within 18-24 hours. Once dry, remove the tape and allow it to finish curing. At 72 hours, it will have fully cured.

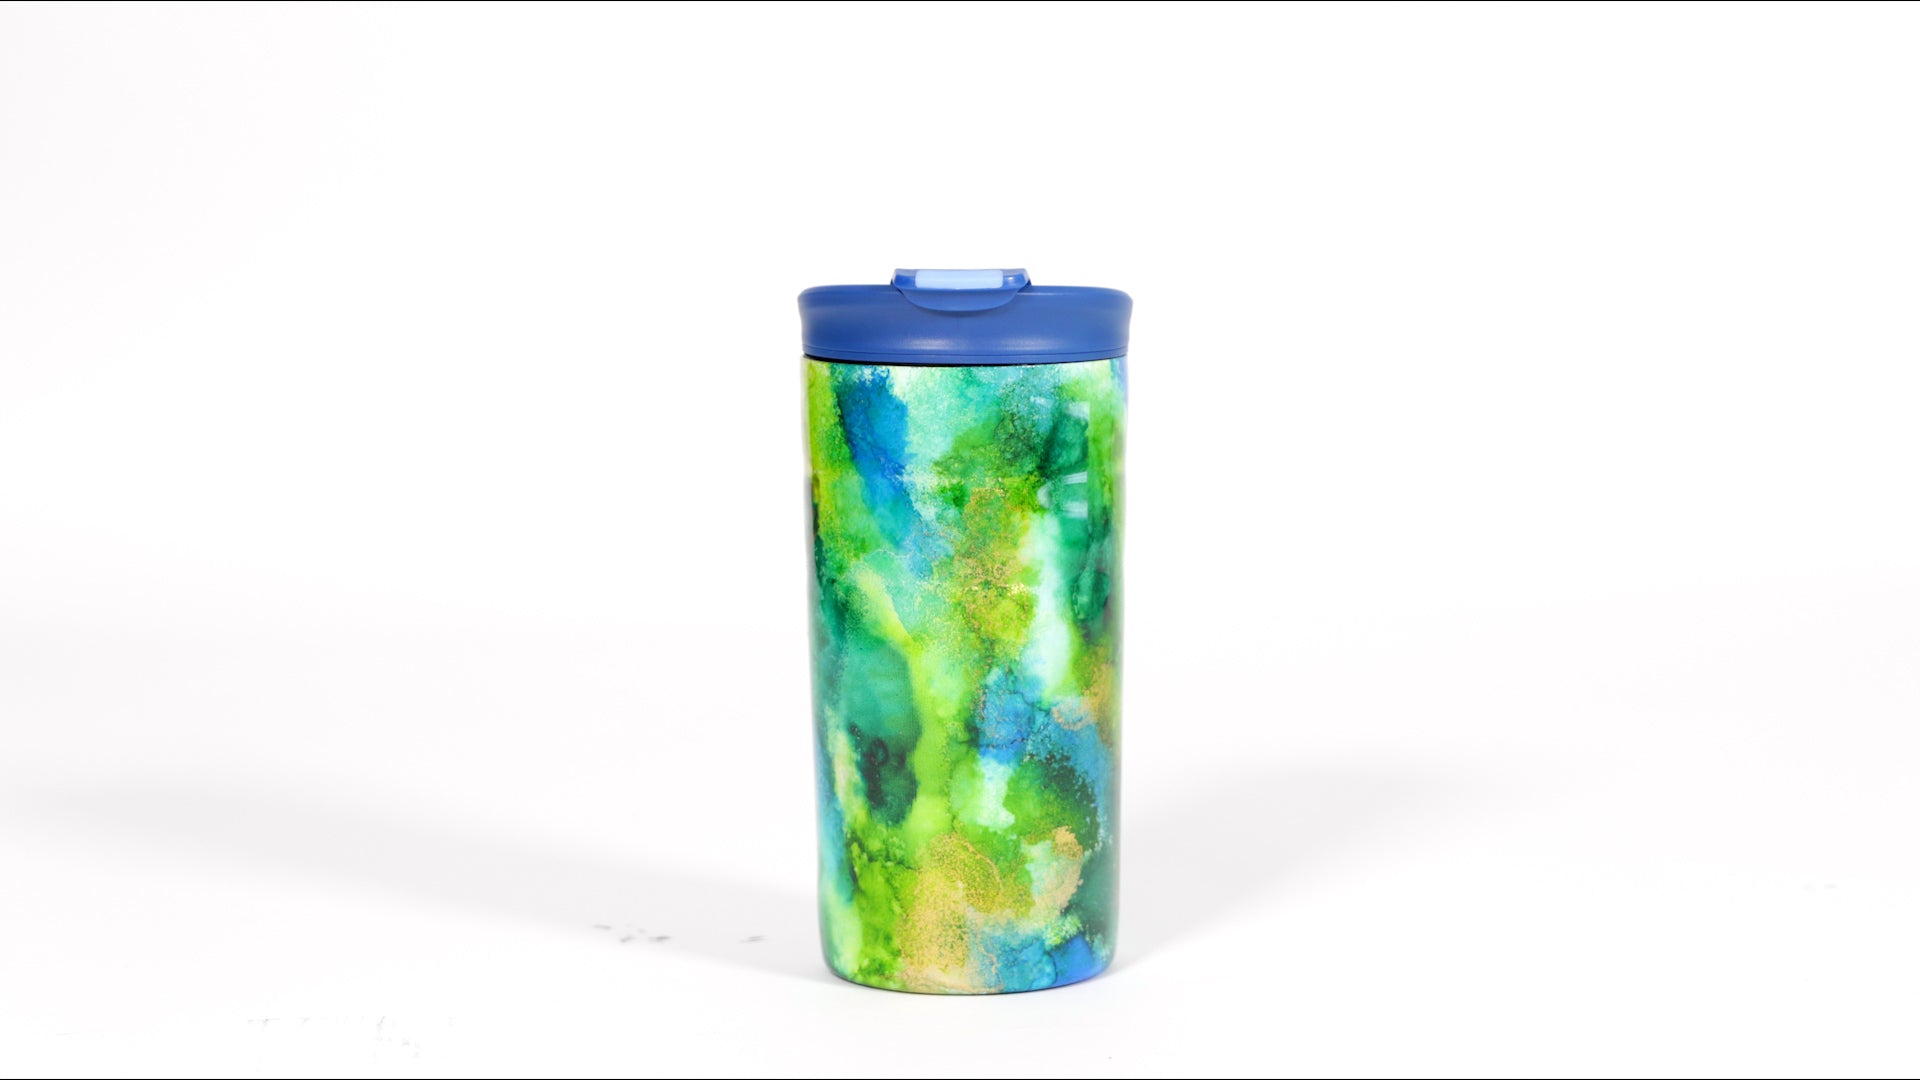
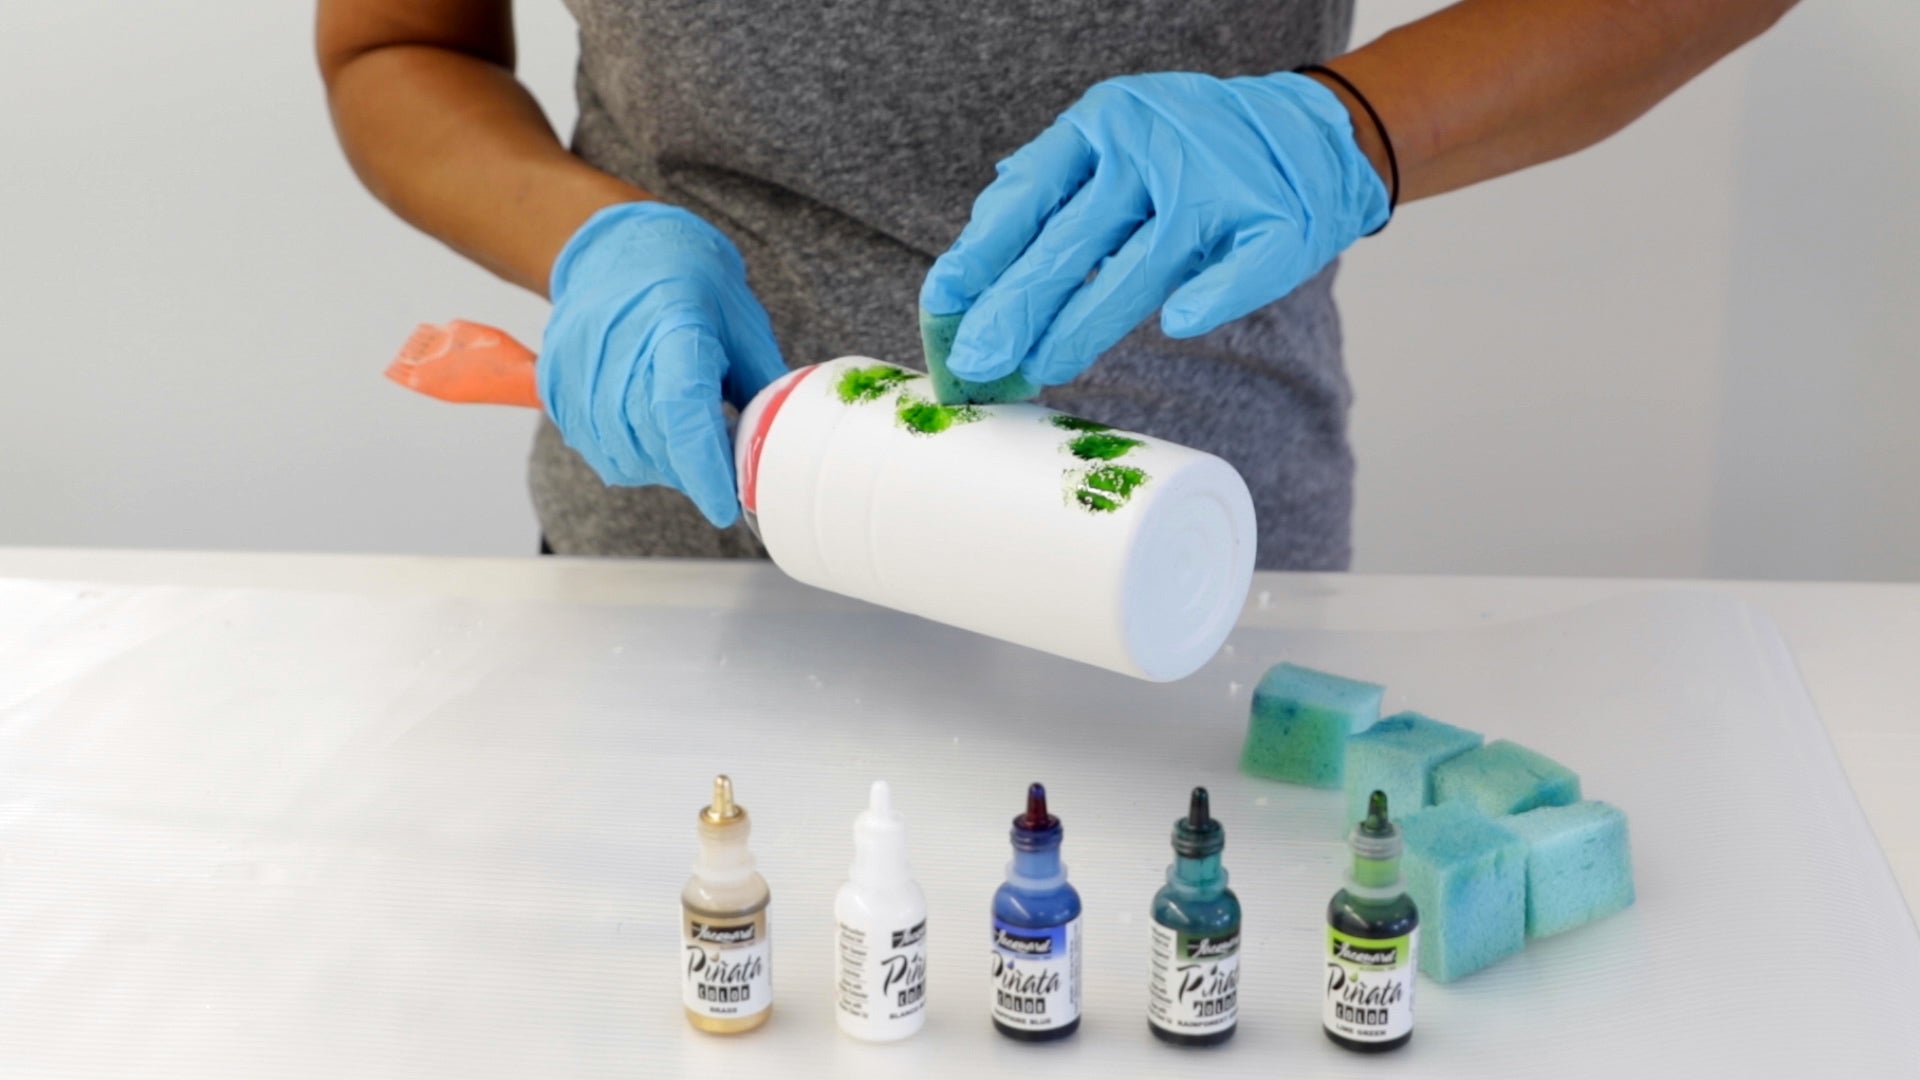
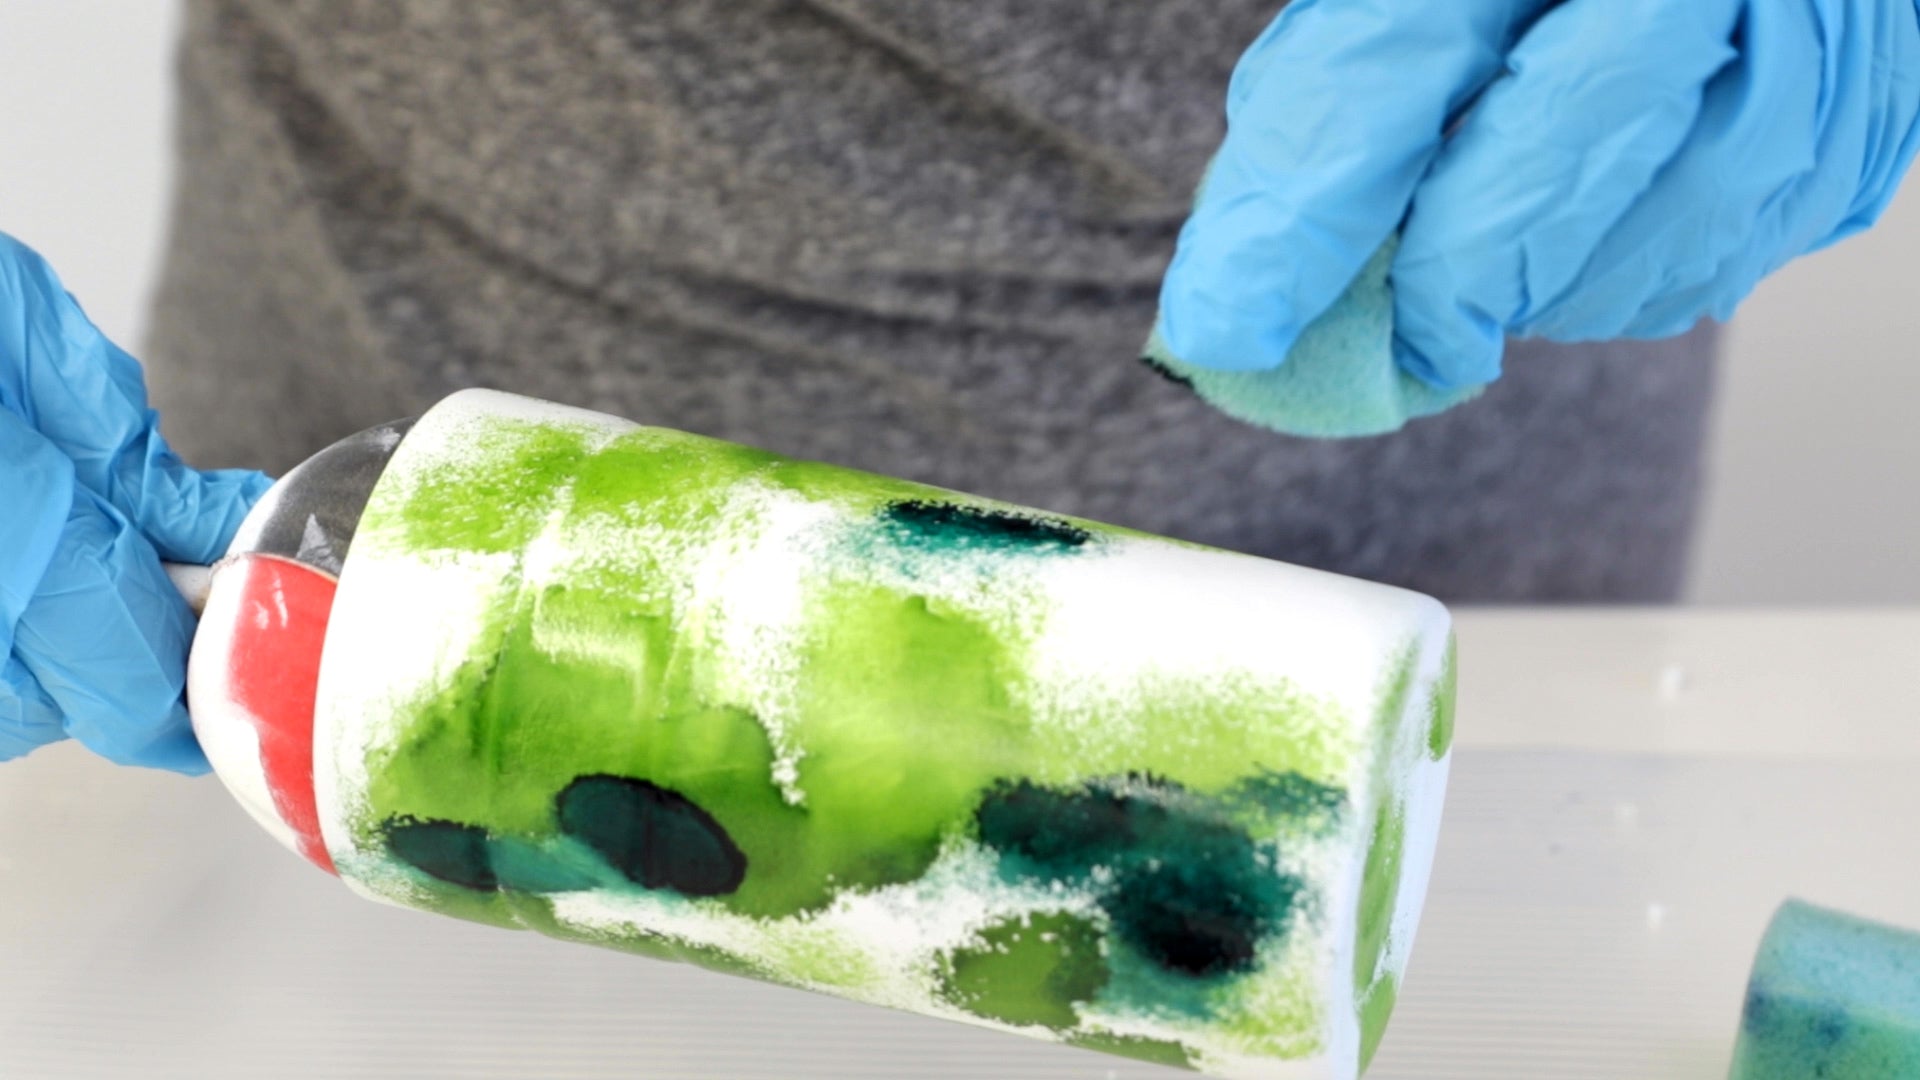
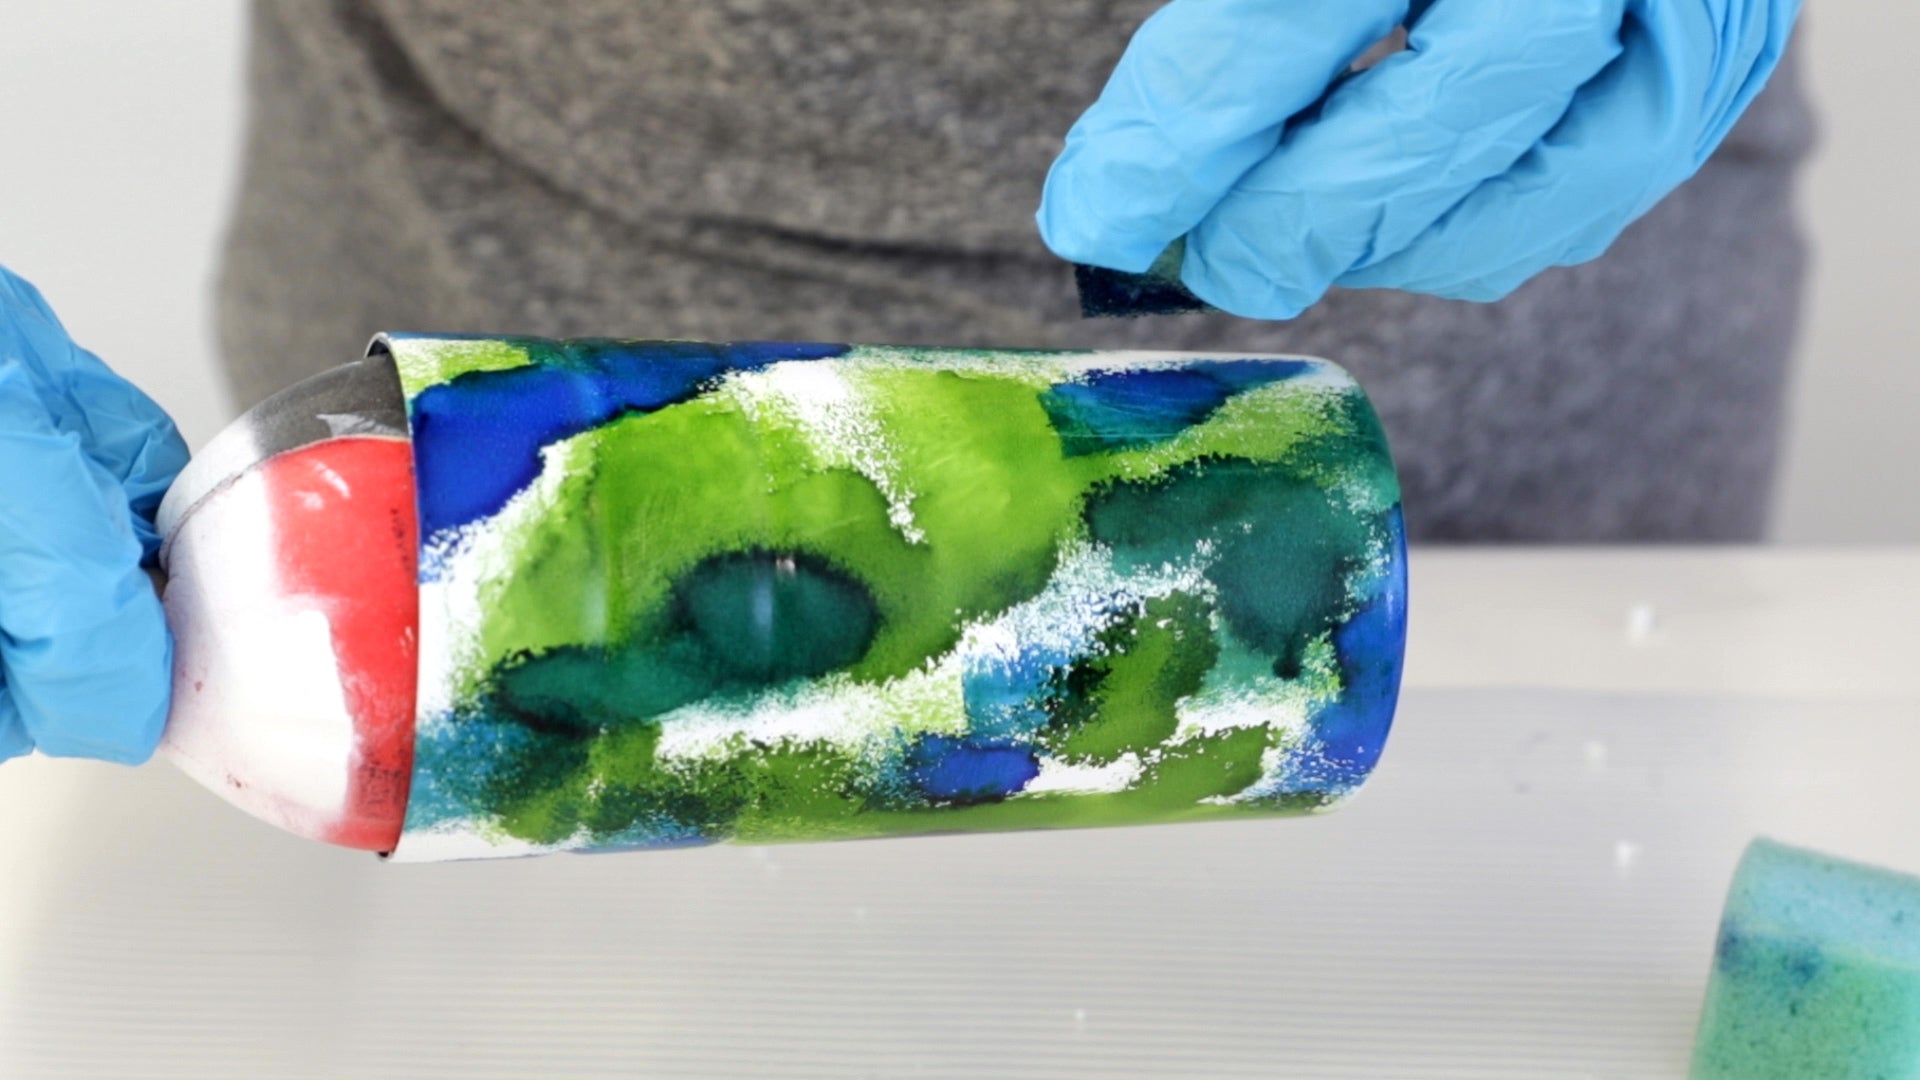
How to brand a Resin Alcohol Ink Tumbler Cup:
What You'll Need:
- an insulated stainless steel tumbler, taped and spray painted white
- ArtResin epoxy resin
- nitrile gloves
- mixing container
- stir stick
- alcohol ink ( we used lite dark-green, dark green, blueish, white and gold )
- 5 x sponges to apply the booze ink ( one per color )
- an empty plastic tote or cardboard box to protect your slice while information technology dries
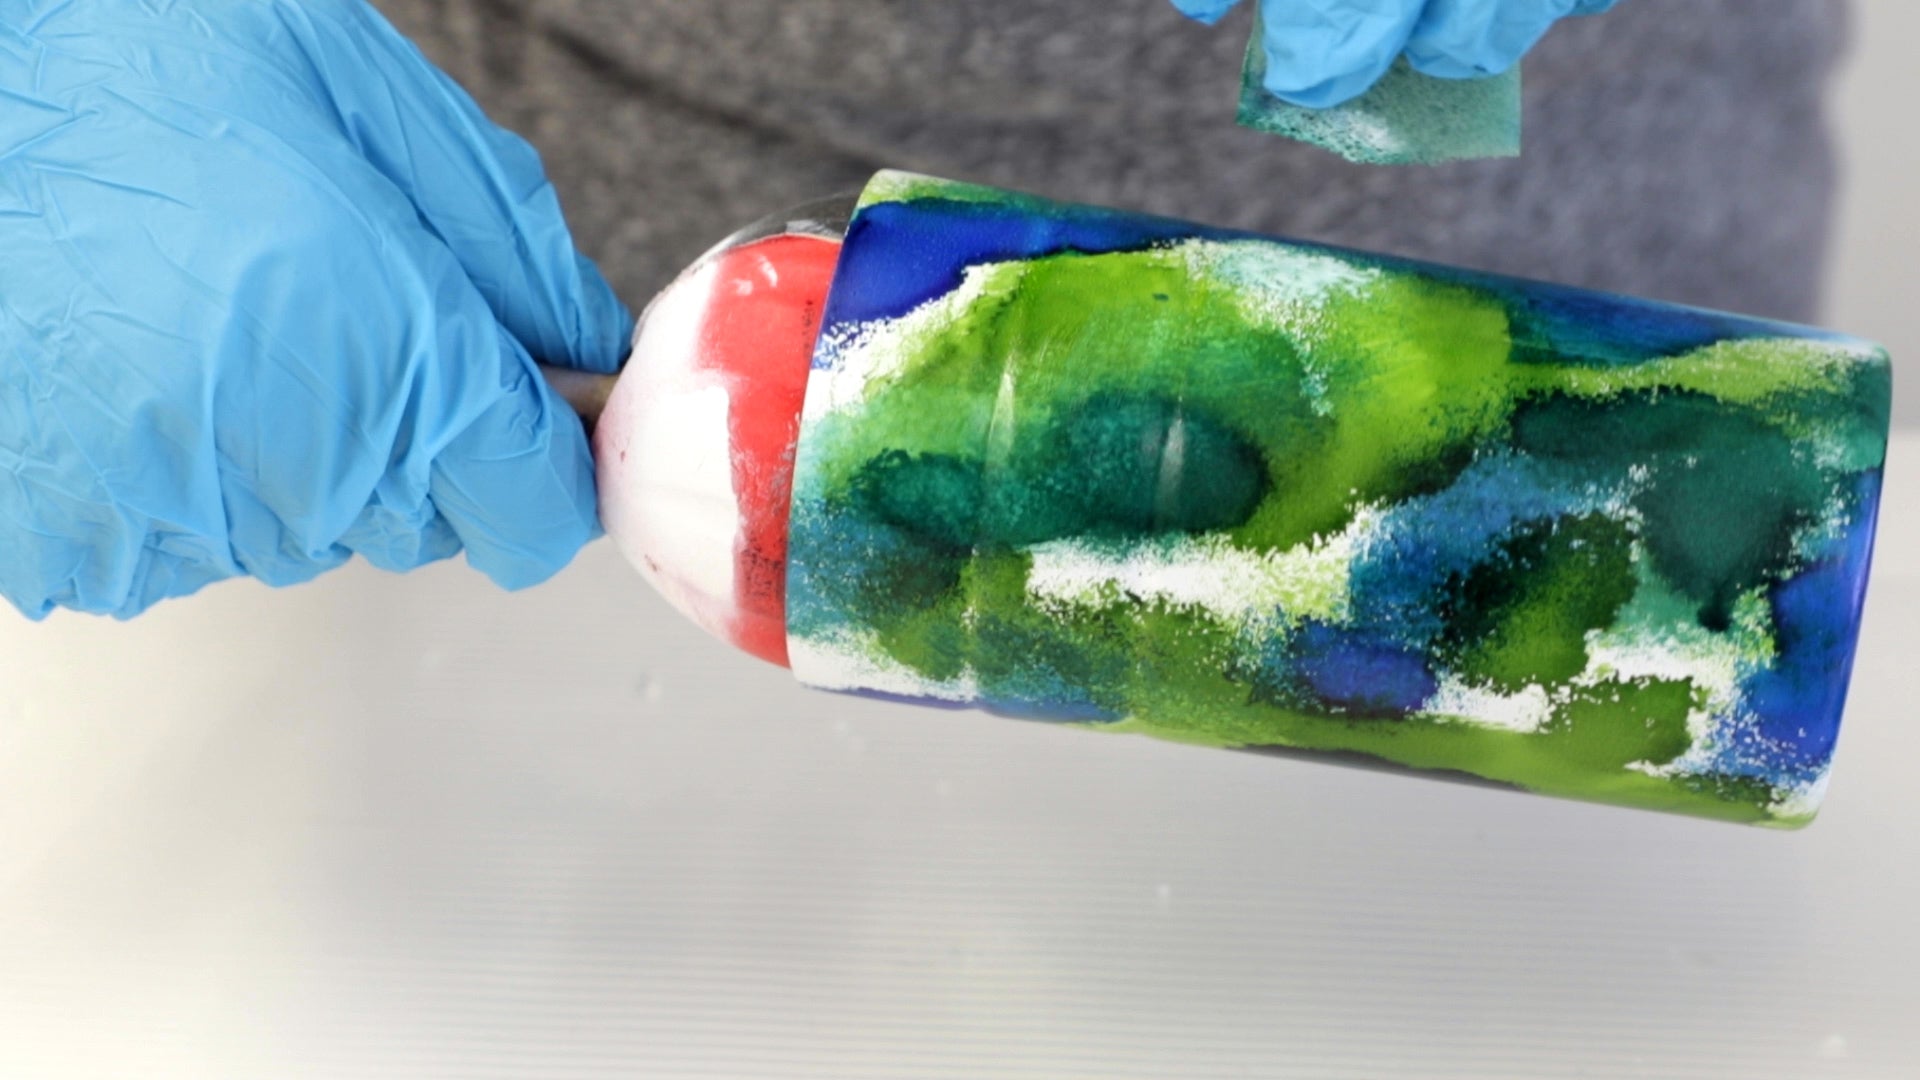
1. Apply The Alcohol Ink
Using a sponge, dab the booze ink onto your tumbler, one colour at a fourth dimension in whatever pattern you wish. Piece of work your way from calorie-free to night, highlighting with golden at the cease.

two. Mount the tumbler onto the cup turner
Once the booze ink has stale, mount the tumbler onto the cup turner. Wearing gloves, carefully measure and mix a small amount of clear ArtResin. Turn the rotisserie motor on and, with the tumbler turning, slowly pour the ArtResin onto the surface of the tumbler equally it turns, smoothing it out with your gloved easily. Once the entire surface has been evenly covered, allow it to plow until information technology is dry to the touch, within 18-24 hours. In one case dry out, remove the tape and let it to finish curing. At 72 hours, it volition have fully cured. 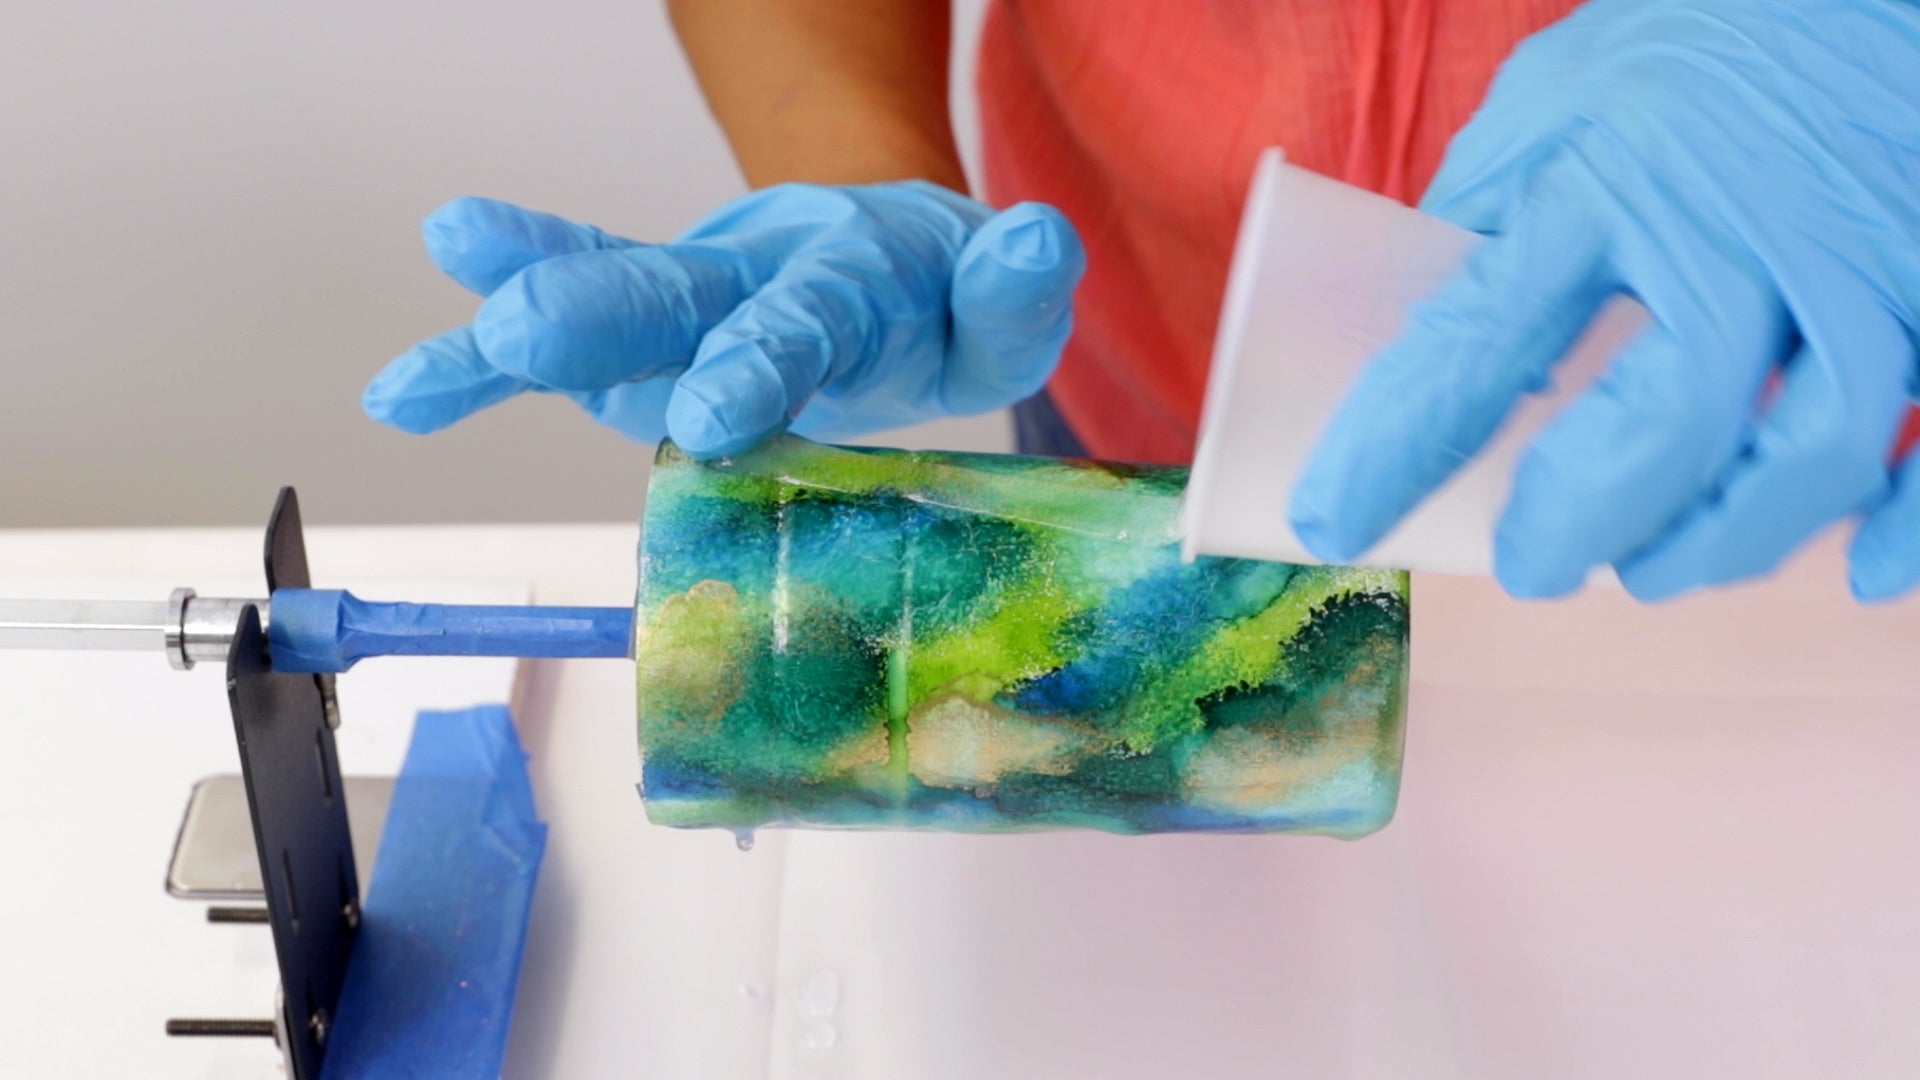
Tips to Preserve your Resin Tumbler Cup:
- The maximum temperature cured ArtResin should be exposed to is 120F or 50C. For this reason, hand wash your tumbler in warm, soapy water and practise not leave your tumbler in a hot auto. Unless your tumbler is double walled or insulated, just use with cold beverages.
- Ensure your tumbler has fully cured for 72 hours earlier utilise.
- Ensure at that place are no traces of epoxy left around the lip of your tumbler. Employ sandpaper or a bract to remove any resin that may have seeped under the tape: remove any sanding grit past wiping with a damp cloth. Wash your tumbler in warm, soapy water before use.
At that place you have information technology - four easy techniques and diy ideas for creating your very own custom resin tumbler!
So whether you brand a glitter tumbler, an booze ink tumbler or a marbled tumbler using tinted resin, we hope this tutorial has been informative and inspires you to get artistic and brand a resined tumbler of your own!
Larn how to Resin Modelling Clay.
Source: https://www.artresin.com/blogs/artresin/how-to-make-an-epoxy-resin-tumbler
Posted by: arnoldknonts.blogspot.com
0 Response to "How To Make Personalized Tumblers"
Post a Comment